
Opportunities
The Opportunities is a roadmapping tool powered by real customer feedback: helping you track, prioritize, and plan actions based on solid evidence.
What is Opportunites?
You can create an opportunity from a hypothesis or a solution, or start one from scratch when you identify a new idea or problem worth exploring. Because the board is on the space level, it can be used across multiple projects and offer a central view on your research. Each opportunity lives in a shared Opportunity Board, giving your team a clear, visual way to manage discovery and prioritize what to work on next.
Solutions can be turned into cards on a simple, customizable Kanban board to help everyone stay aligned on progress and status.
You can also link feedback items to existing opportunities and add external links such as research notes, tickets, or documents to build stronger evidence around each opportunity. The more context you add, the easier it becomes to make confident, data-driven decisions.
How to create a new opportunity?
Explore the video or text guide below:
An opportunity can be created in 3 ways:
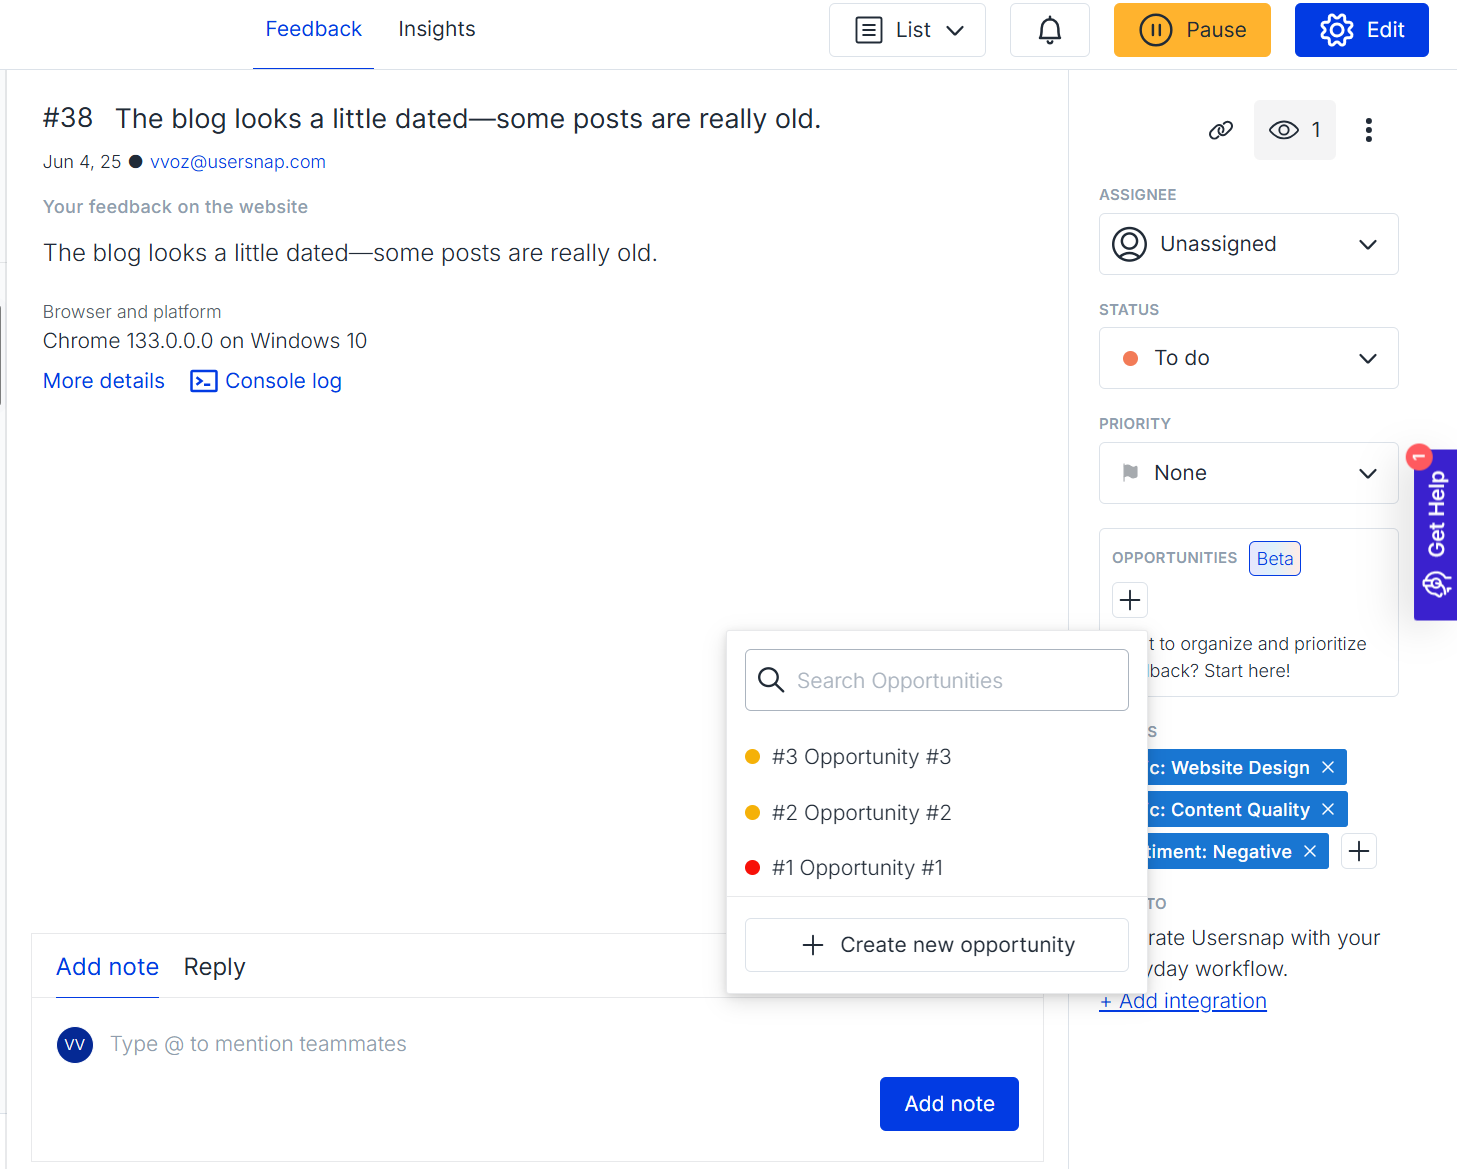
- From the Feedback List view:
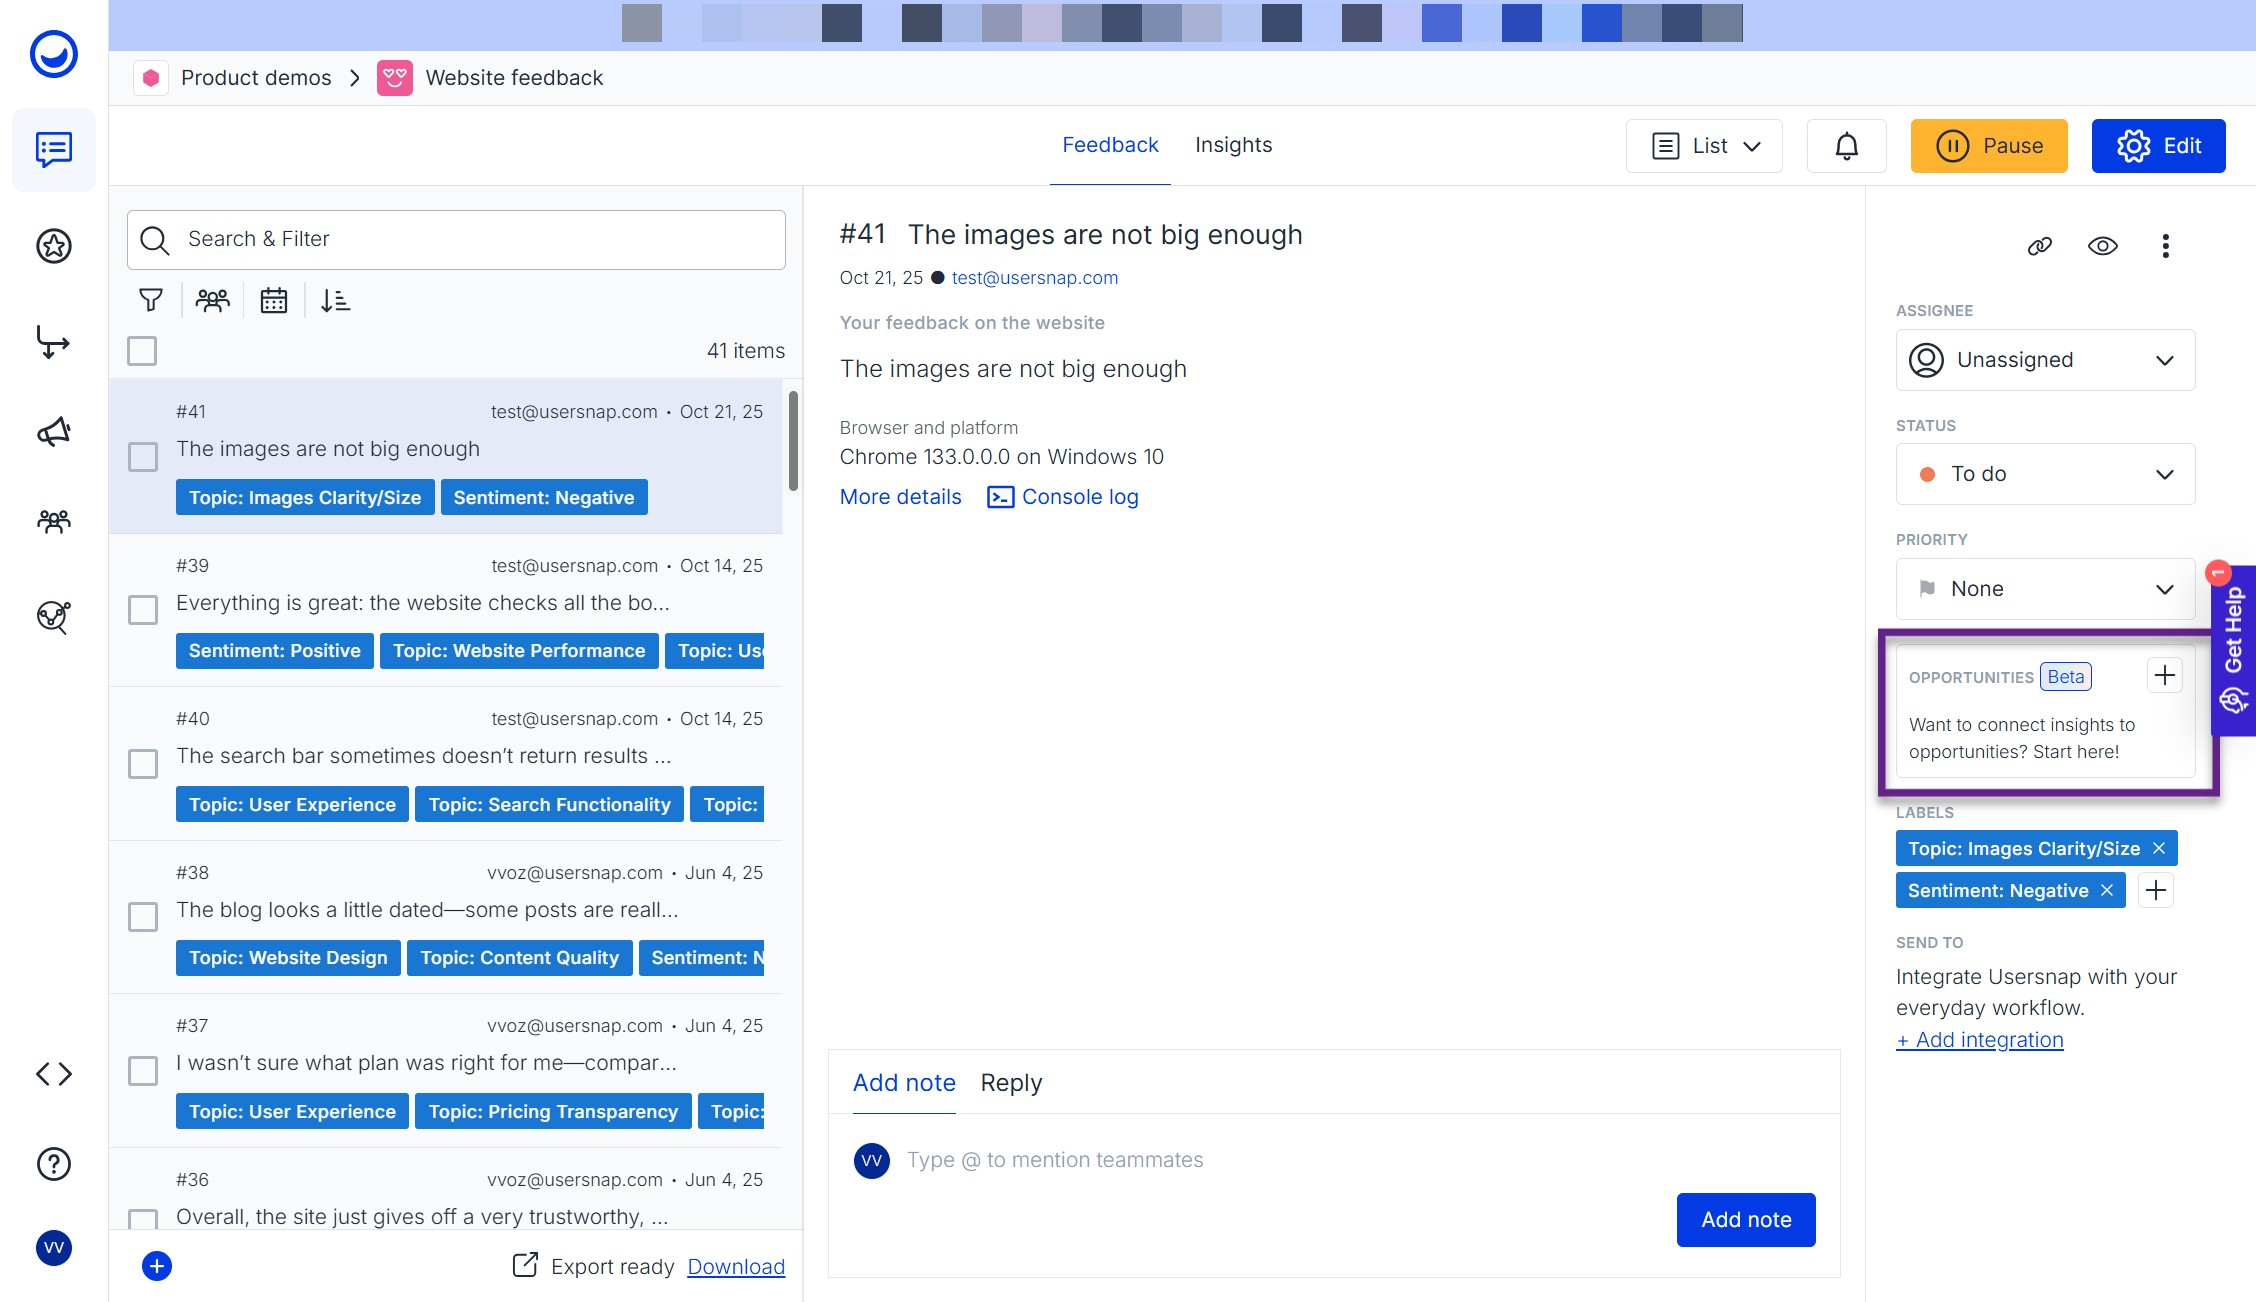
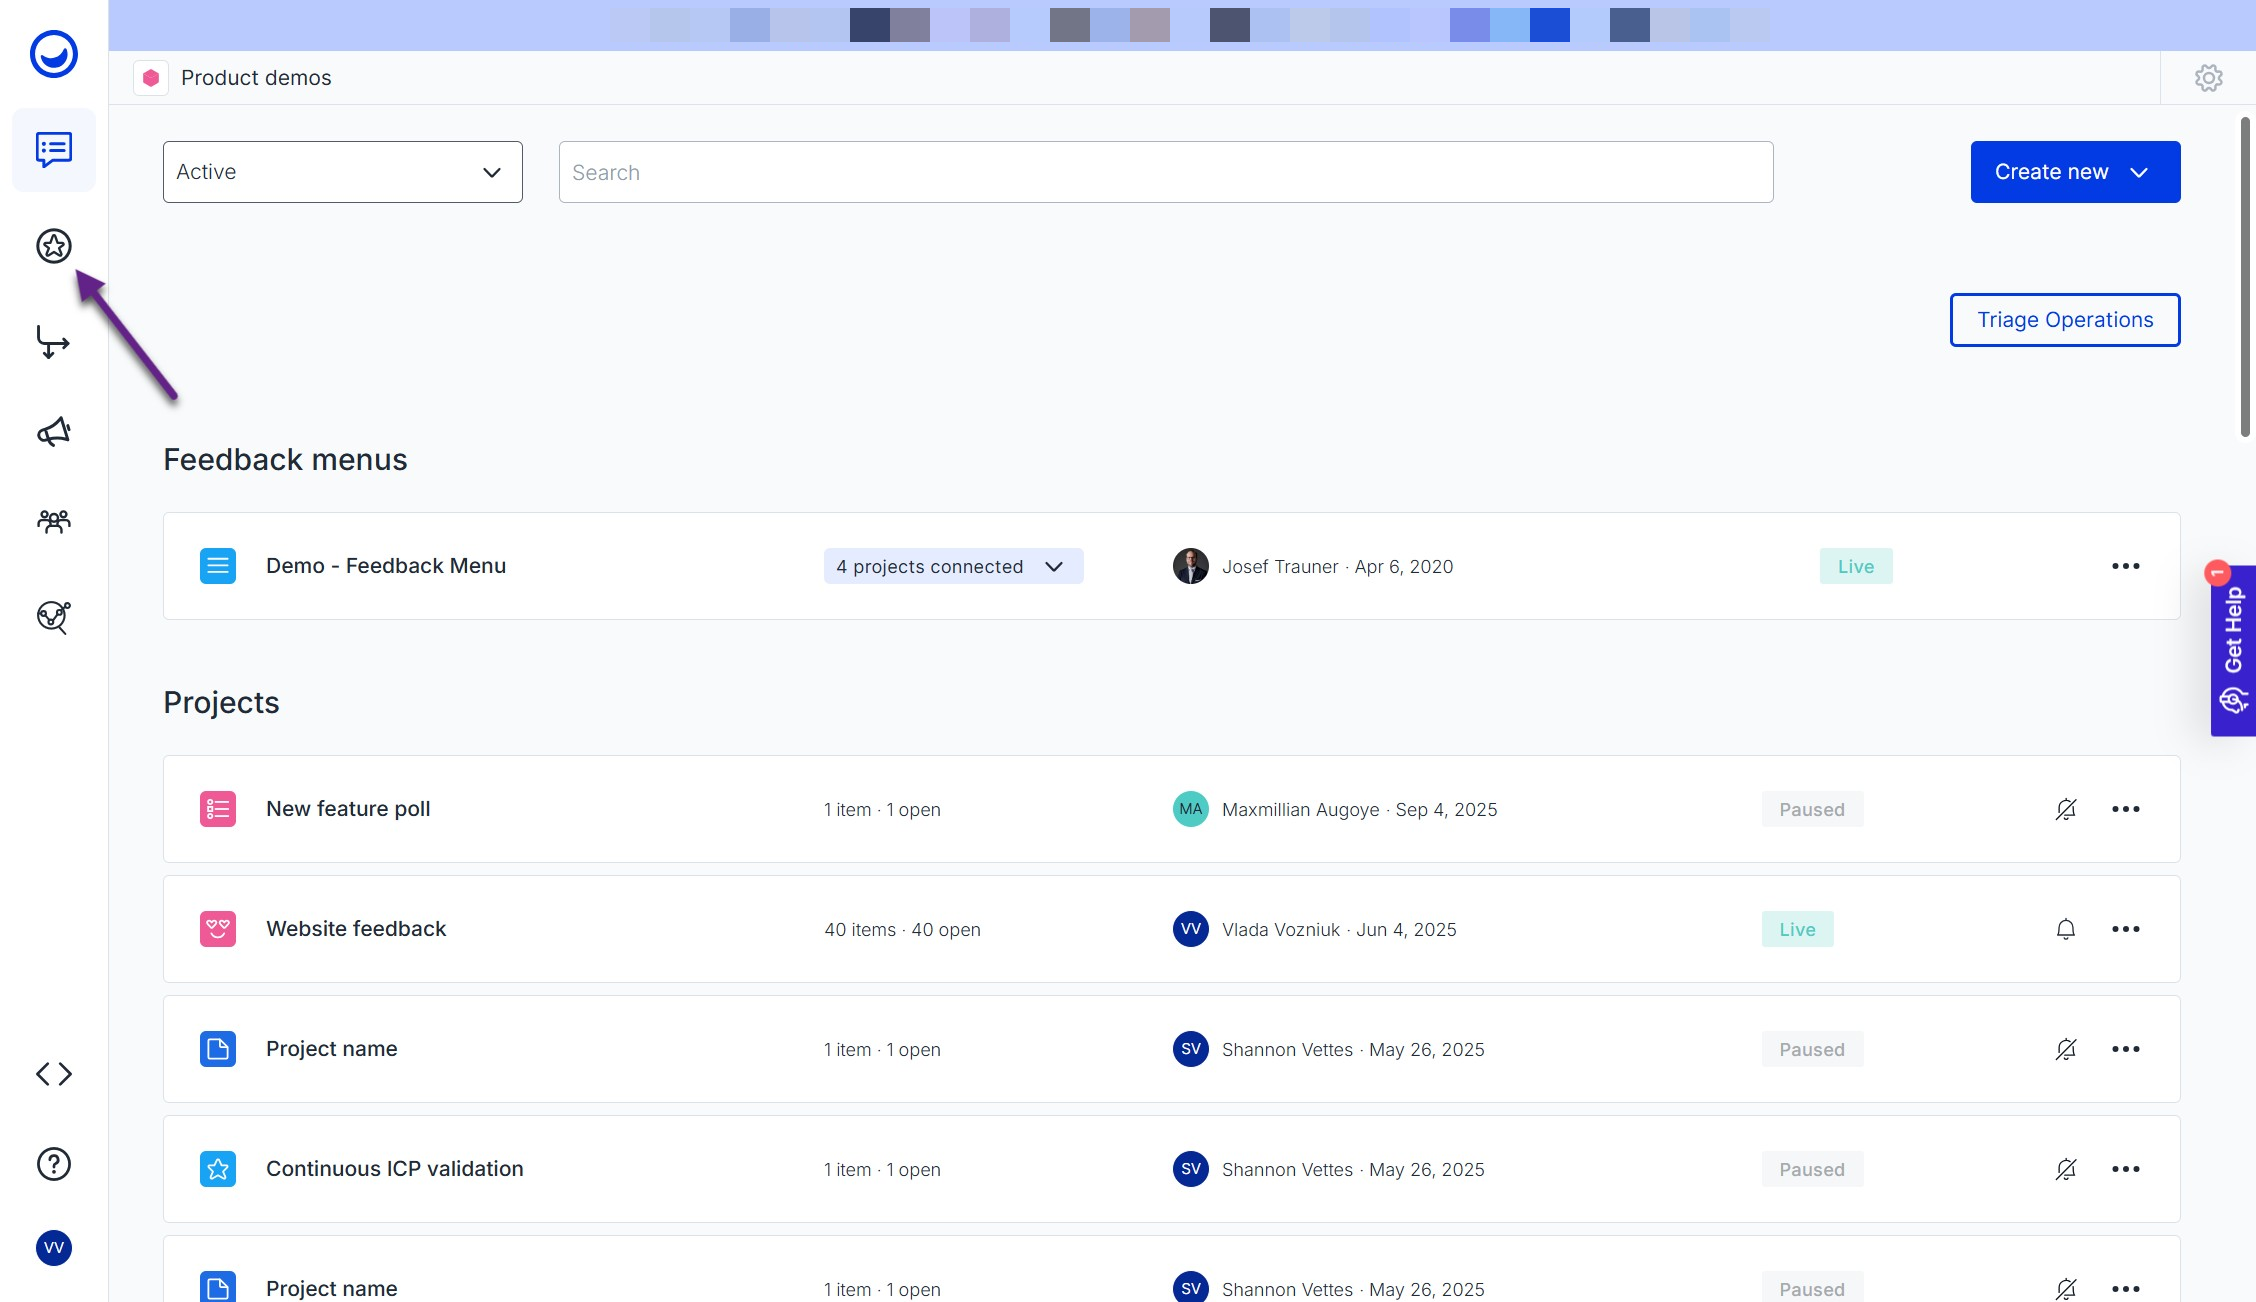
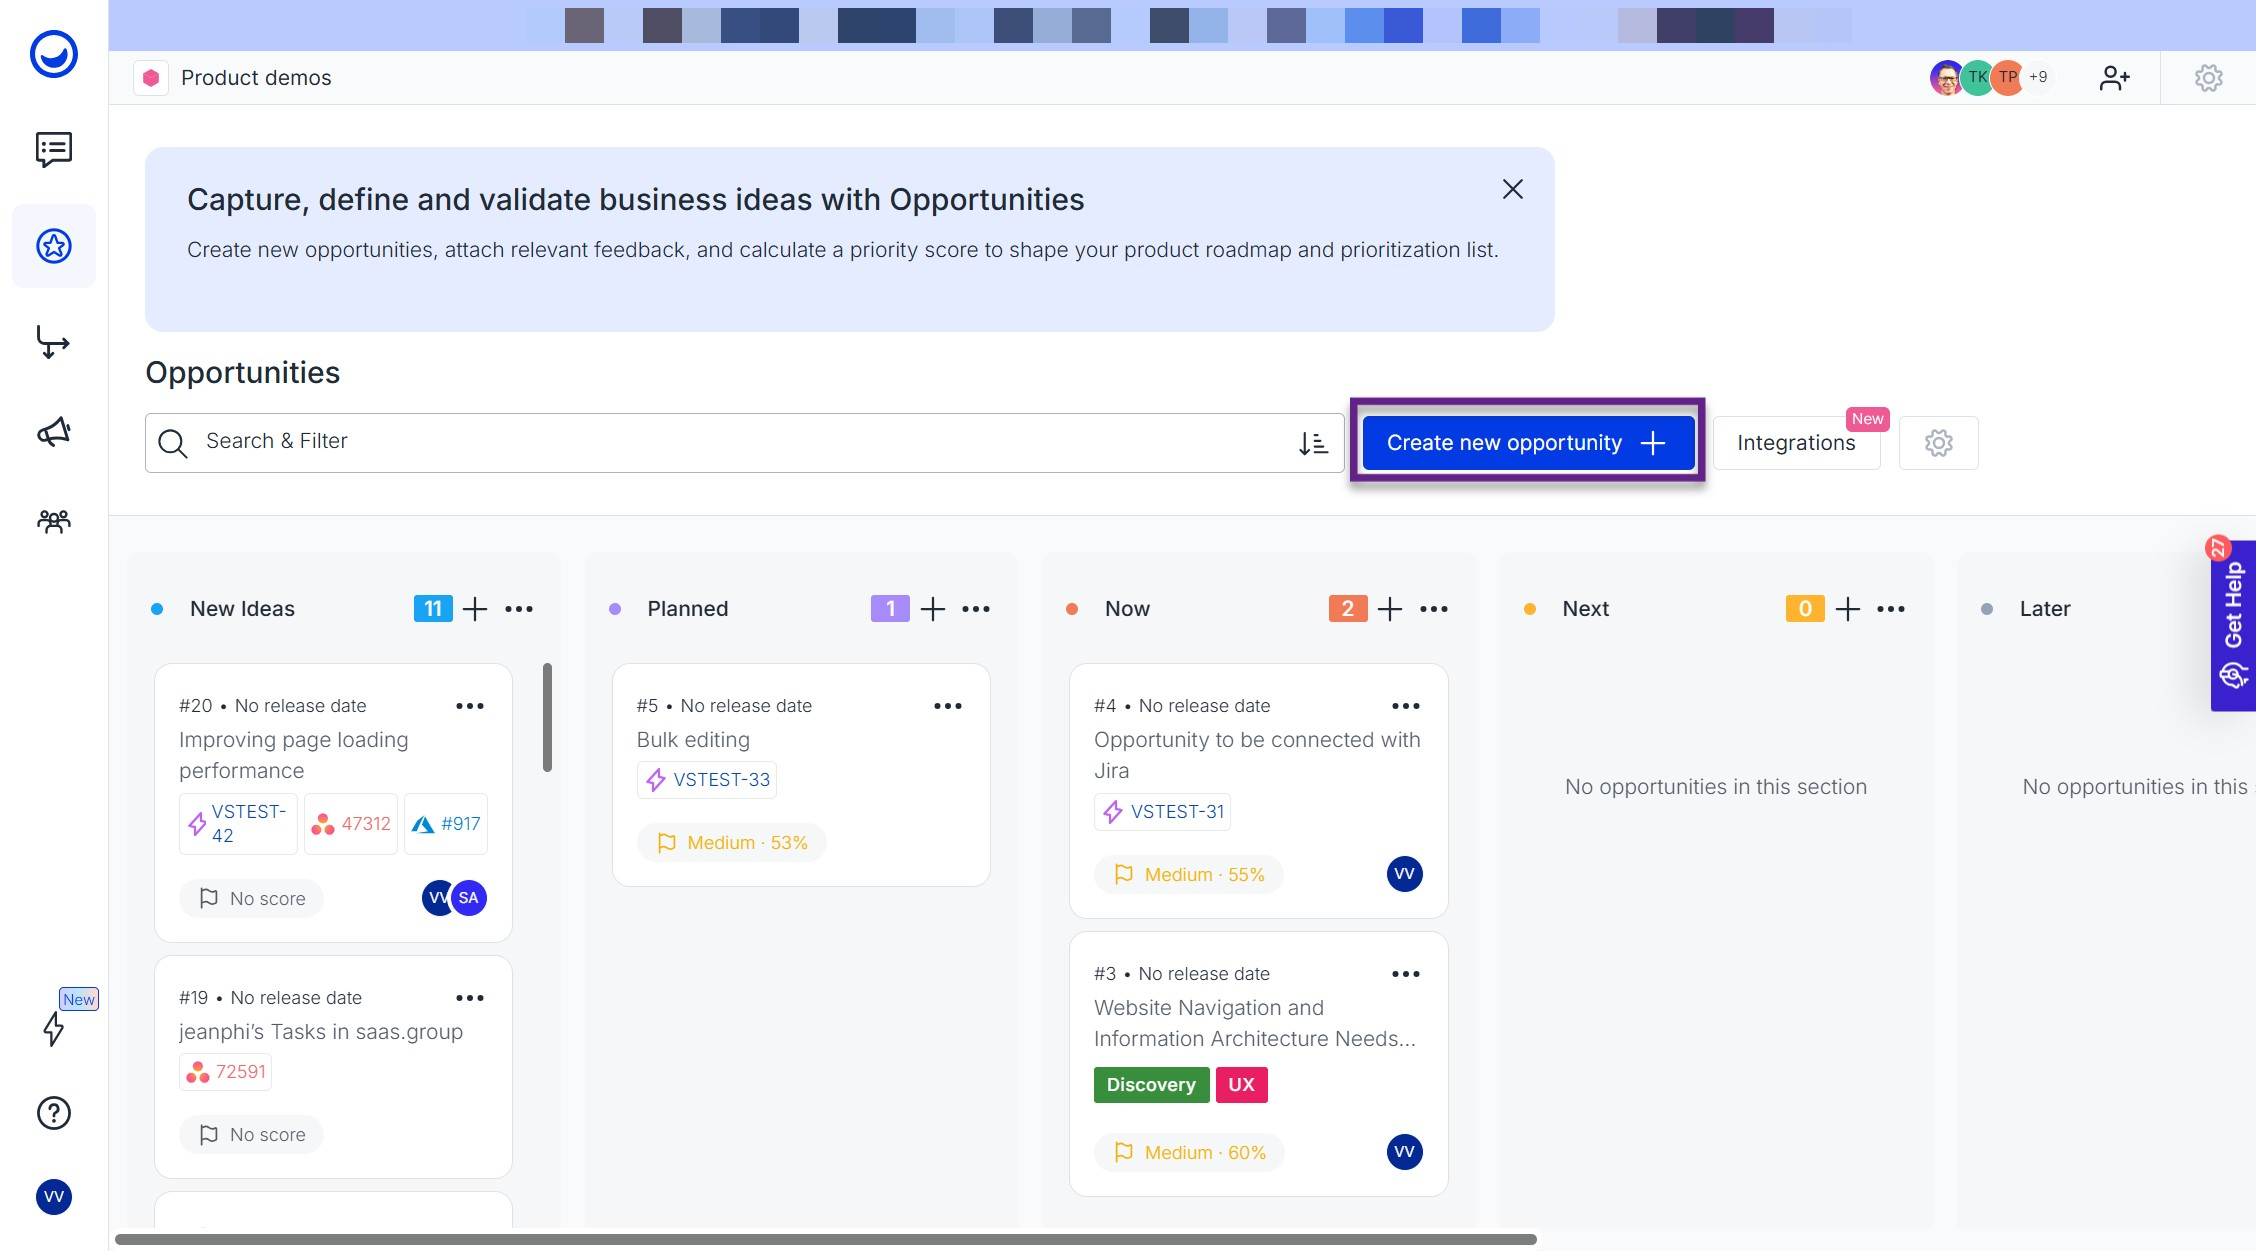
- From the Opportunities board: To open the board, simply select one of your available Spaces and click on the "Opportunities" icon:
In the board, find the "Create new opportunity" button:
- From the Hypotheses Generator:
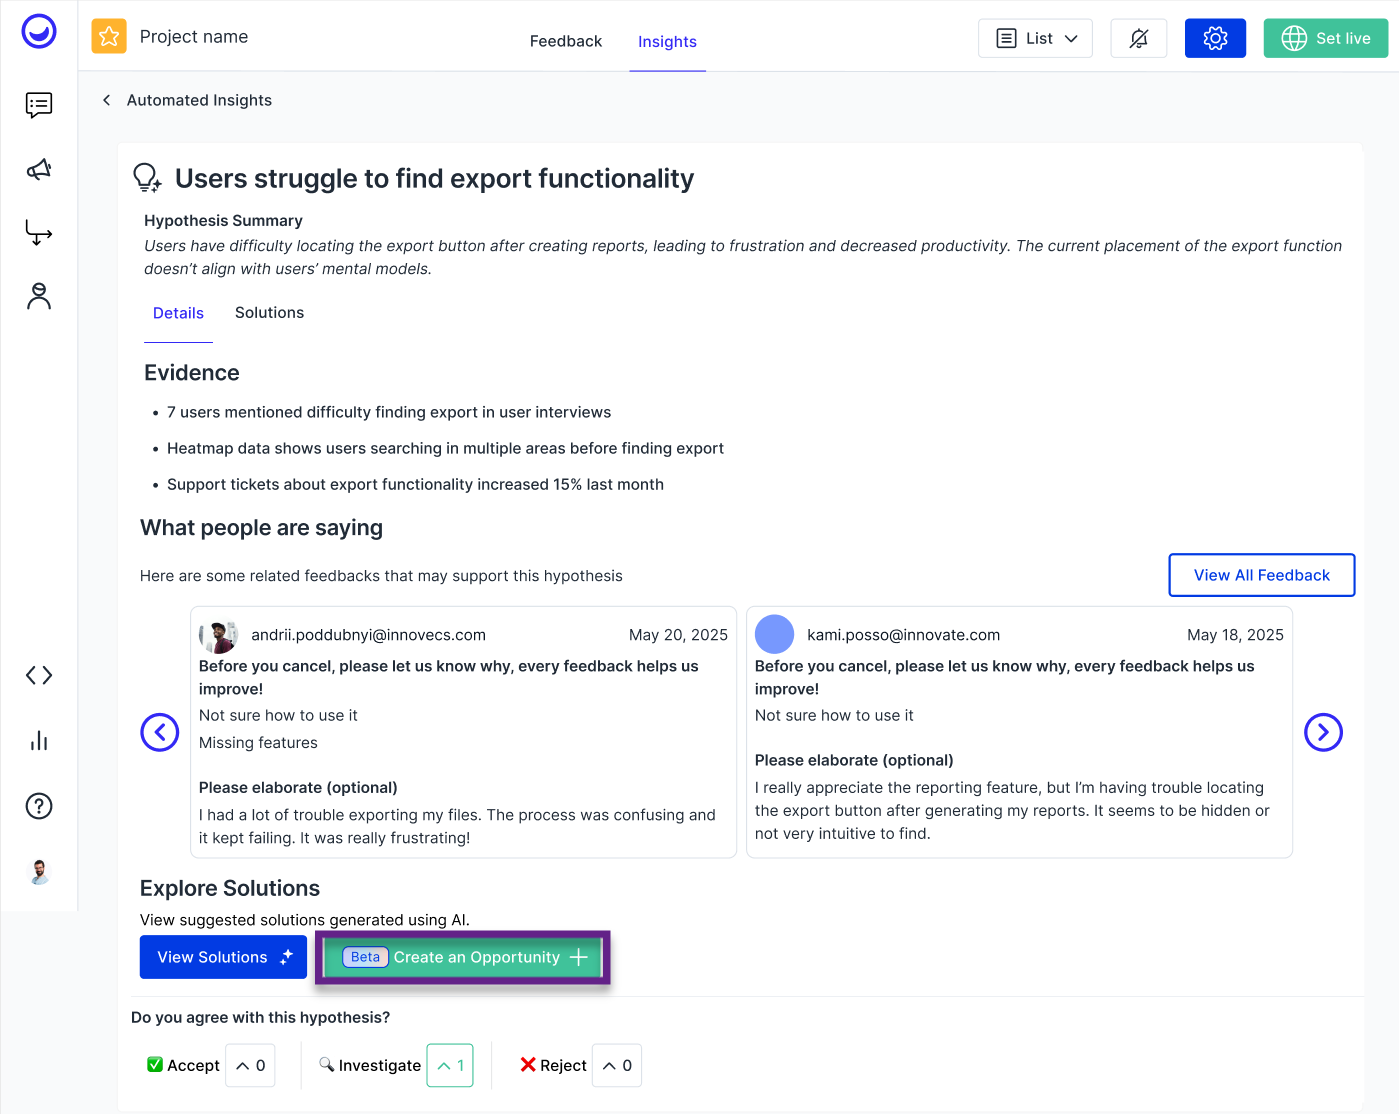
A Pro tipIf you create an opportunity from an existing hypotheses, you will automatically have all the feedback items used to generate a hypotheses linked to it. This way you can easier track the feedback items related to the opportunity and quickly close the loop once a related feature is released.
Please noteThere is no limitation to how many hypotheses can be linked to an opportunity. There is also no limitaton on how many feedback items can be linked to the opportunity or and vice versa
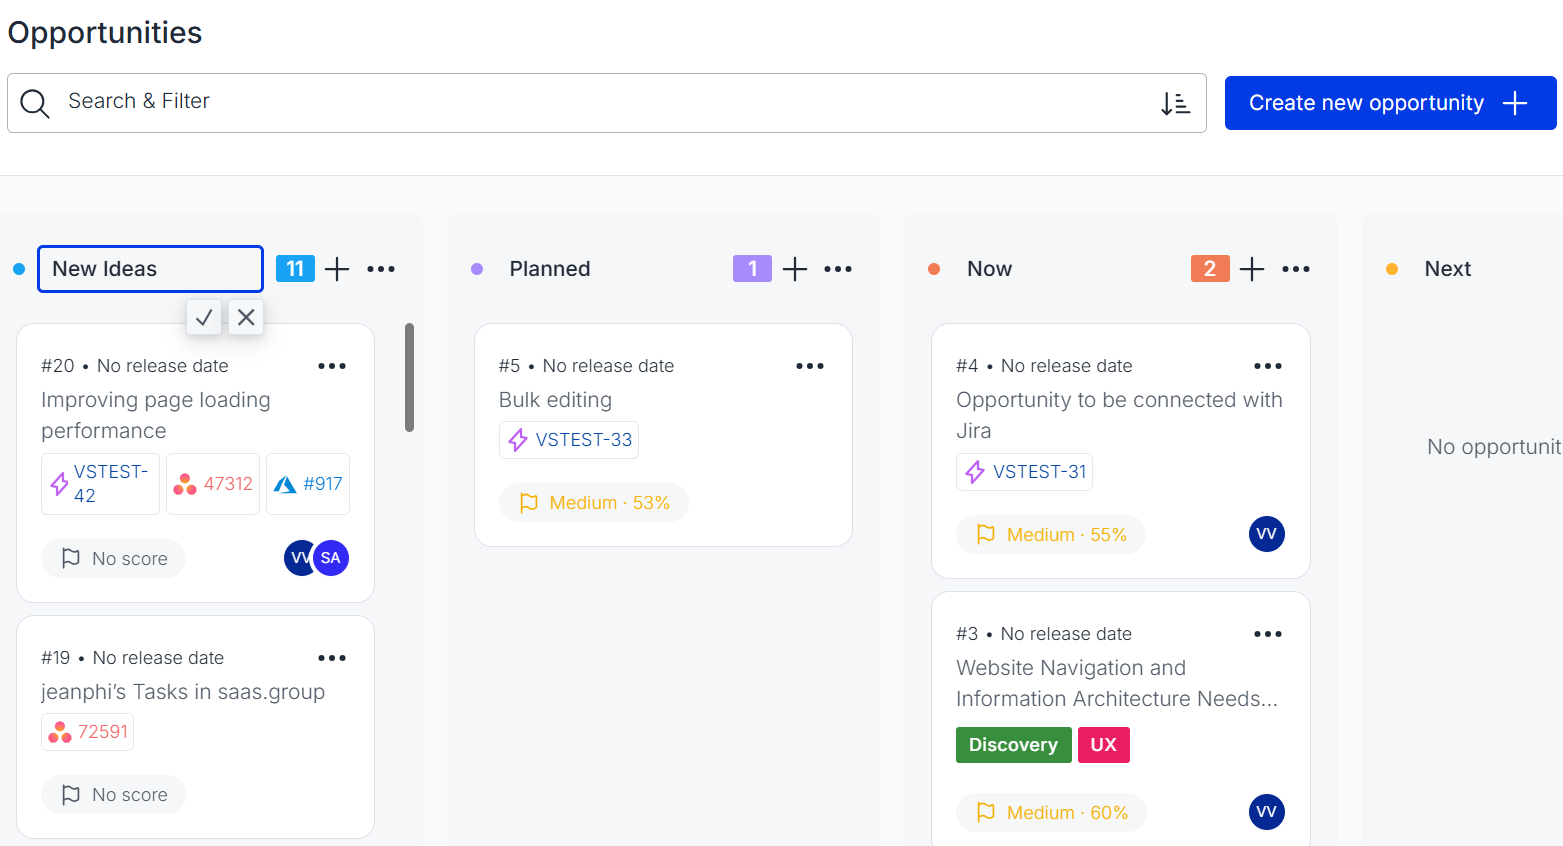
Customizing the board statuses
To customize the existing statuses, just click on the title and edit:
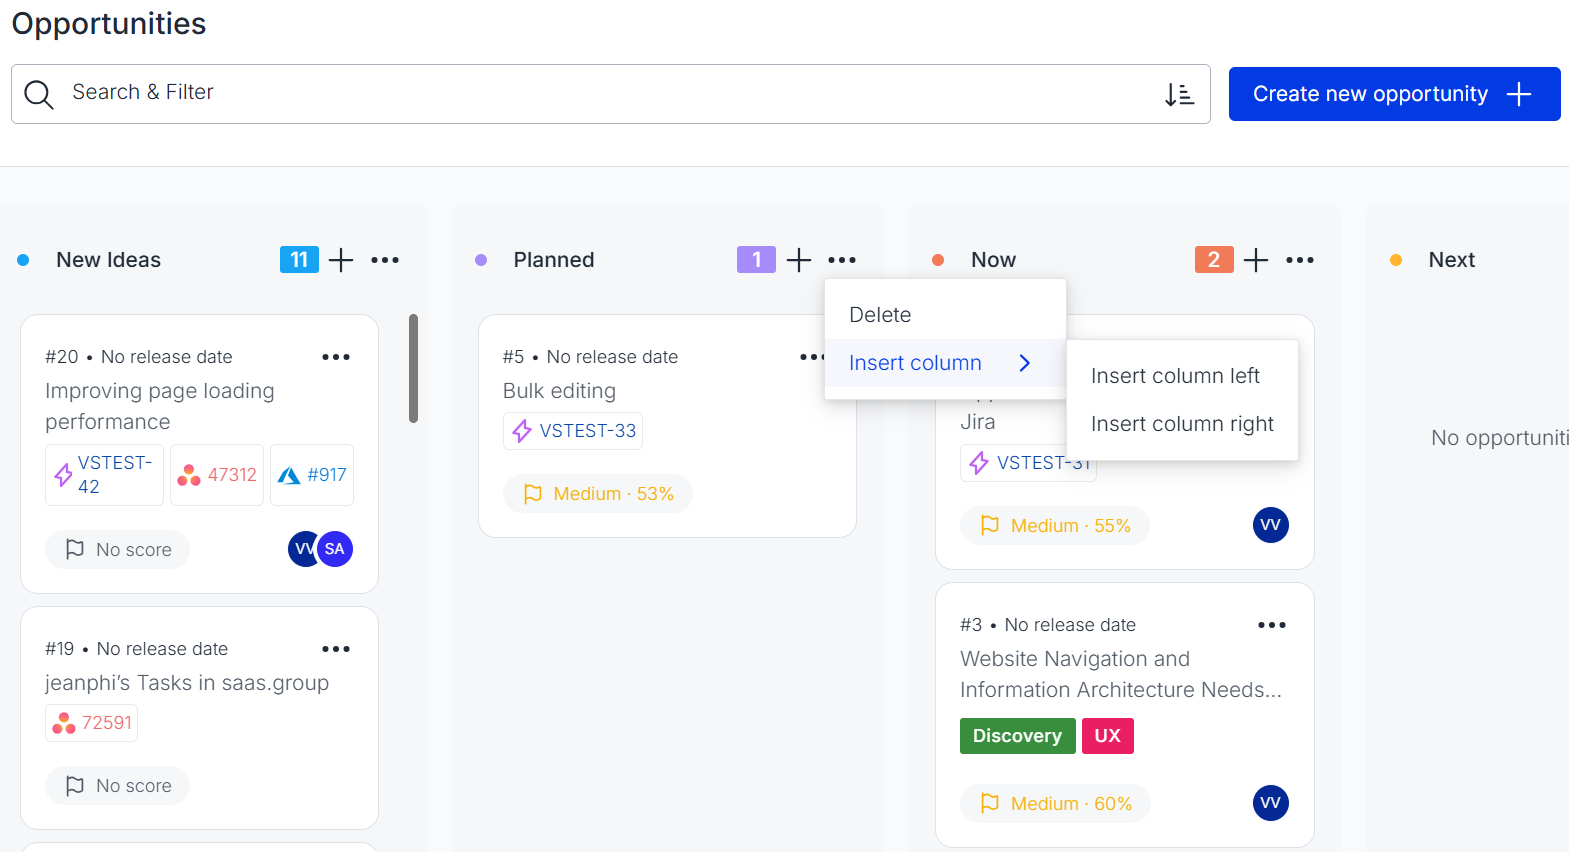
To add a new status, click on the 3 dots near an existing status and choose "Insert column left/right"
What can you do next?
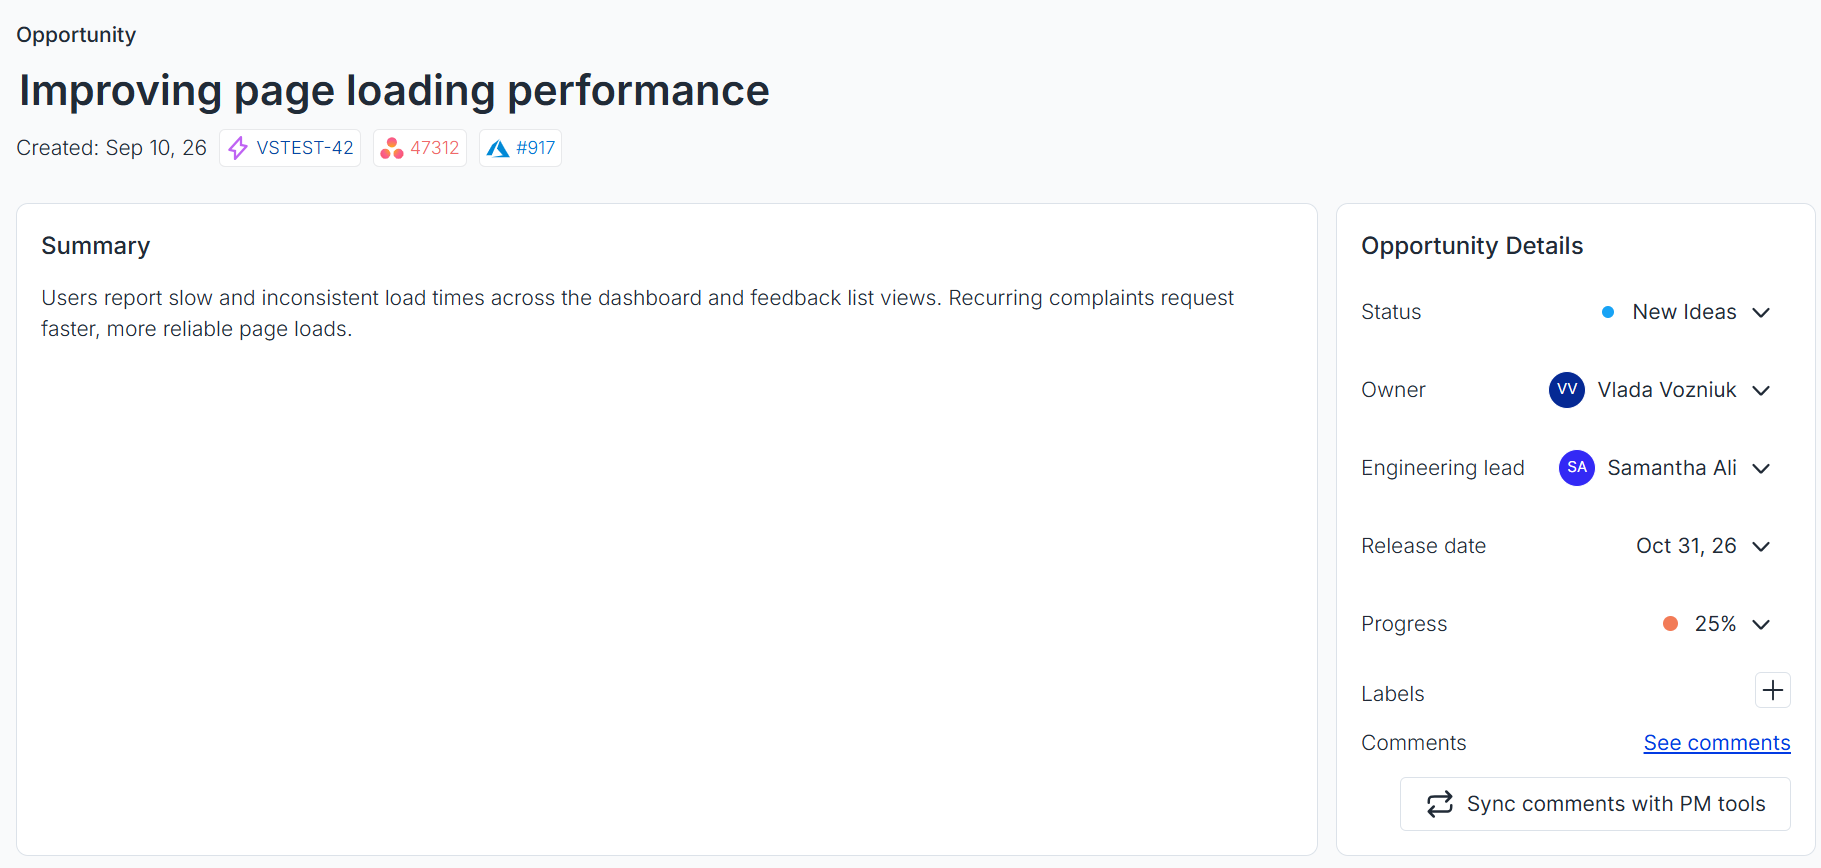
Once you created an opportunity, go to the Opportunities Board and click on the opportunity you would like to work on. In the detailed view, you can:
-
Add a description in the Summary section, as well as Owner, Enginnering Lead, Release date, Progress indicator and Labels in the Opportunity Details section.
-
Add external links to the opportunity (e.g. Figma, Jira ticket):
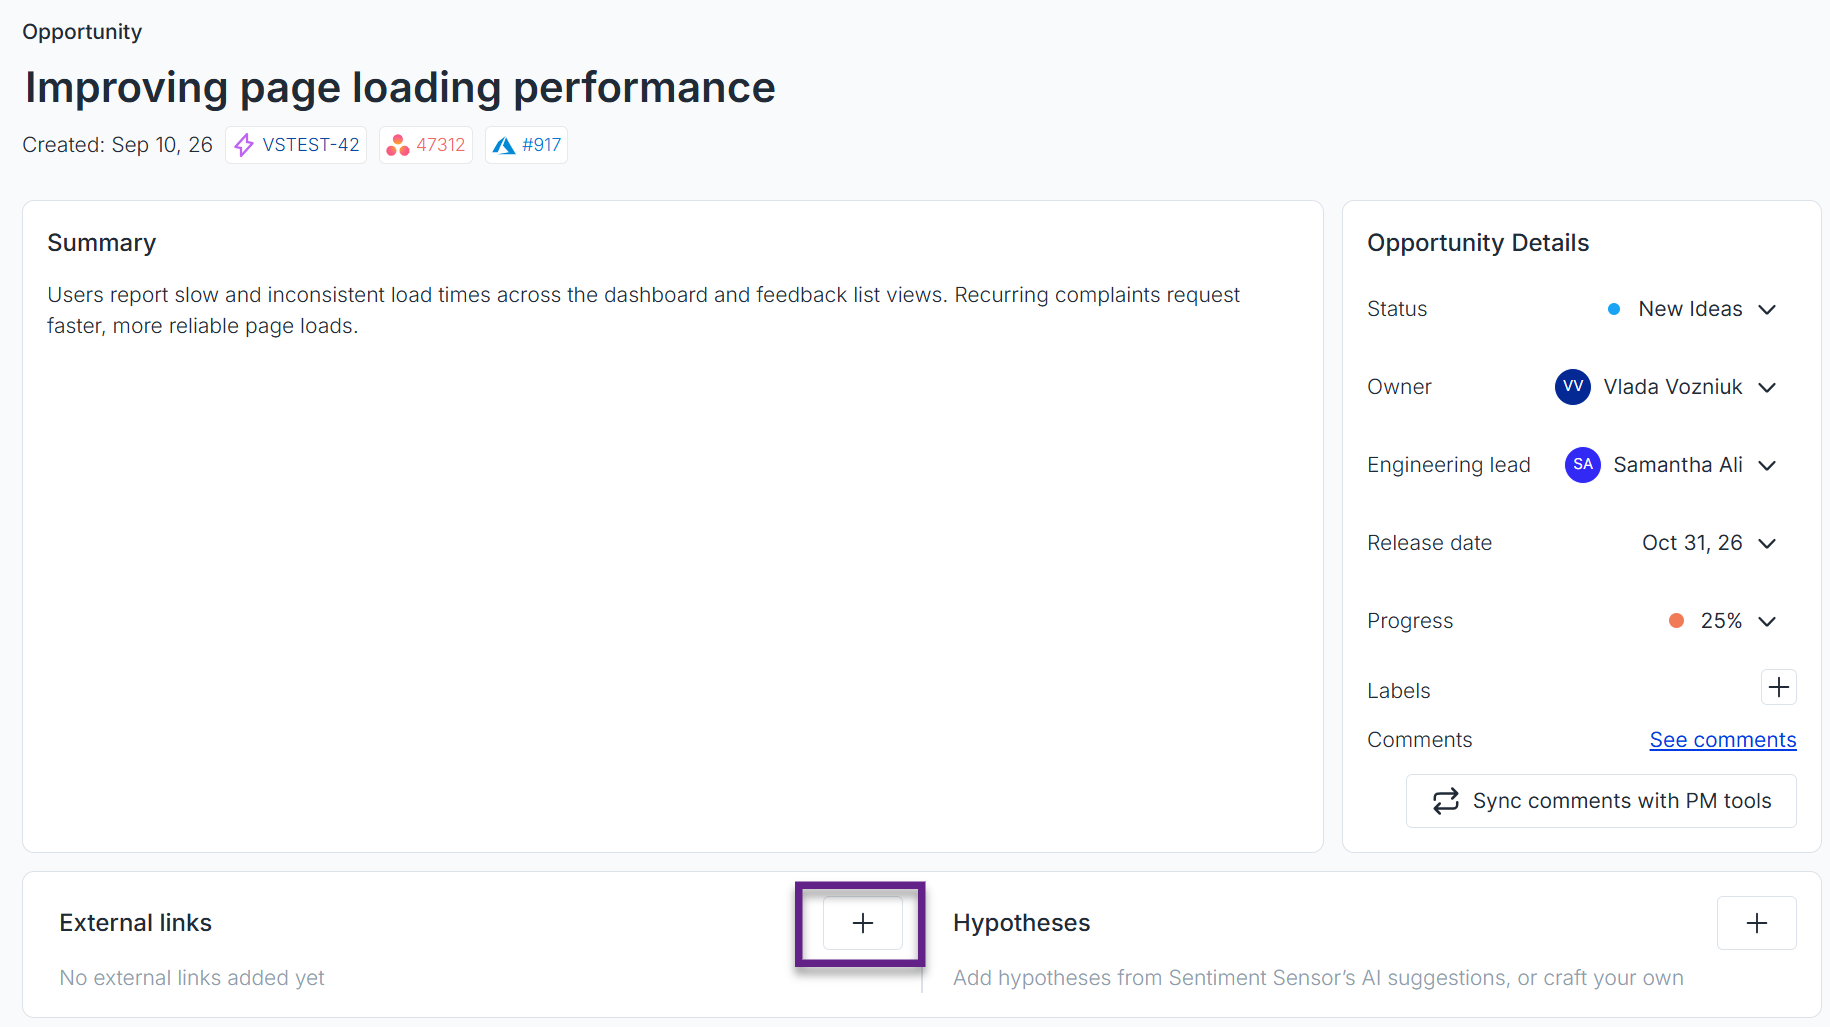
-
Create hypotheses:
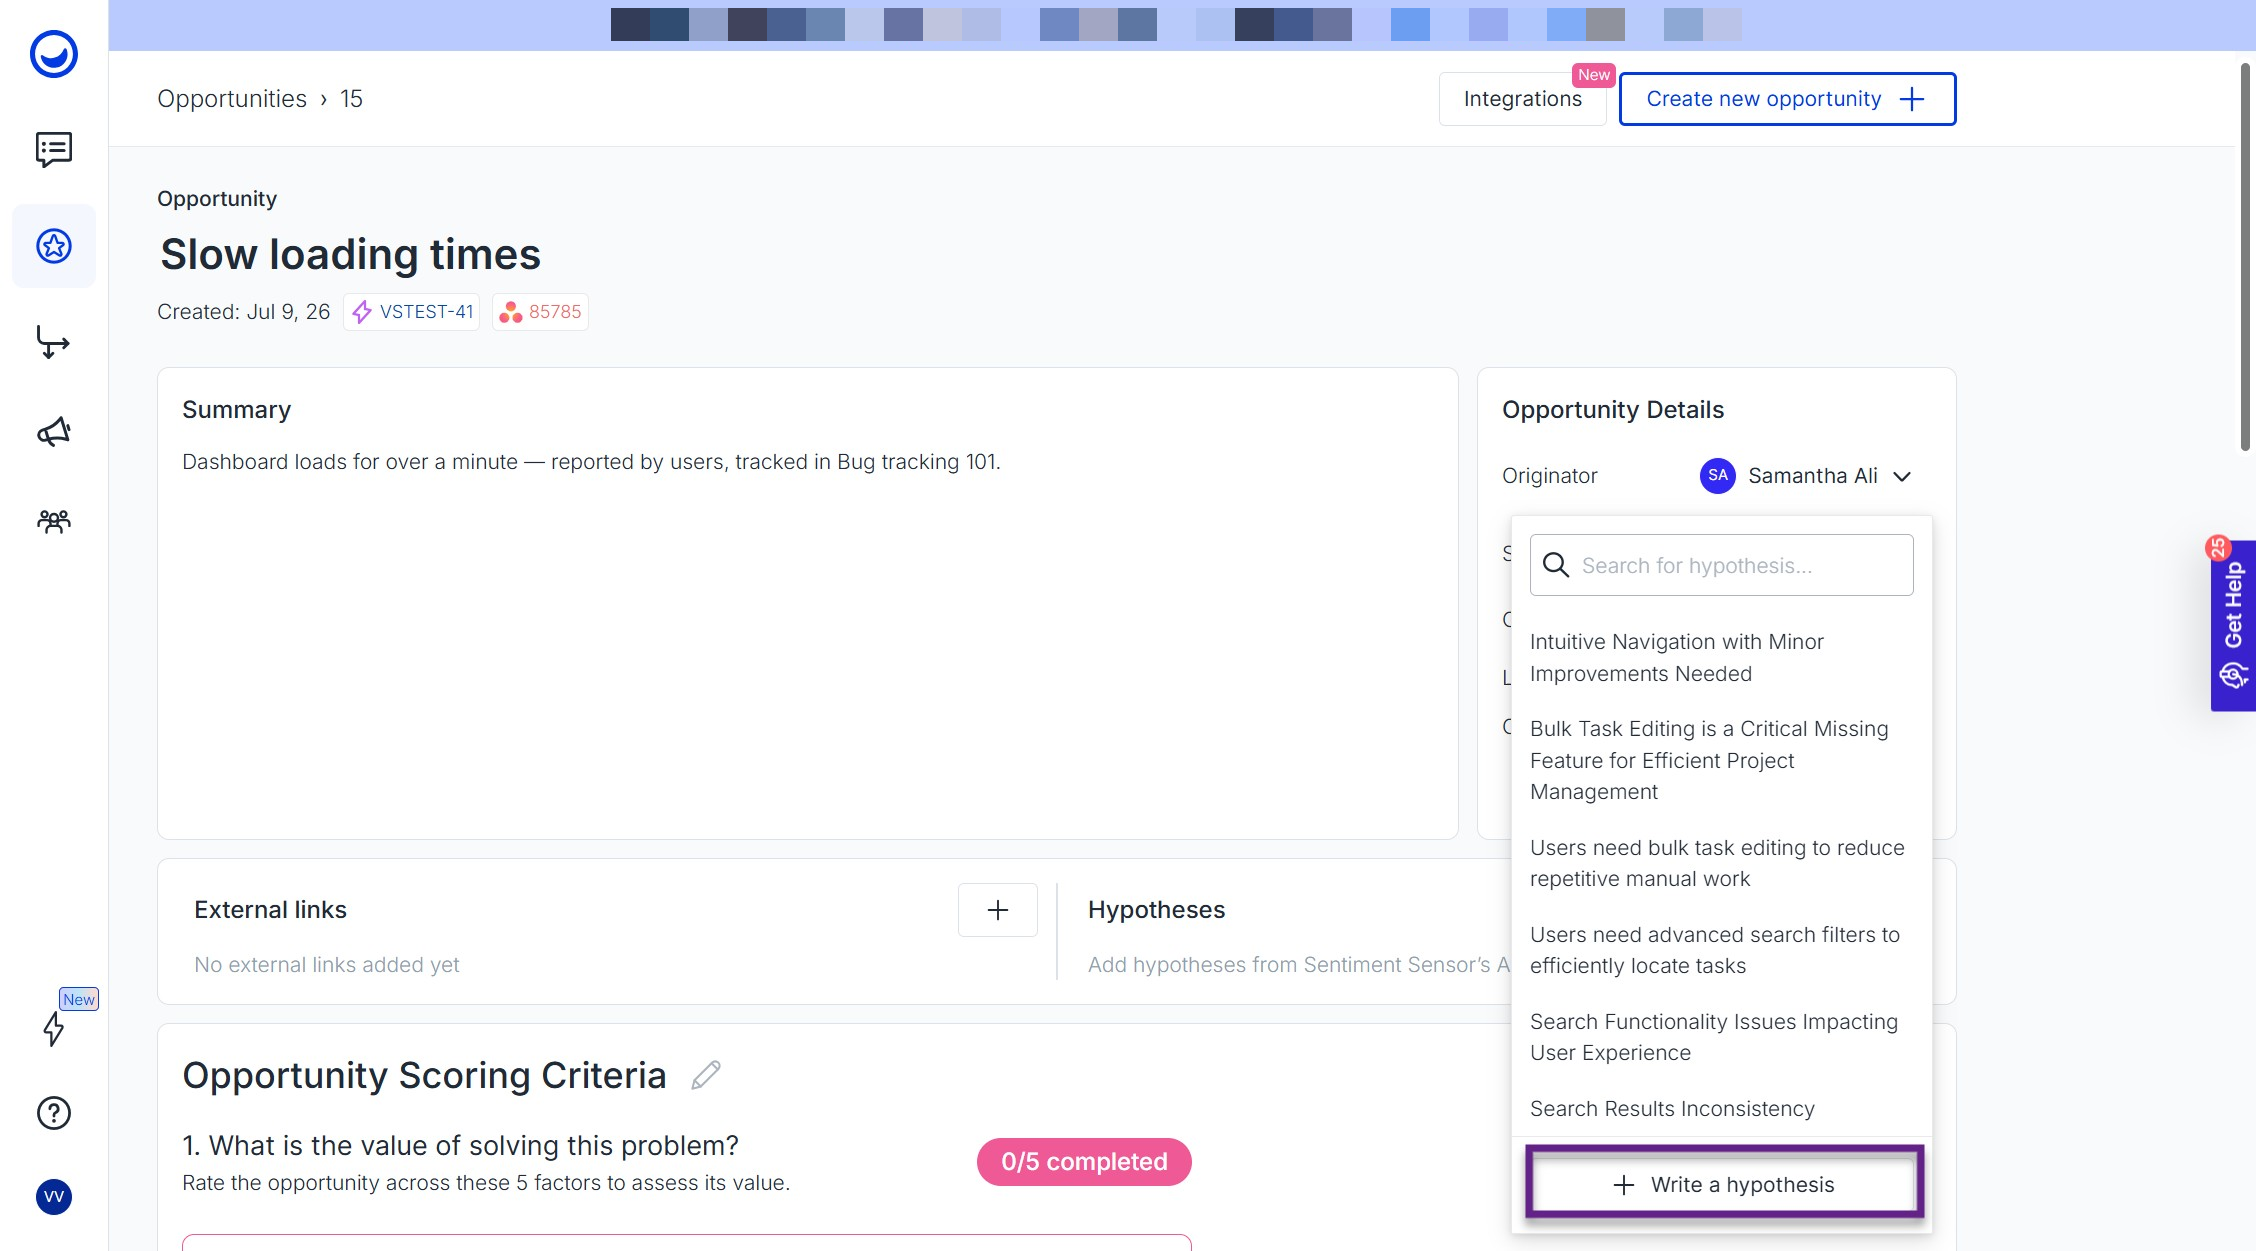
-
See all the feedback items linked to the opportunity:
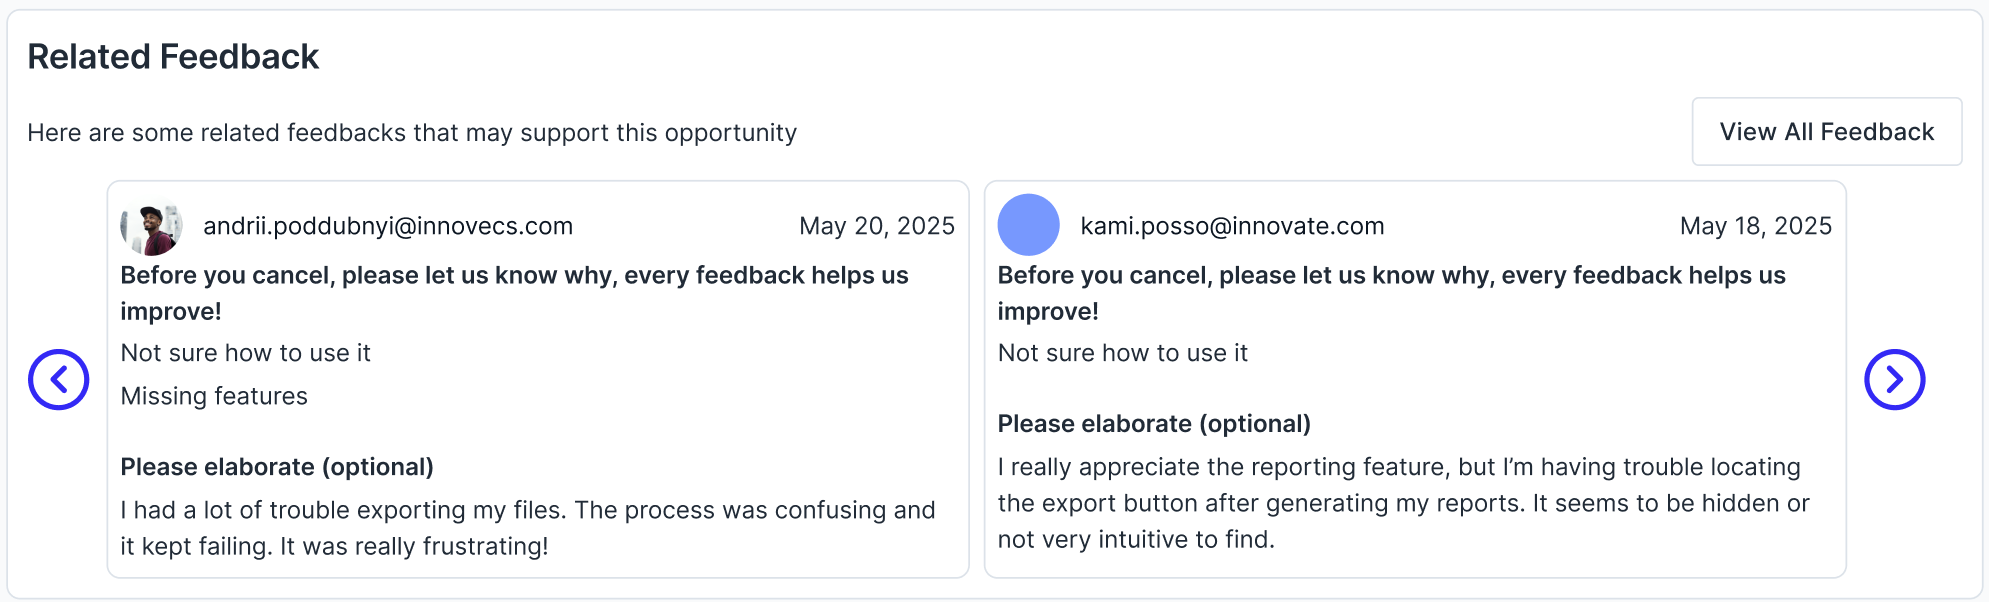
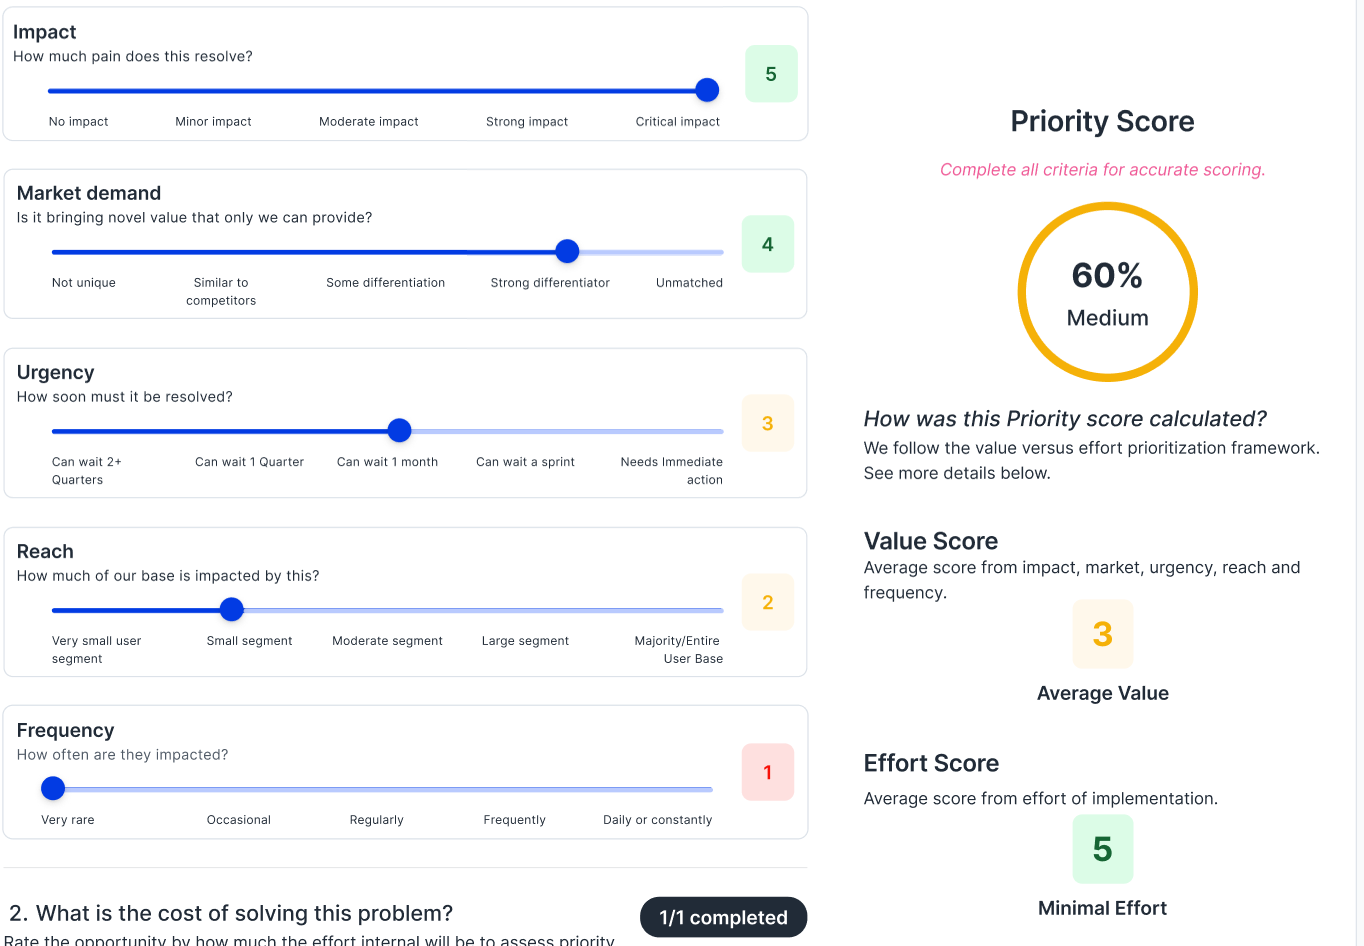
- Score the value of the opportunity:
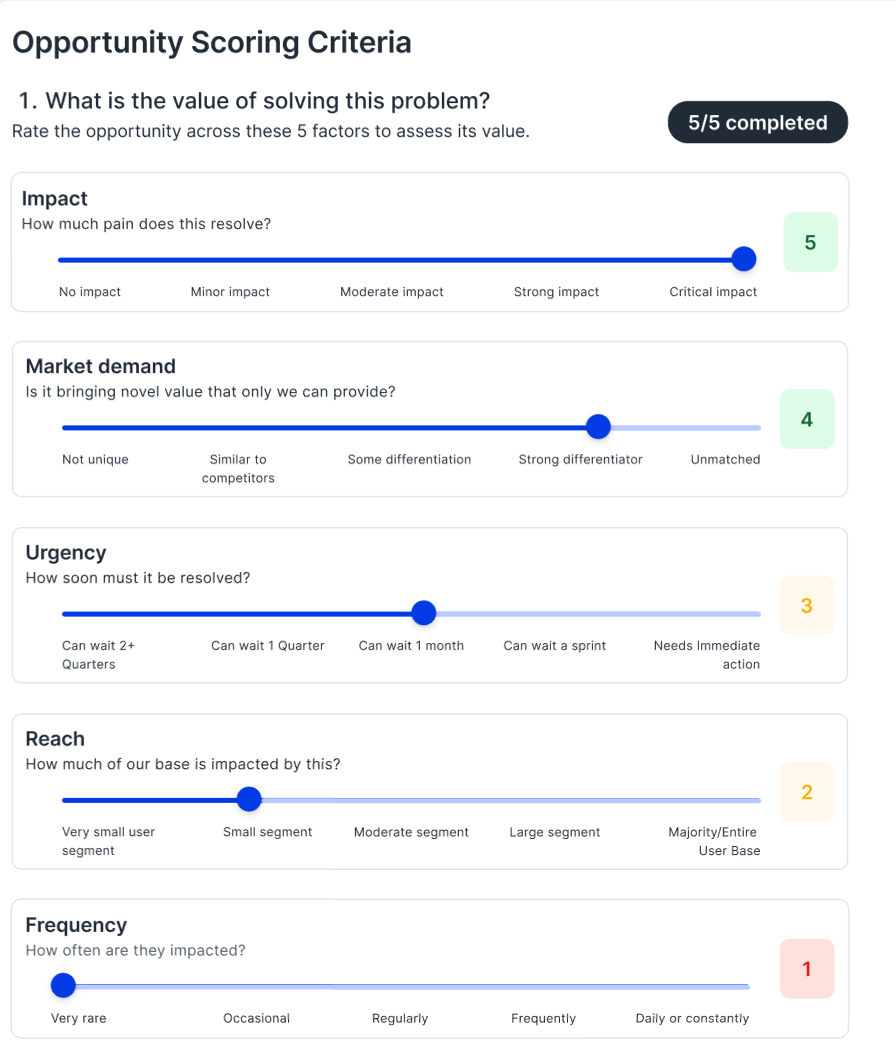
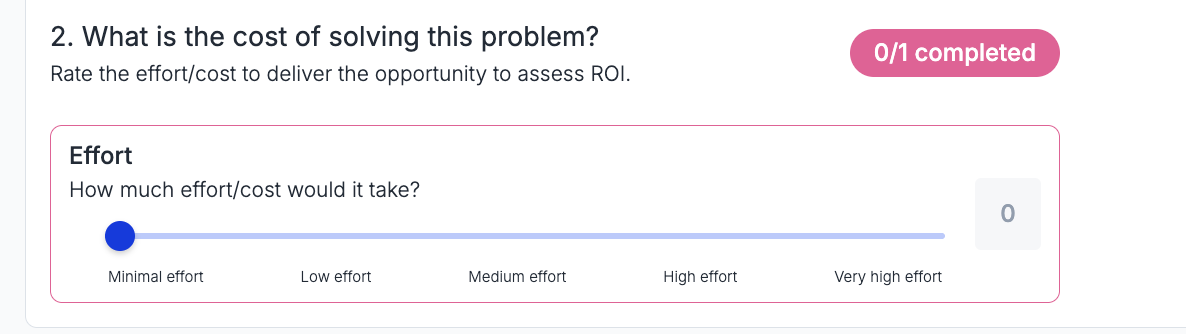
- Score the cost of the opportunity:
- Get an automatically calculated Priority Score:
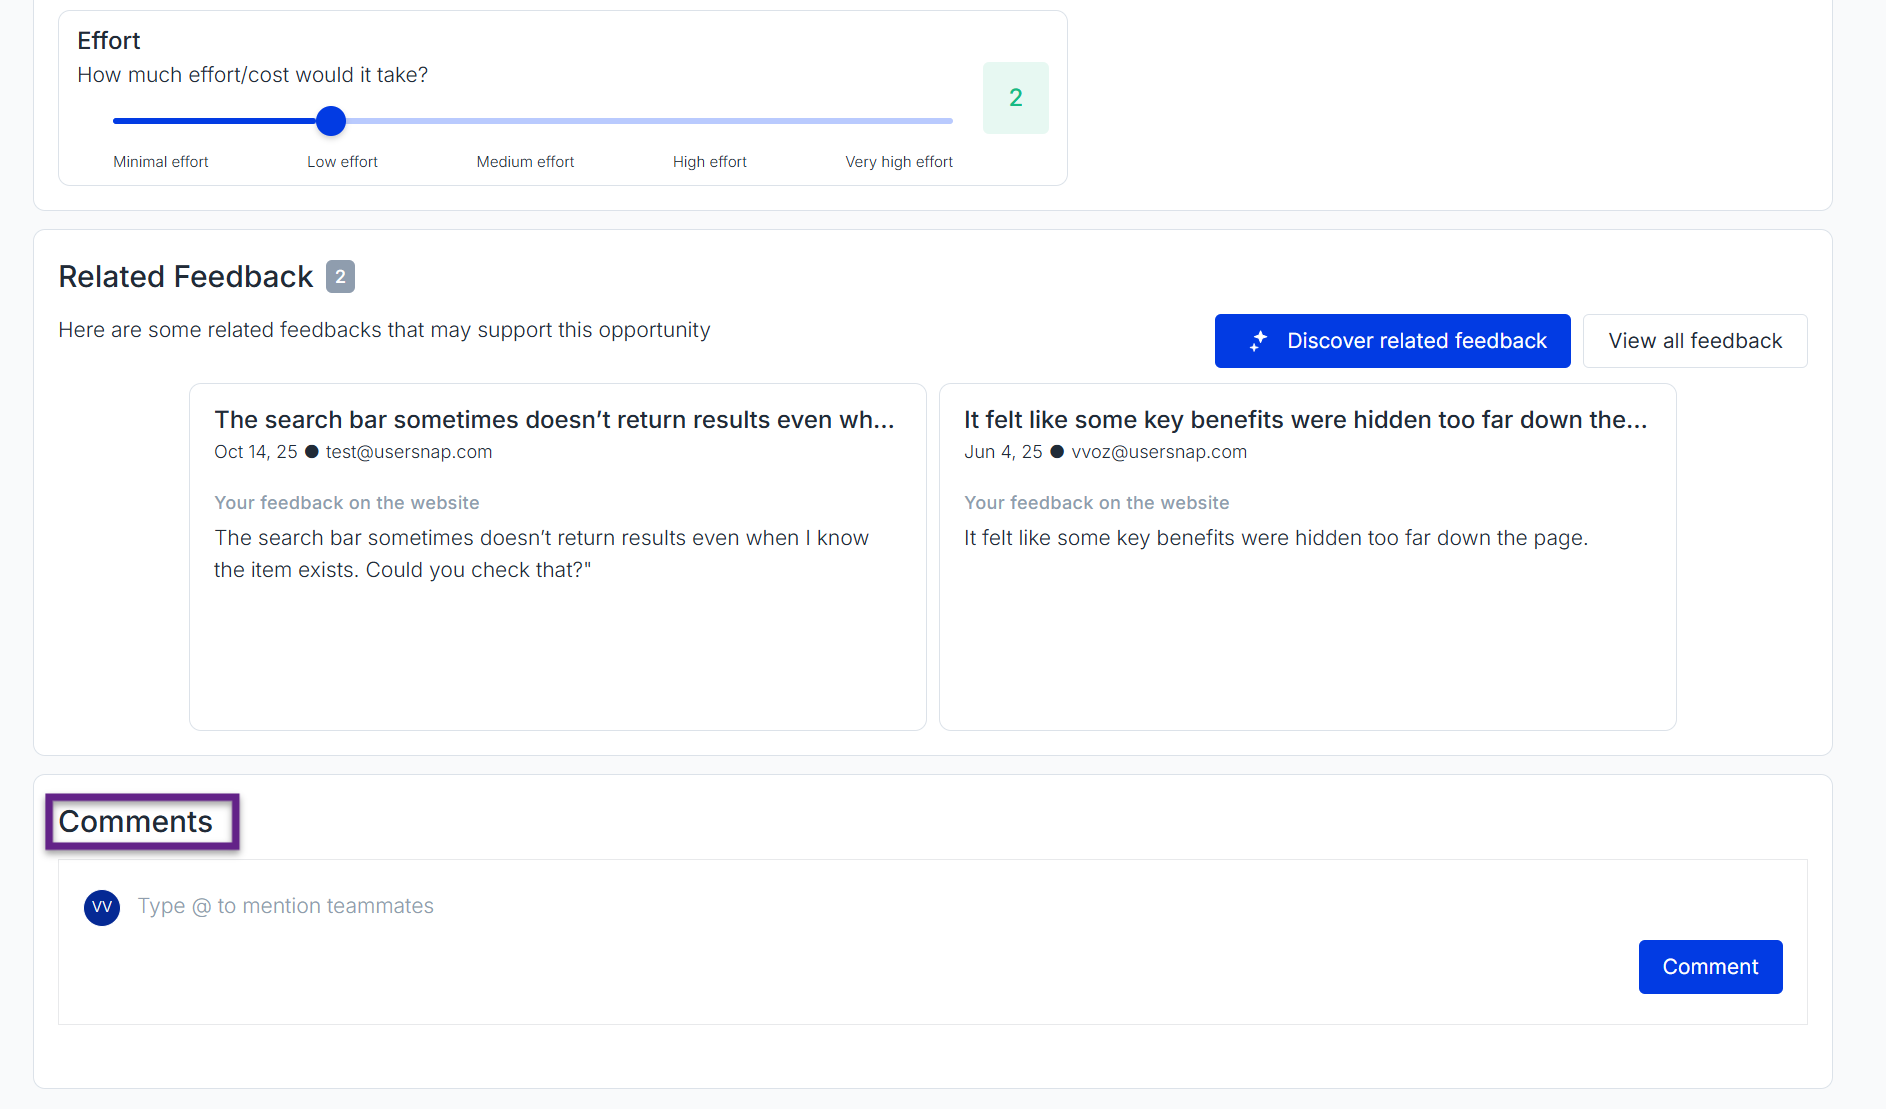
- Leave comments for your team members
Customizing the scoring criteria
You can customize the opportunity scoring criteria by clicking on the "edit" button:
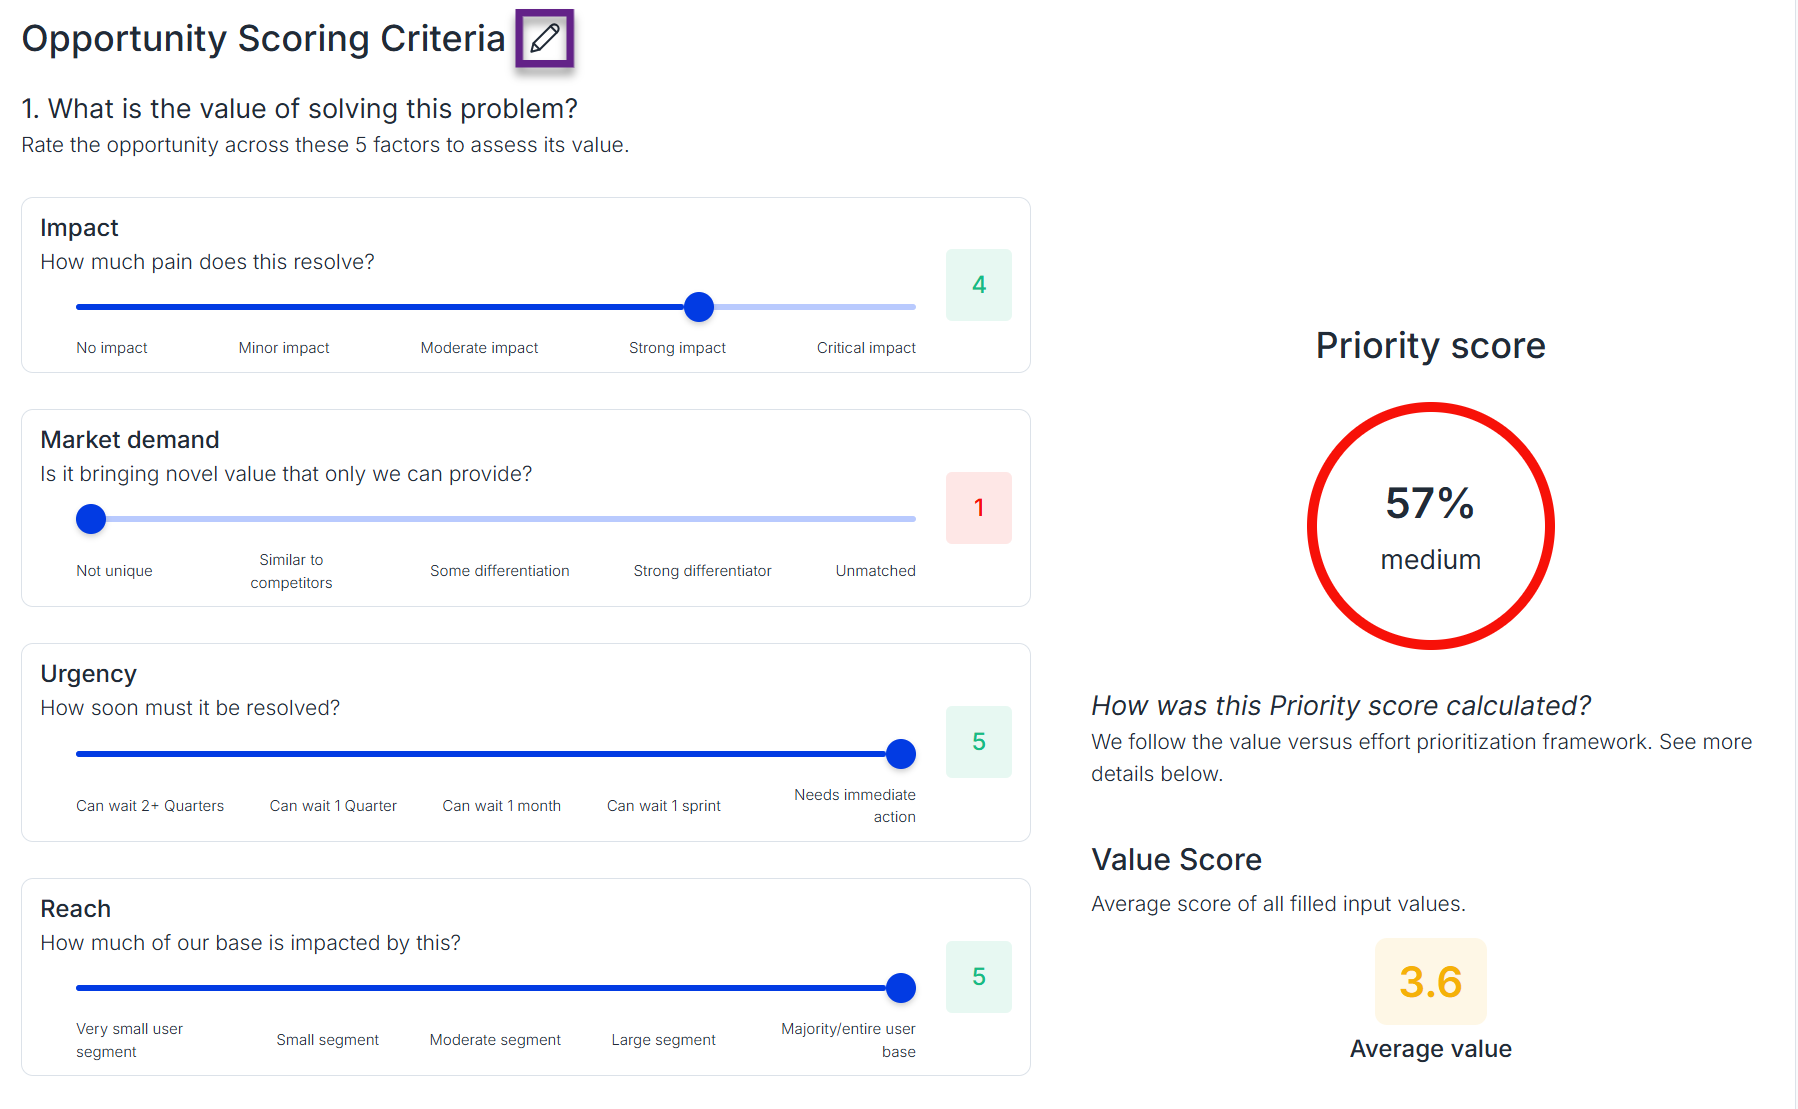
You can then customize each criteria and add new criteria input:
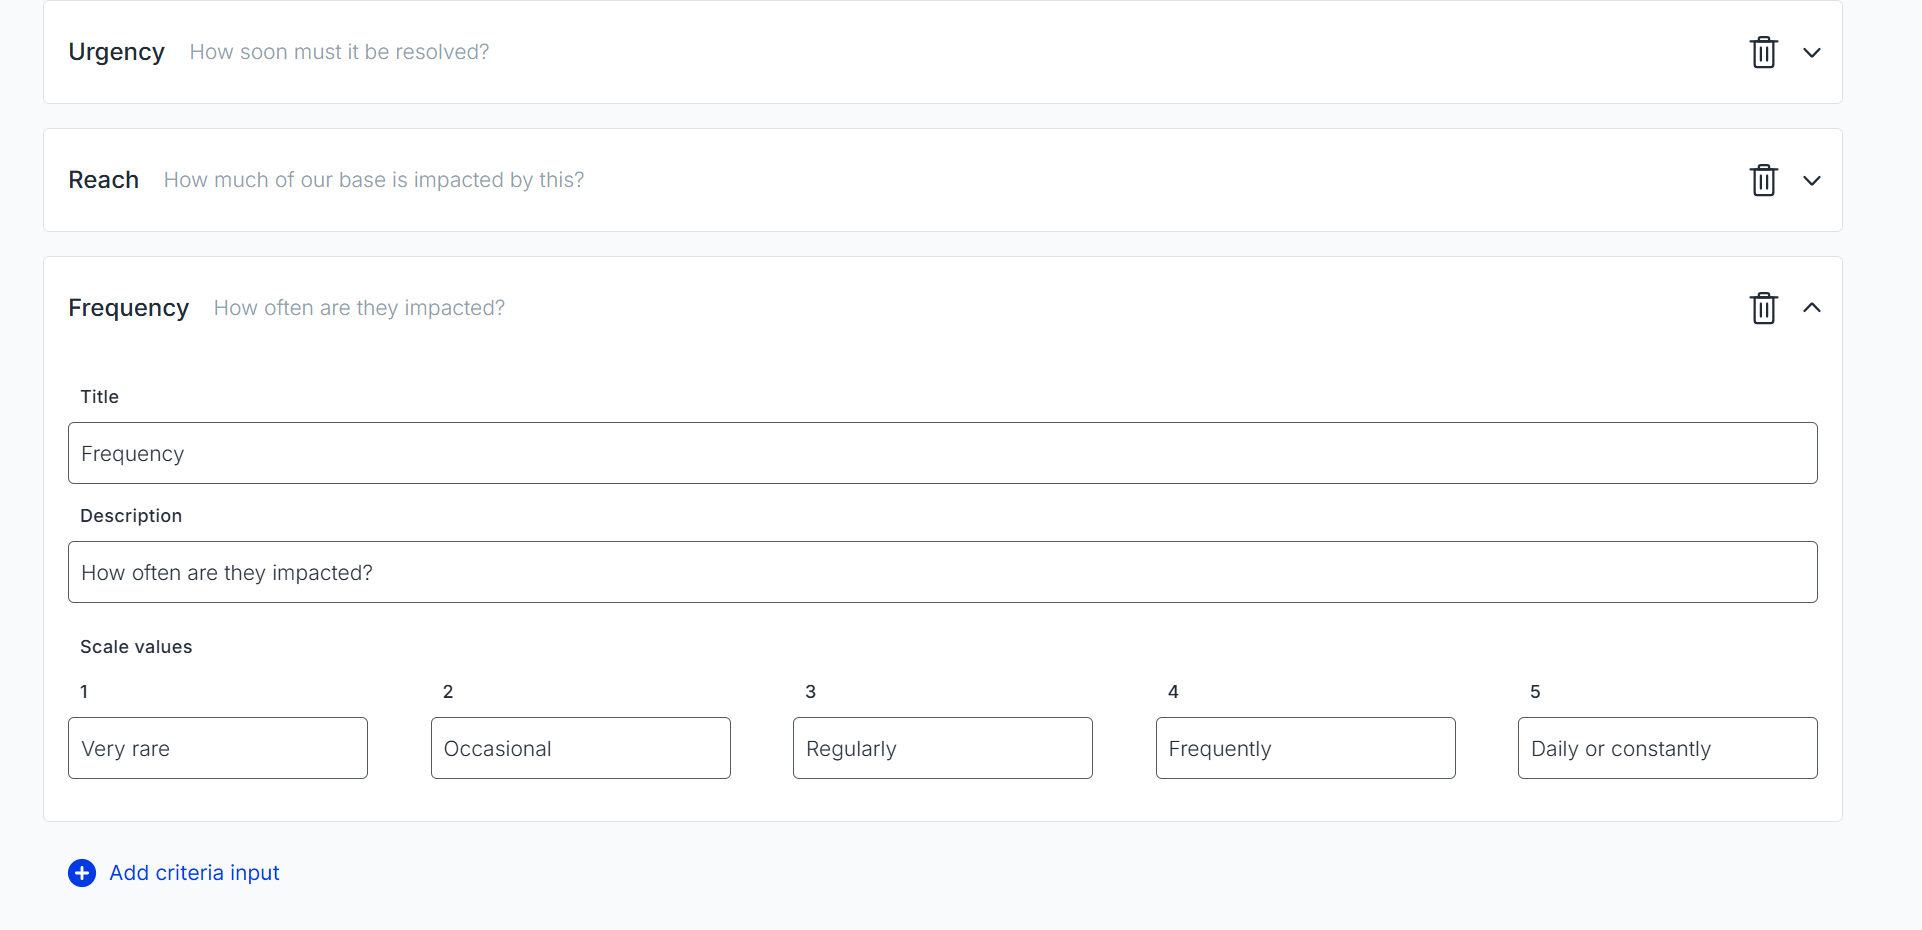
Once you change the criteria in one opportunity, these changes will be applied to all other opportunities as well.
Filtering opportunities
You can filter opportunities using the labels you added previously. To do that, just go to the board and click on the Search & Filter bar:
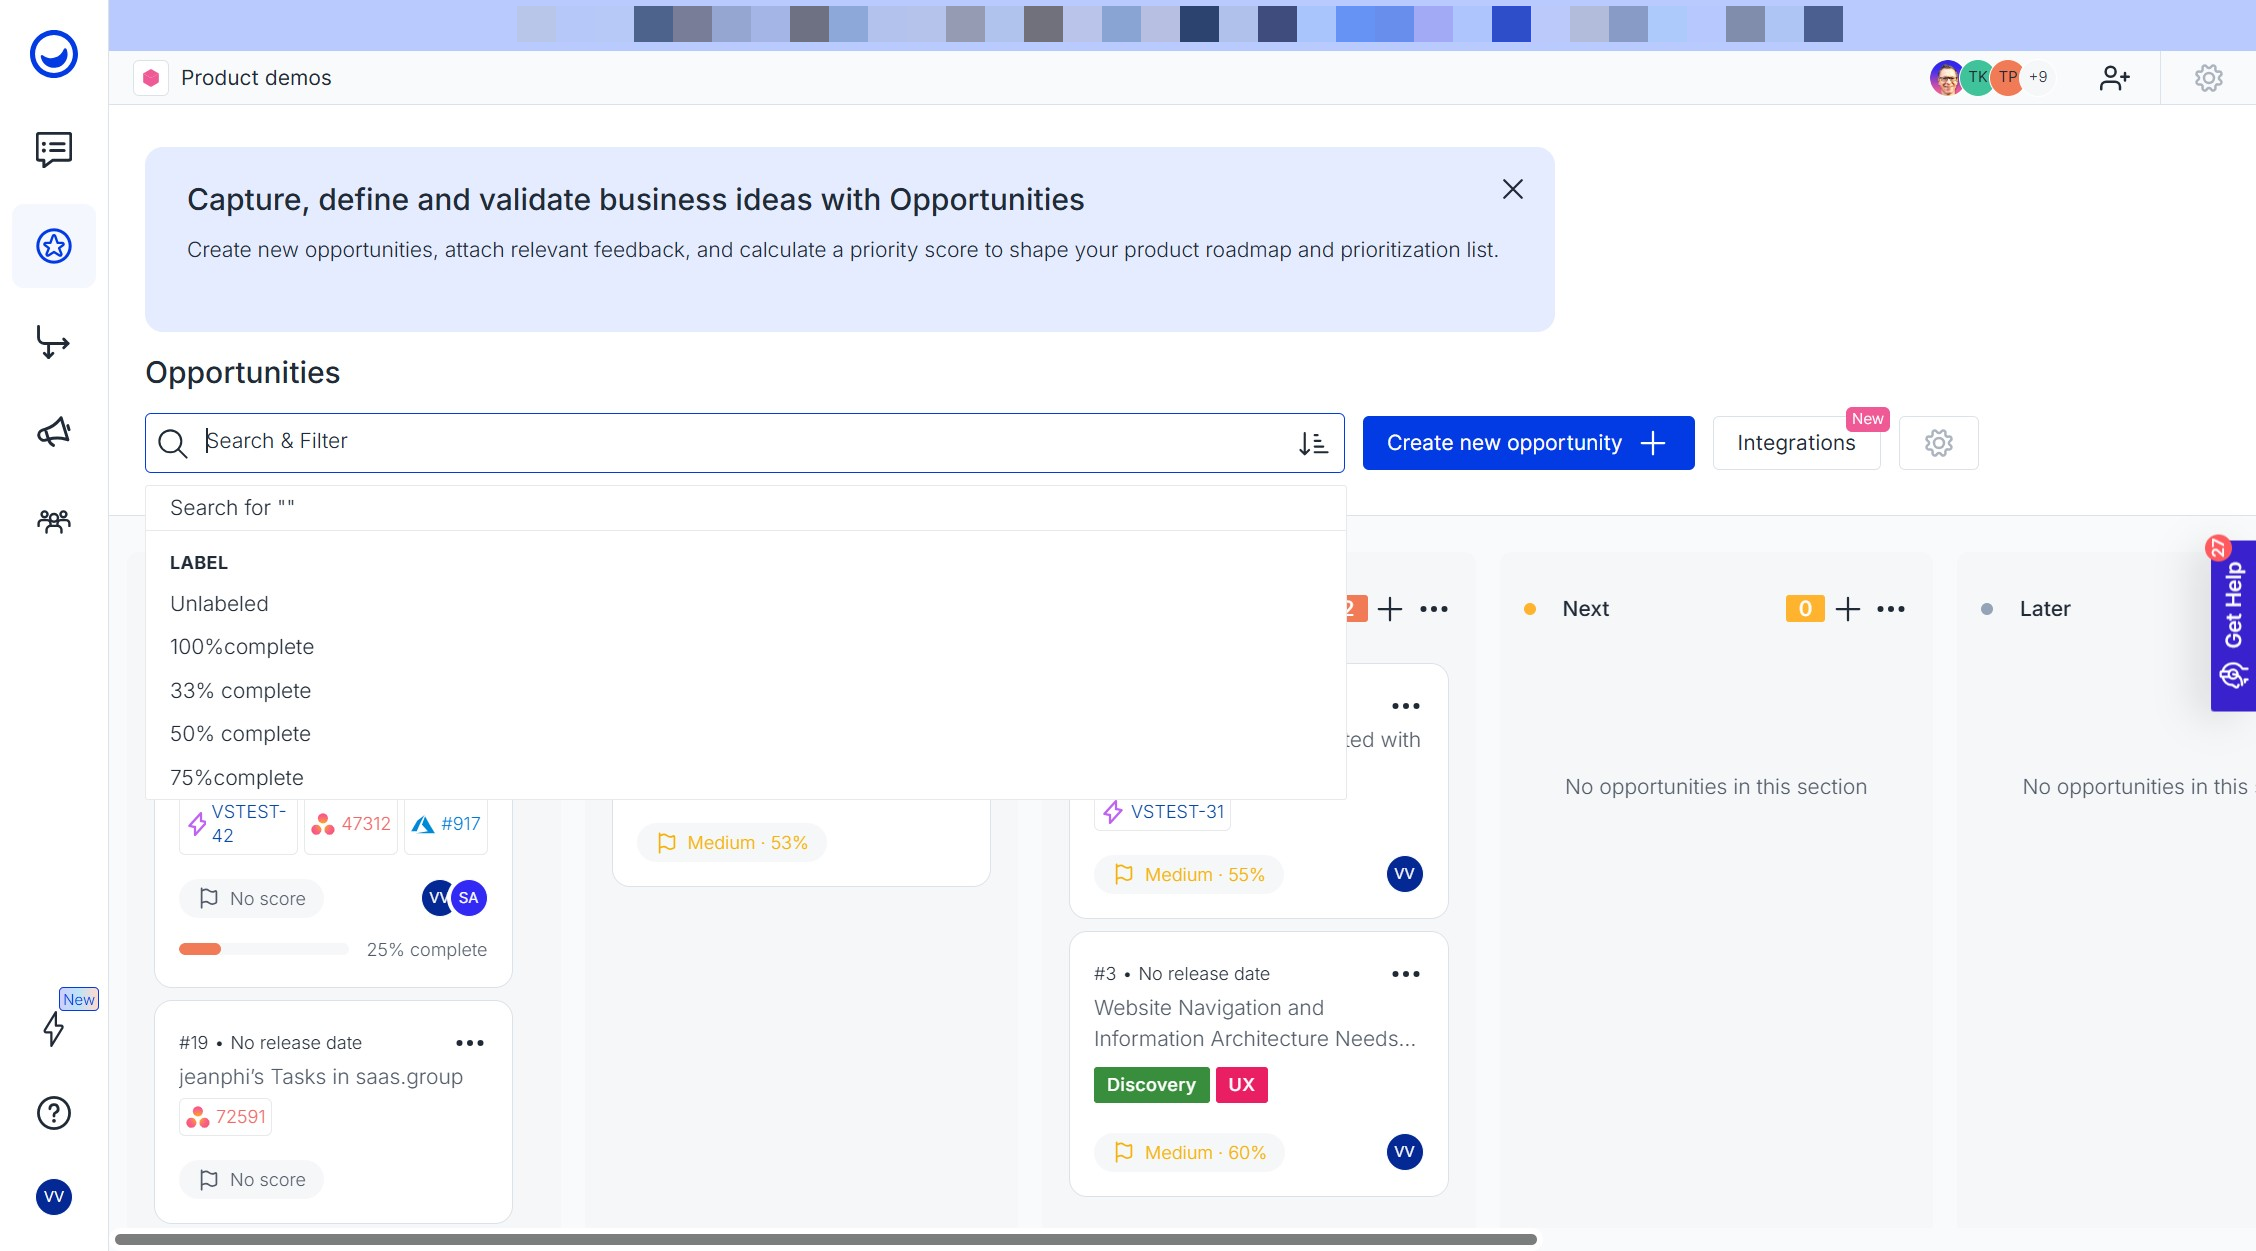
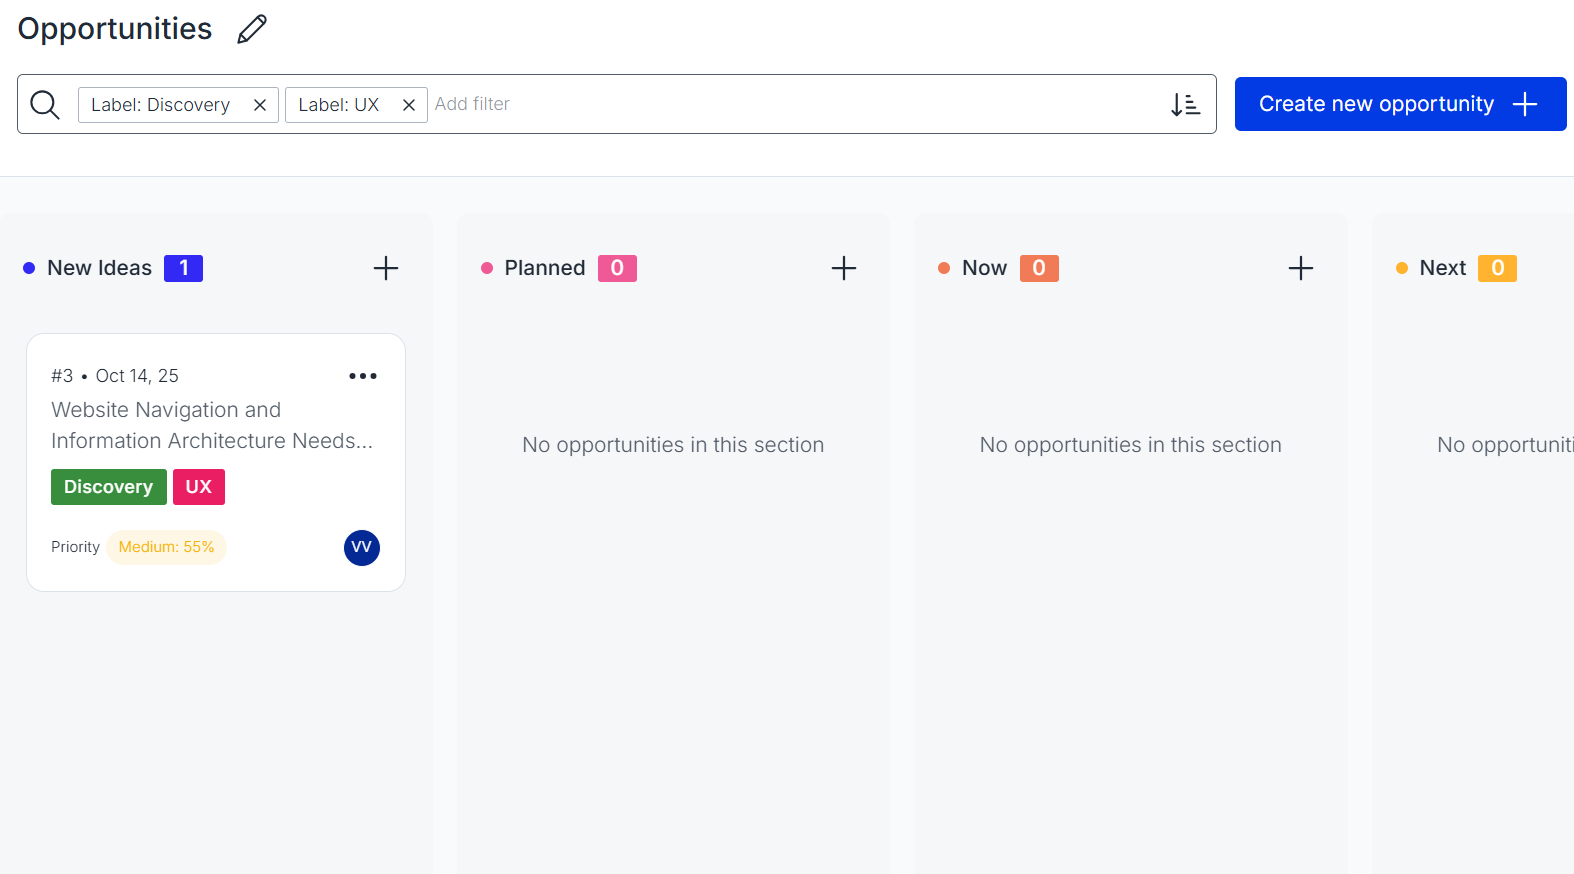
You can combine multiple labels to filter the list and show only items that include all selected labels:
Opportunities 2-way sync integration with Jira
With Usersnap, you can turn high-priority issues and opportunities into actionable working tasks in Jira directly. To do that, just set up a 2-way integration between your Opportunities board and Jira. Here is how you can do that:
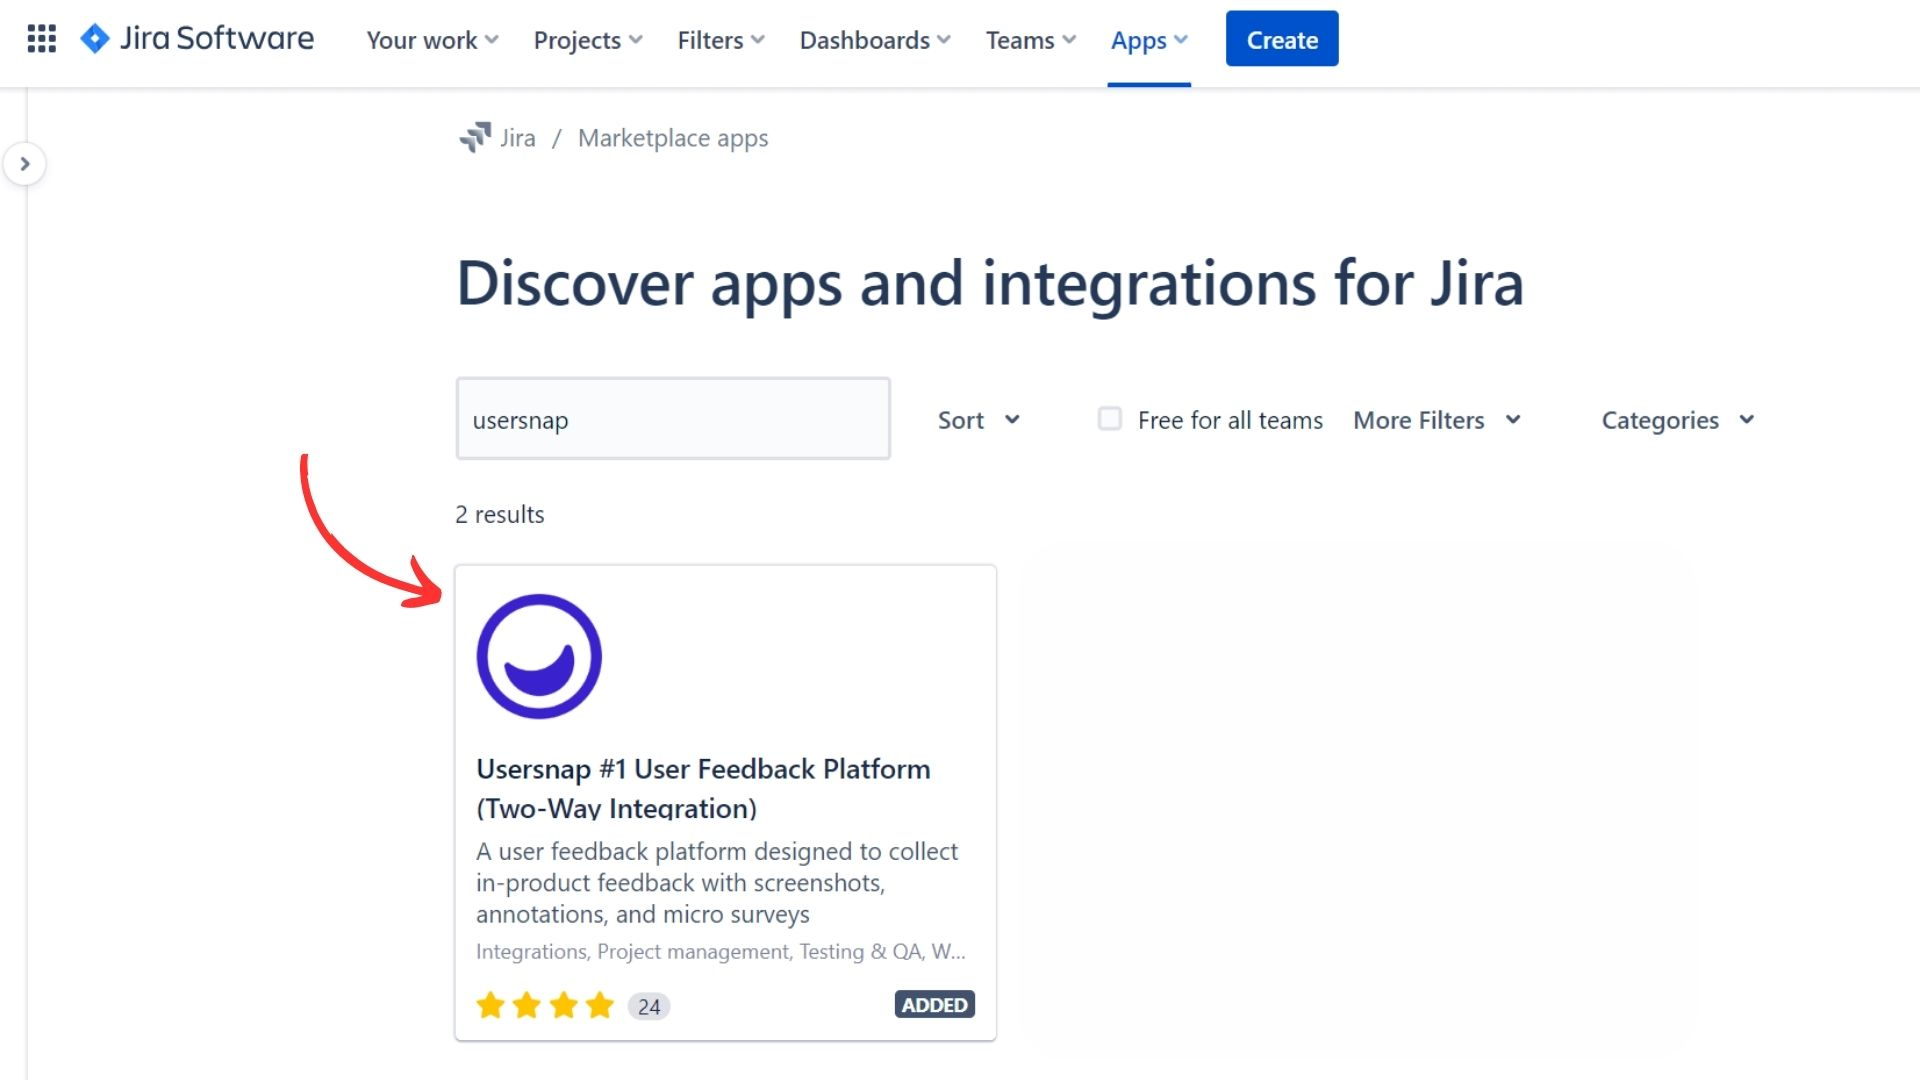
- To start with the integration, please make sure that you have installed the Usersnap app from Jira marketplace:
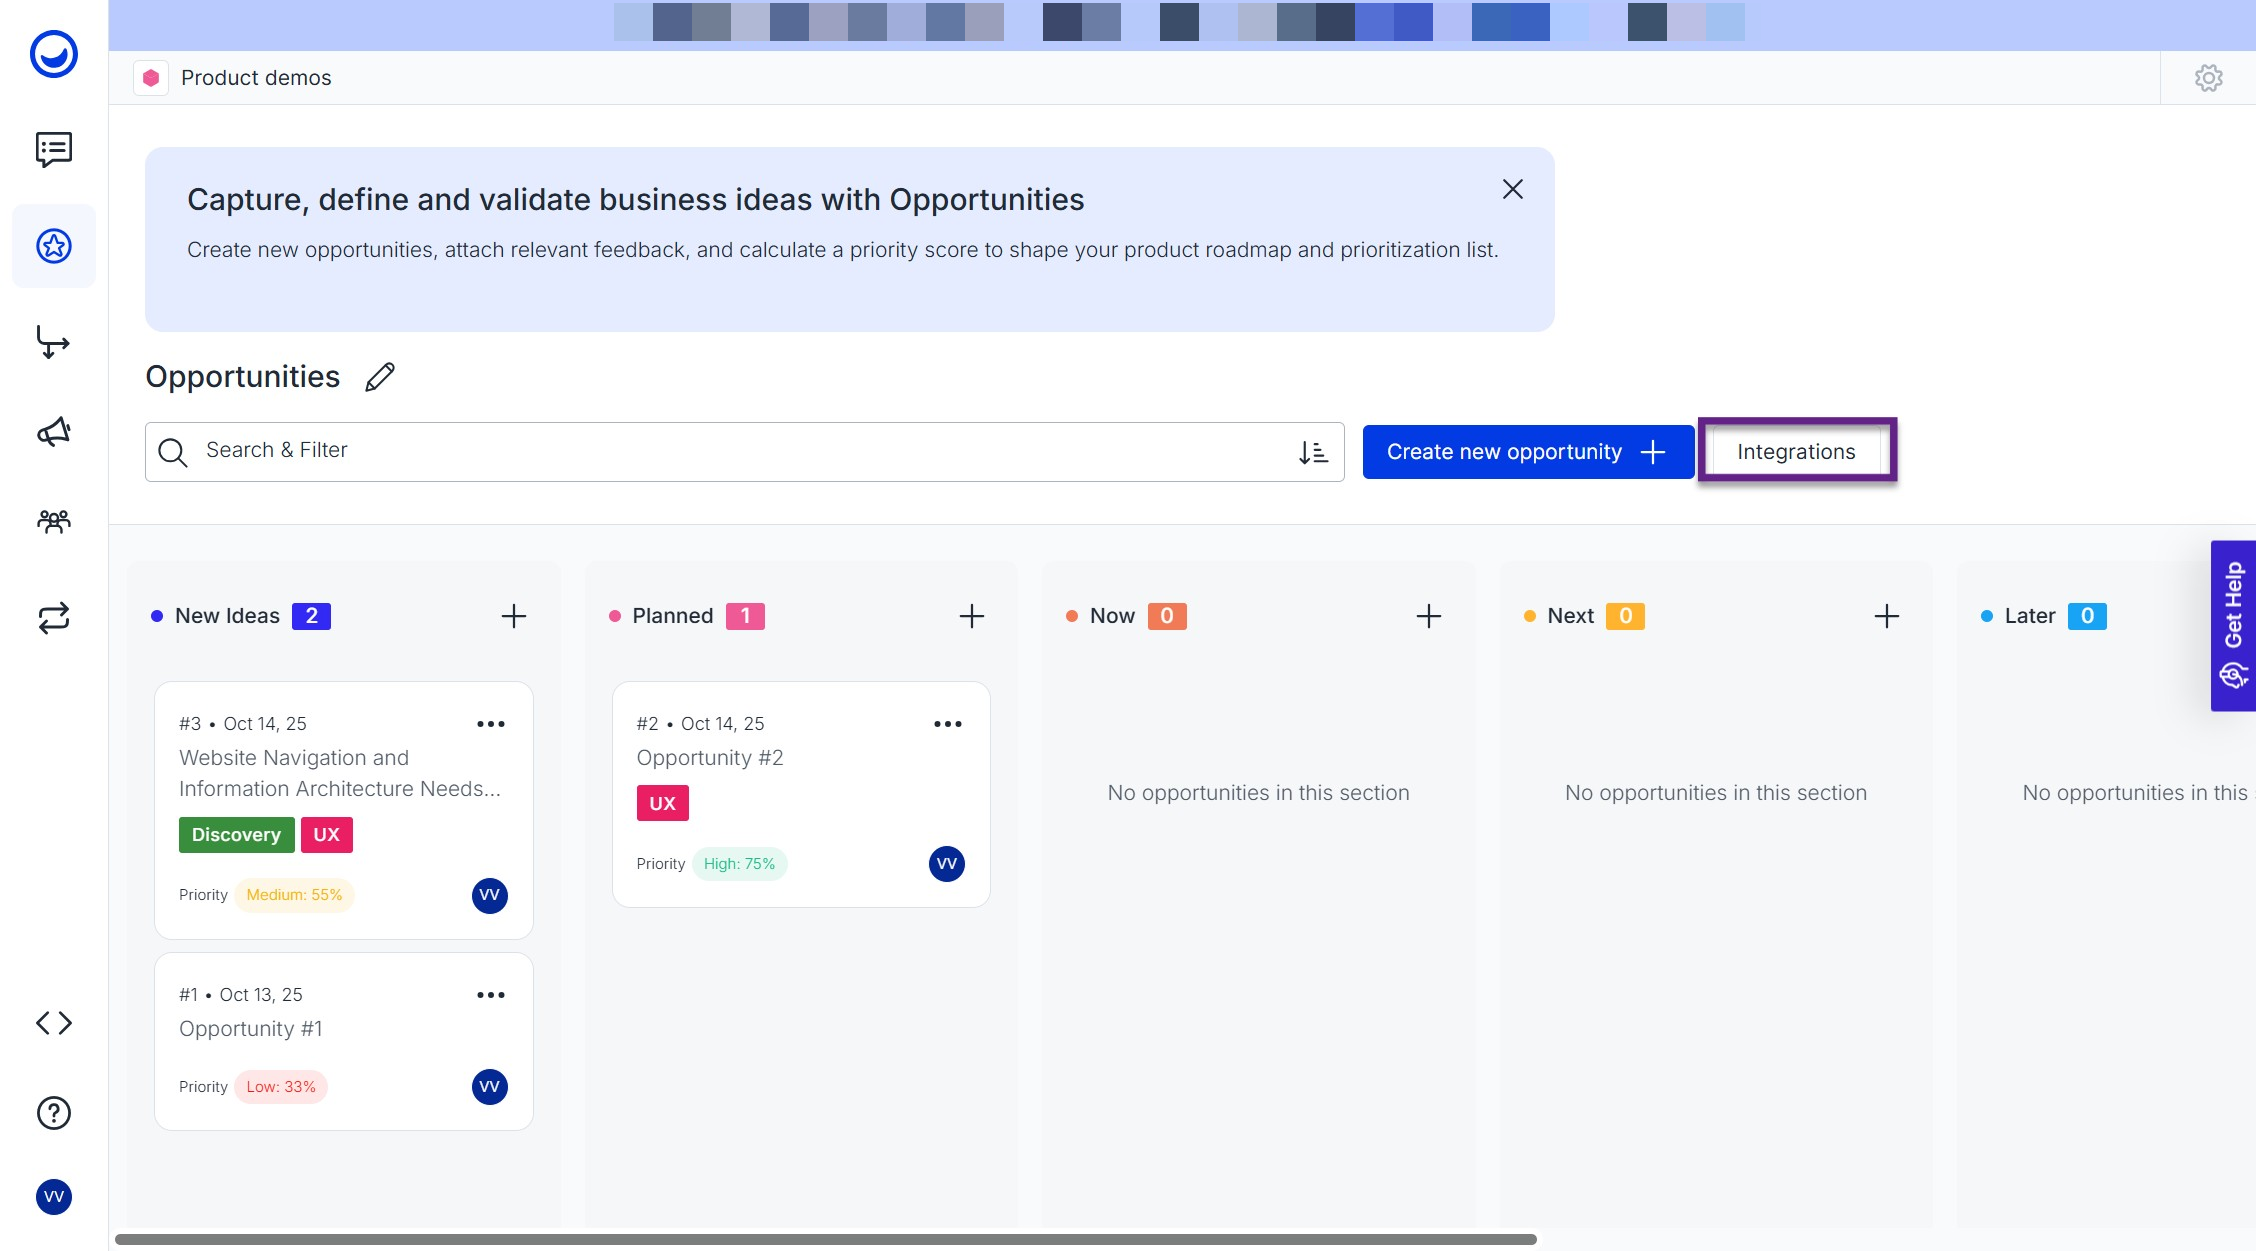
- Then navigate to Opportunities and find the Integrations button:
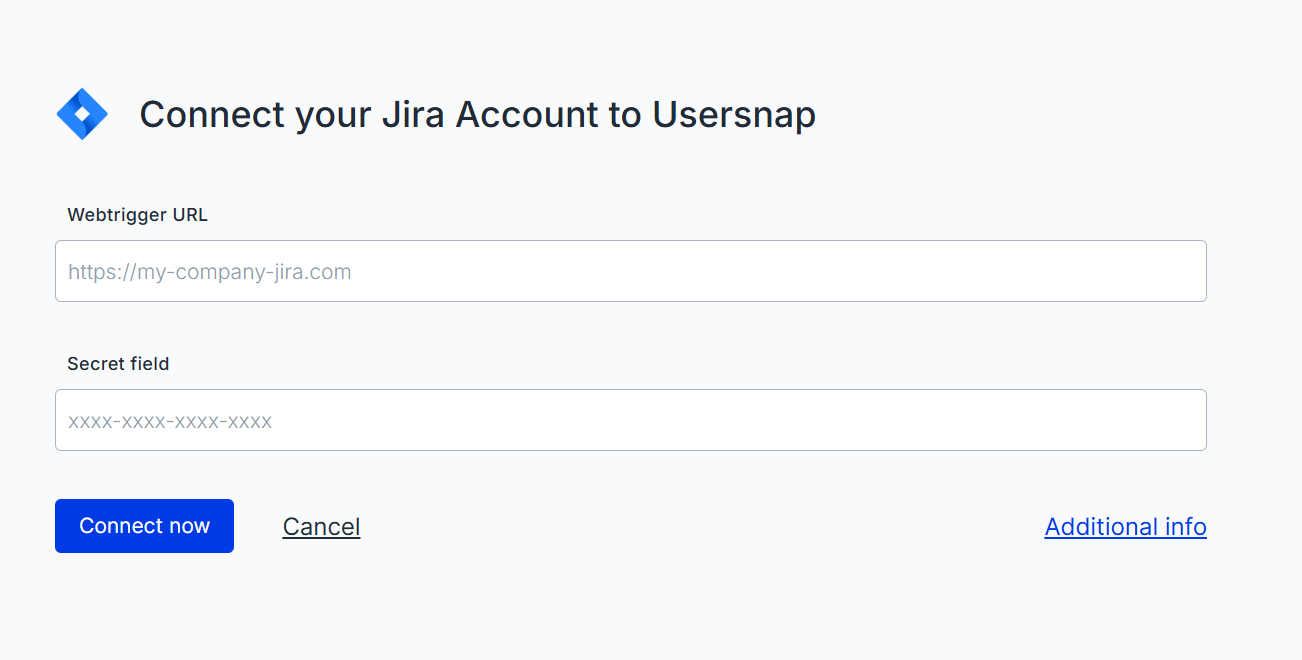
- Choose Jira and enter the setup settings, where you need to add a "Webtrigger URL" and a "Secret field":
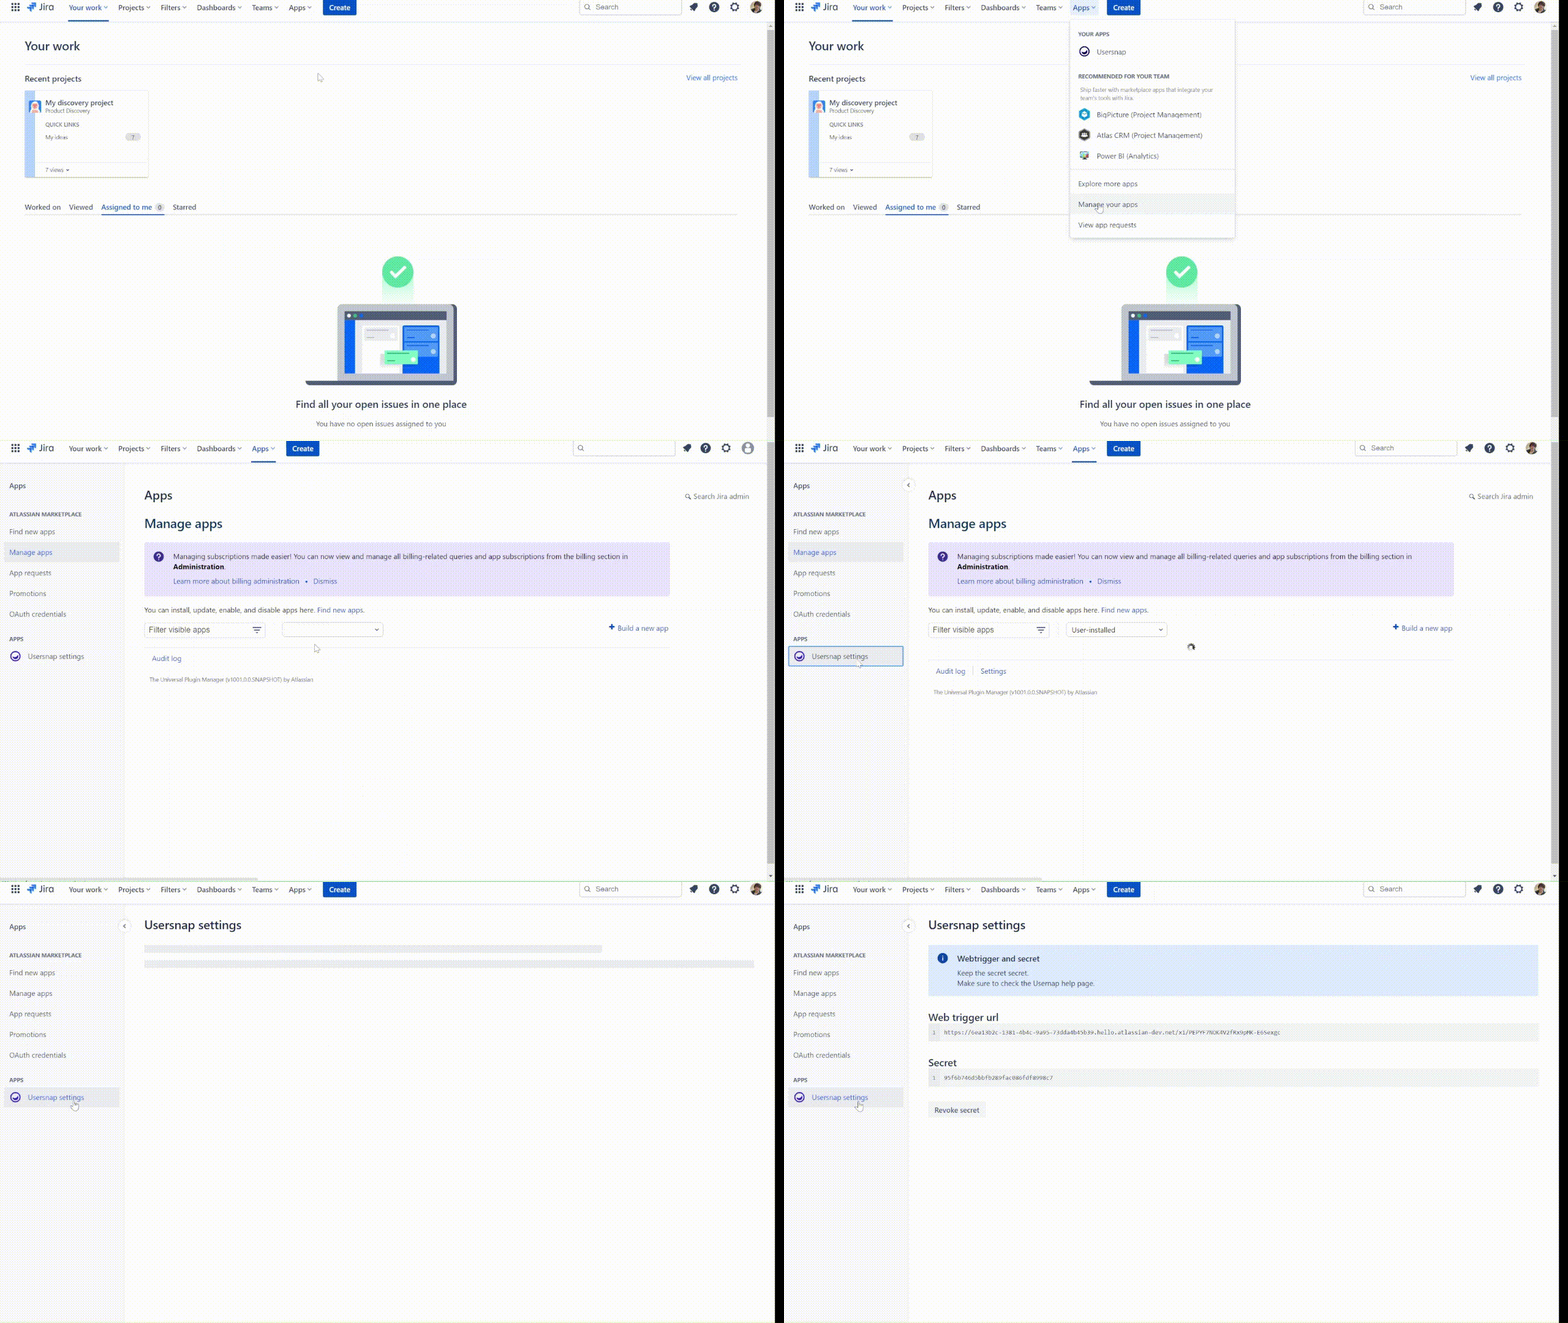
Here's how to find this information in you Jira account:
-
Set up the integration settings by choosing the Integration name, project, default reporter, etc. and save them before exiting.
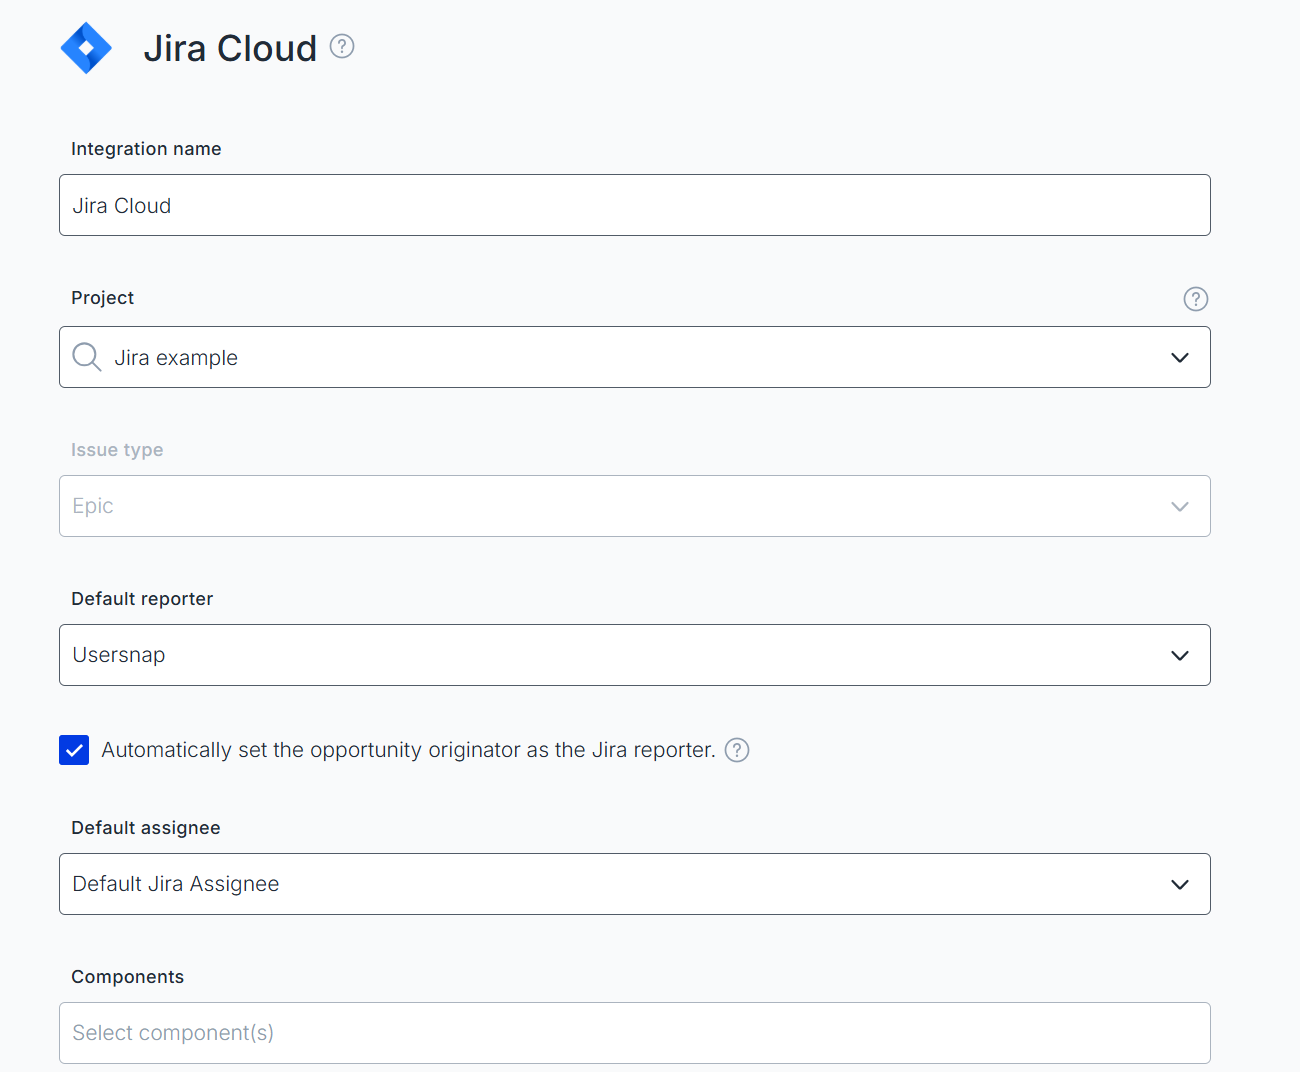
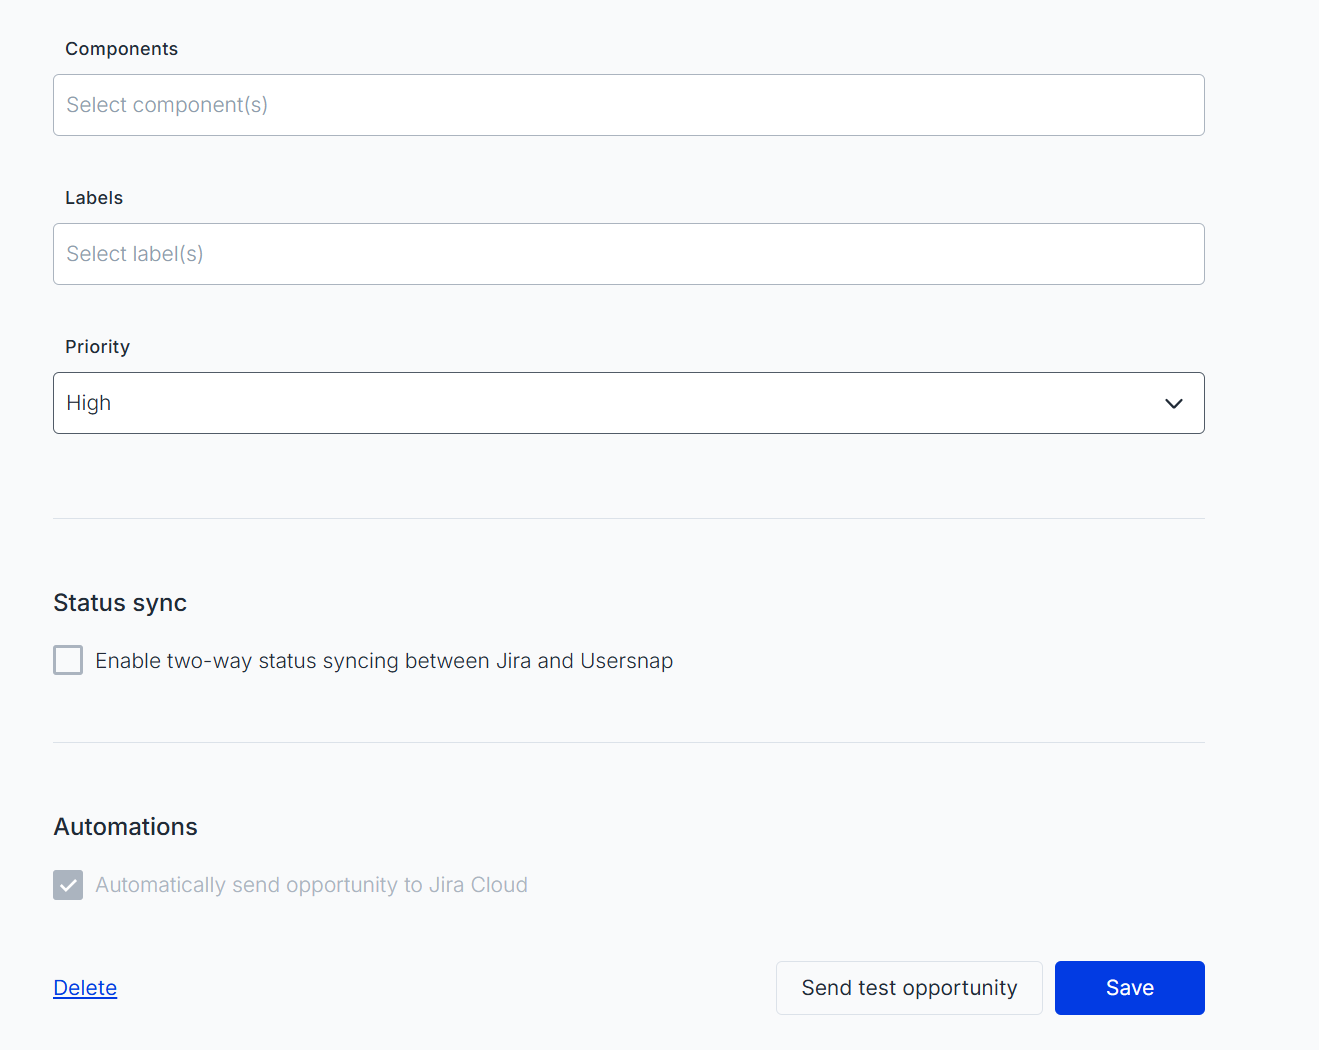
Issue type: epic
Please note that you can only connect Opportunites with the Epic issue type.
-
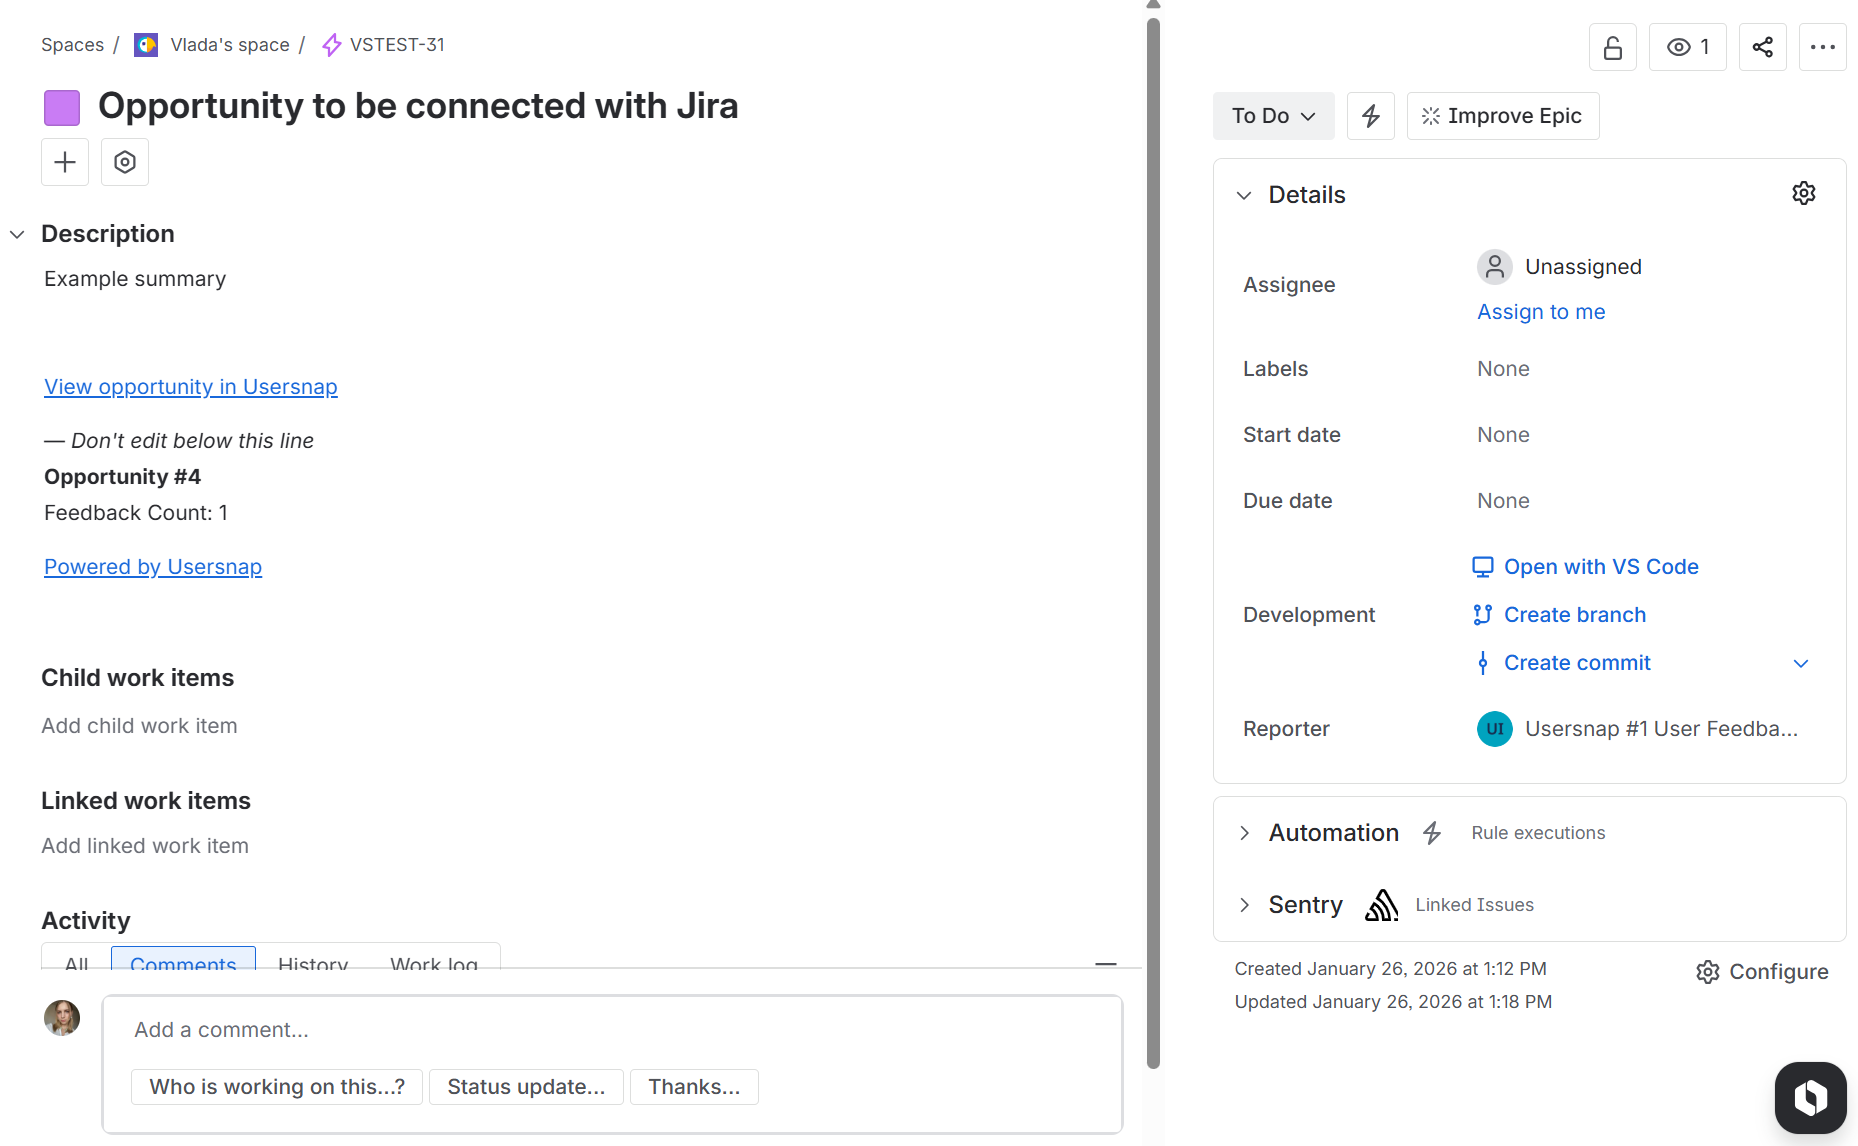
Now, once you create a new Opportunity, it will be automatically created in Jira as well:
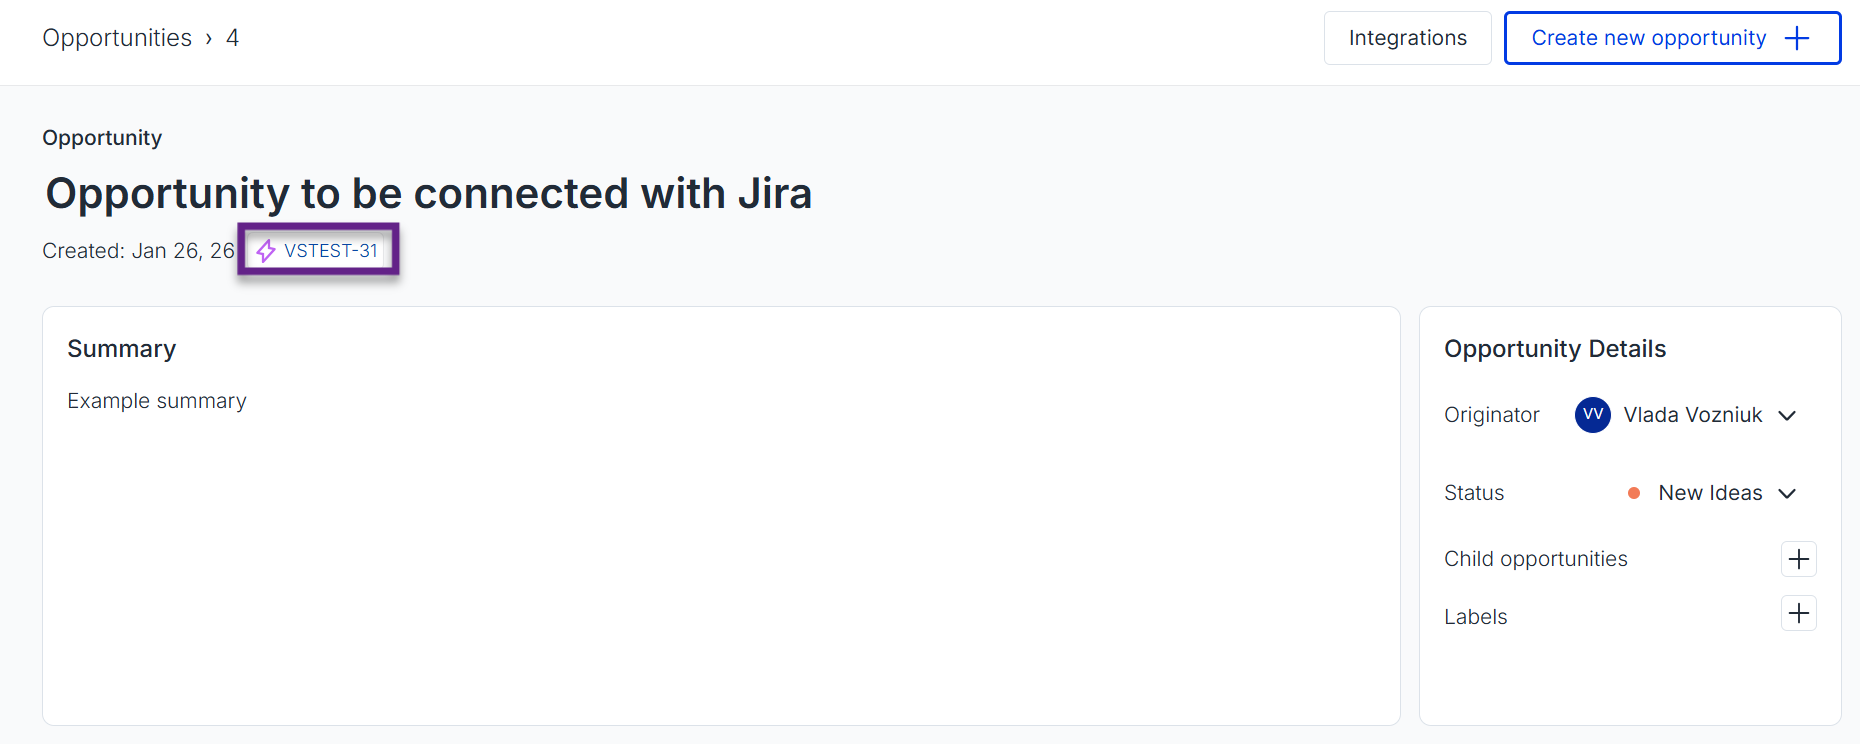
The title and the description of the item will be synched with Jira. The status of the epic will be set as "To Do" unless a two-way status sync is enabled.
-
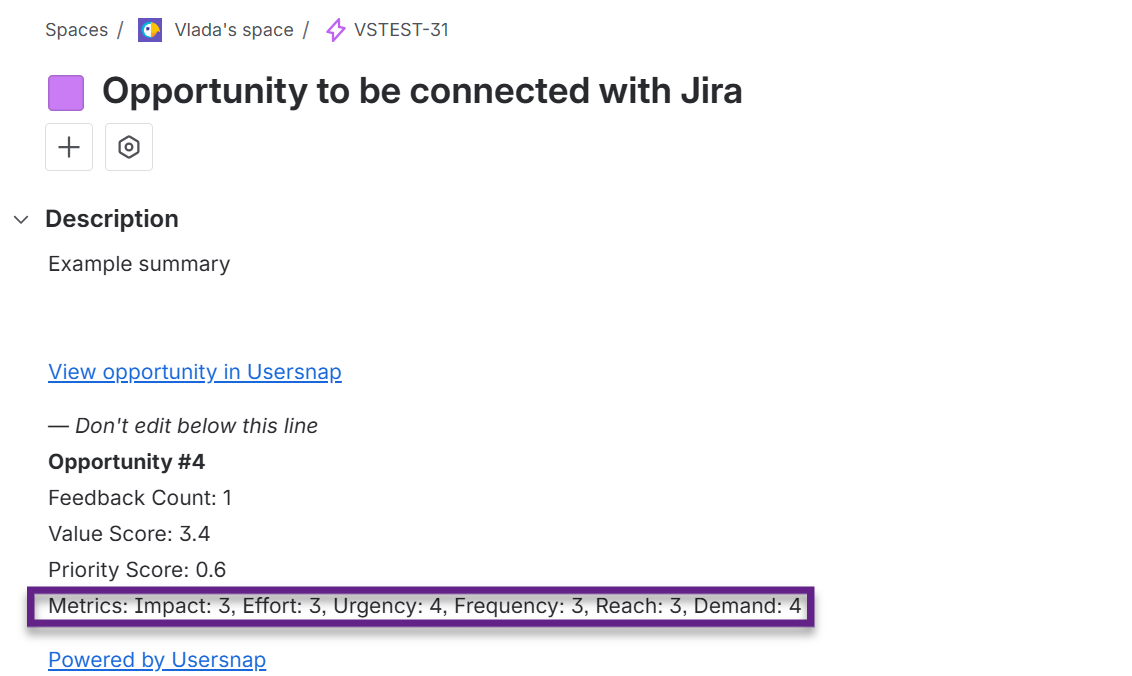
Once you score an opportunity, you will see the criteria reflected in Jira description:
-
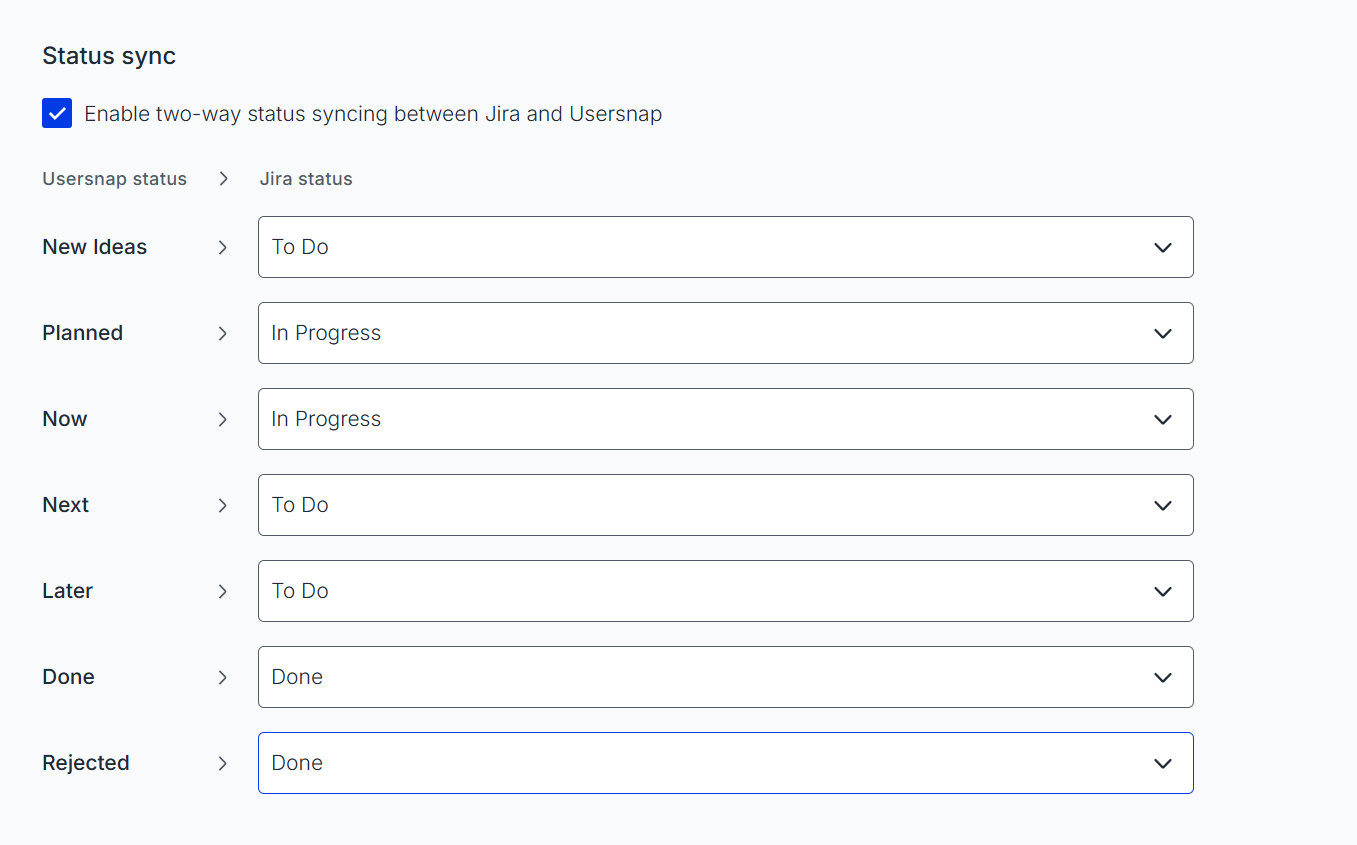
You can also enable 2-way sync between epics in Usersnap and Jira, as well as their statuses:
Opportunities 2-way sync integration with Asana
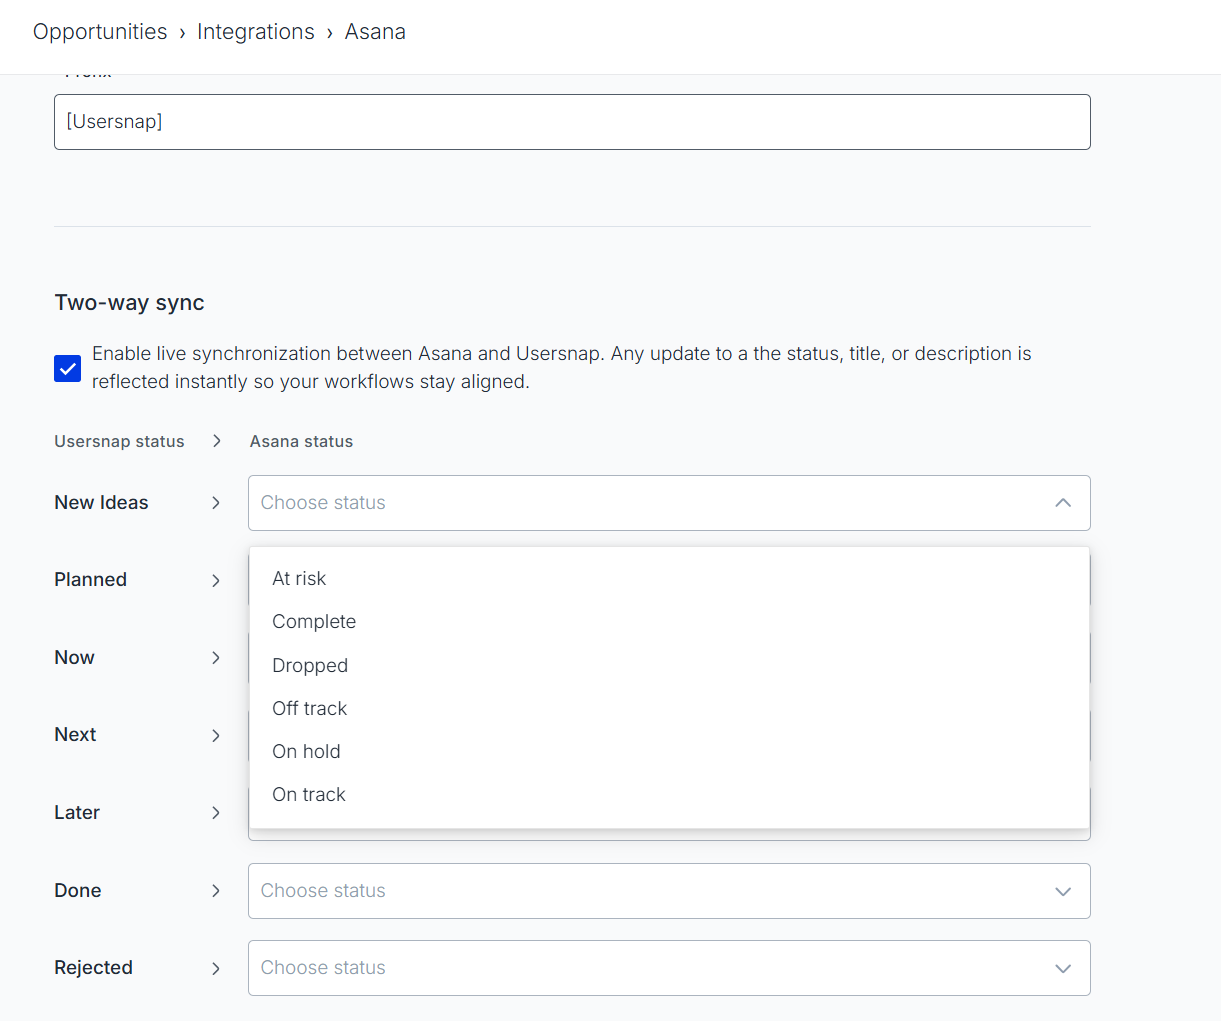
Connect Usersnap Opportunities with Asana to ensure customer feedback directly informs your team's work. With two-way sync, any update to the status, title, or description in Usersnap is reflected instantly in Asana and vice versa. Here's how you can do that:
-
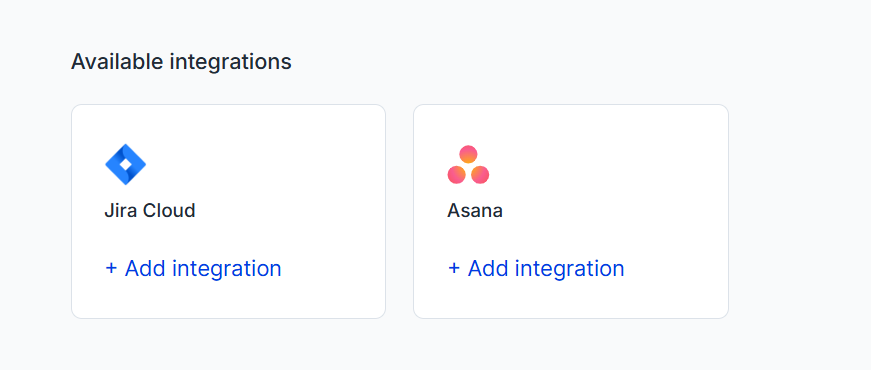
Go to the Integrations section of Opportunities and choose Asana from the grid:
-
Authenticate the connection by signing in to Asana:
-
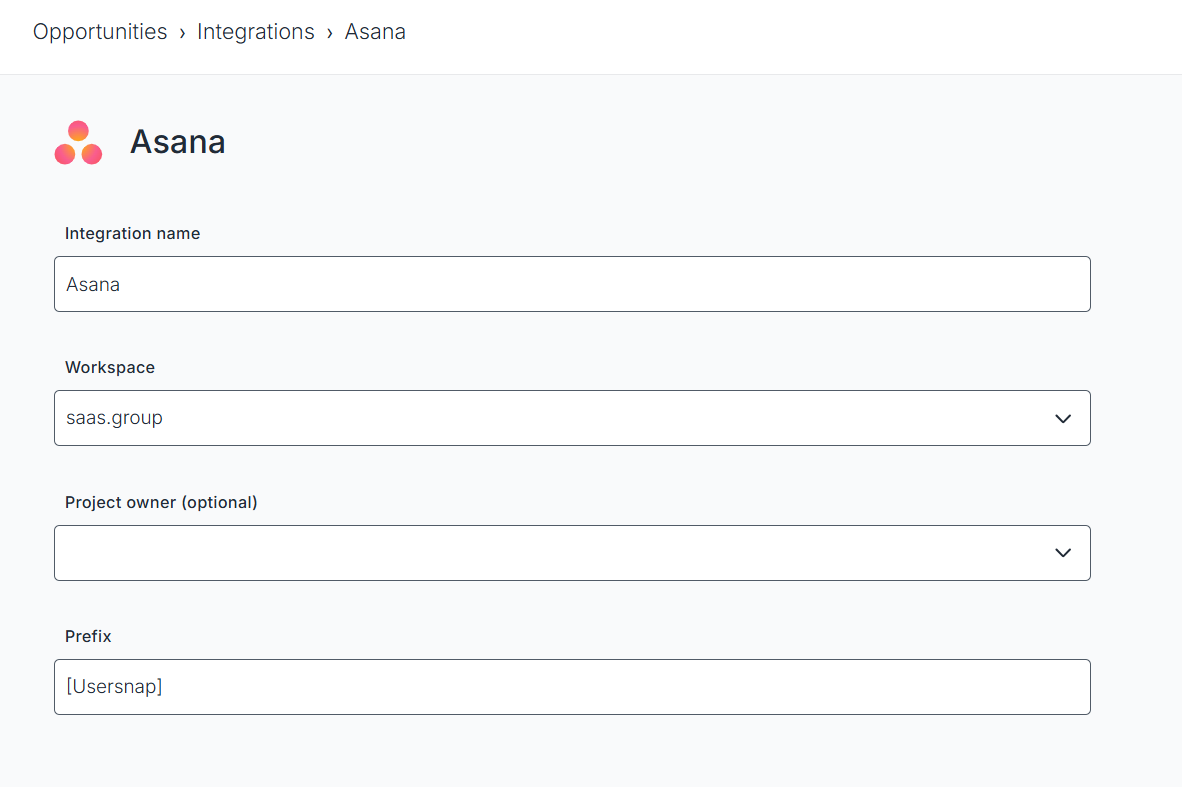
Complete the integration settings:
-
Enable the 2-way sync and map Usersnap statuses to Asana statuses:
 Opportunities 2-way sync integration with ADO
The Azure DevOps Opportunities integration automatically creates Azure DevOps work items from your Usersnap Opportunities. With two-way sync enabled, status changes made in Azure DevOps are also reflected back in Usersnap, keeping both systems in sync.
Before setting up the integration:
Install the Usersnap app from the Azure DevOps Marketplace.
In Azure DevOps, go to Organization Settings → Policies → Security.
Enable Third-party application access via OAuth.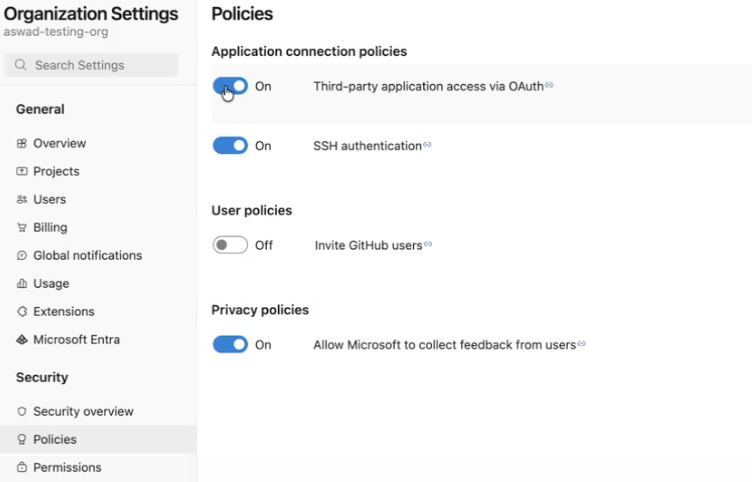
Note: If OAuth access is disabled, you'll receive an authentication error when trying to connect your Azure DevOps account.
Connect Azure DevOps
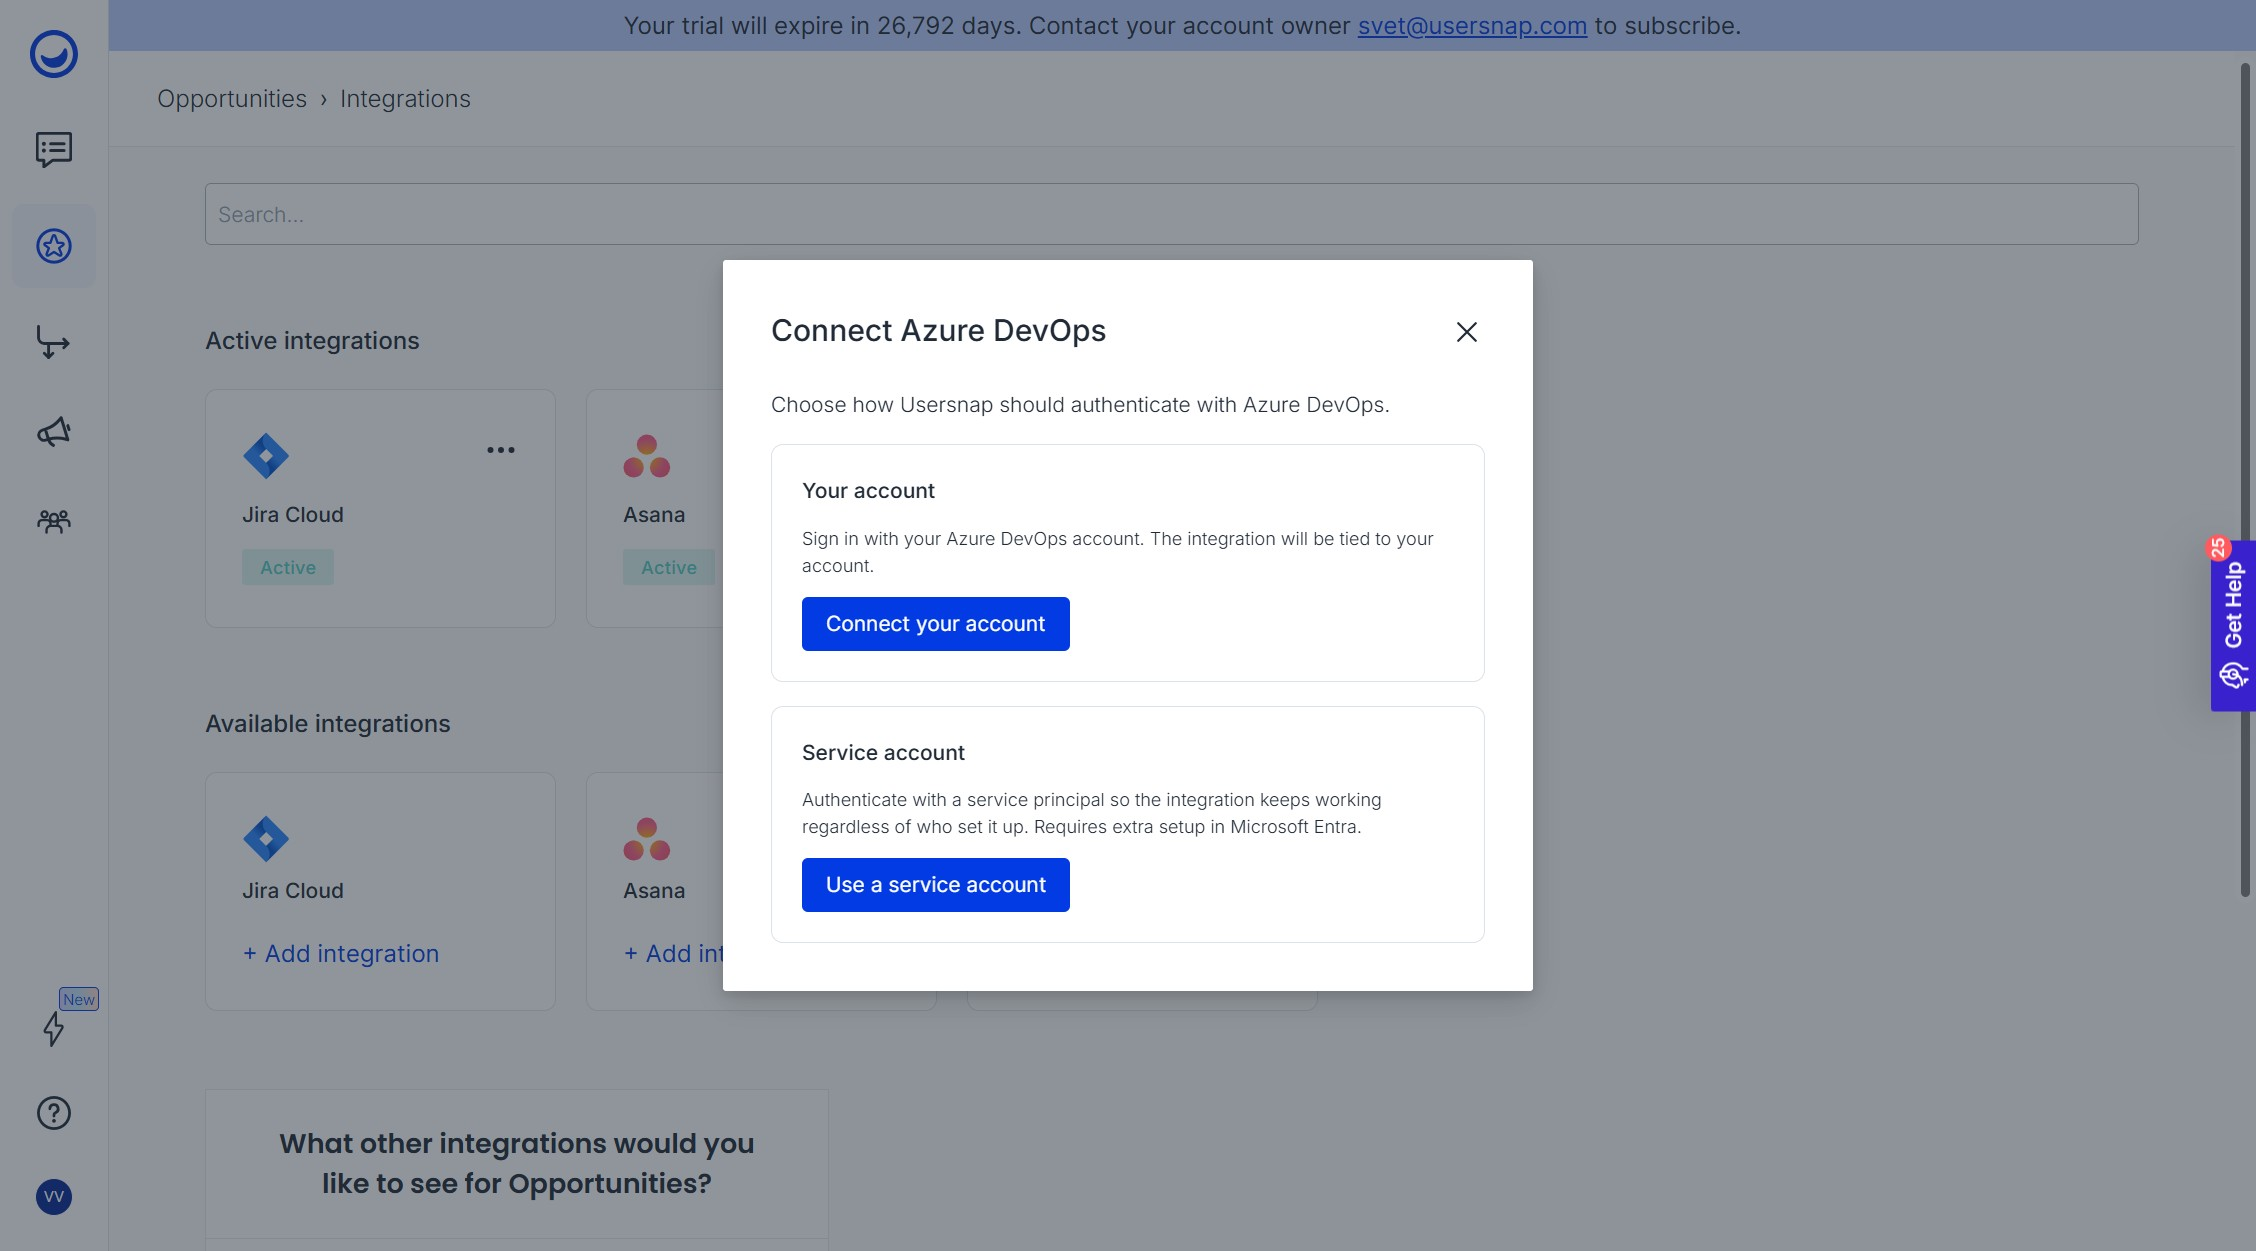
In Usersnap, navigate to Opportunities → Integrations and select Azure DevOps.
Alternatively, you can connect using a service account, which is recommended for advanced or enterprise setups.
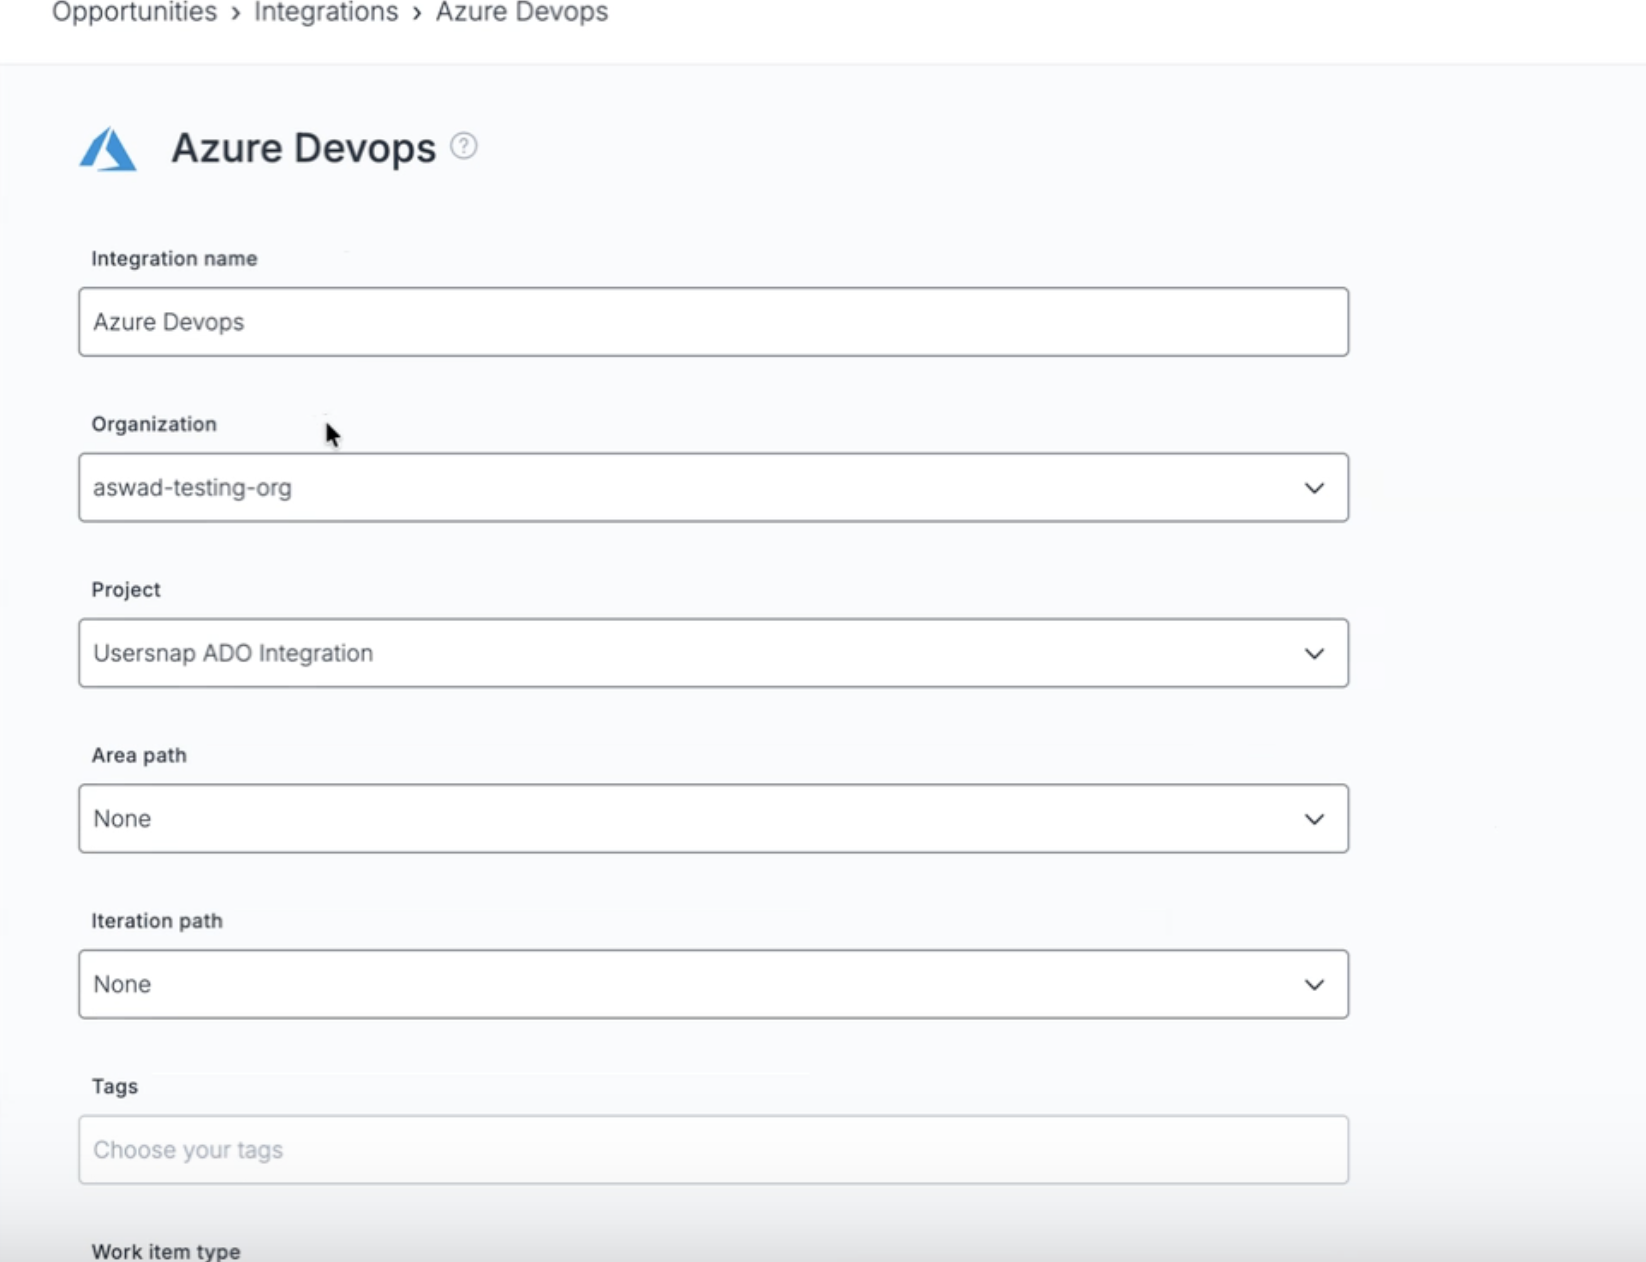
Select your Azure DevOps organization, project, and work item type (for example, Epic).
This determines where your Opportunities are created in Azure DevOps and ensures they follow your team's existing work item workflows.
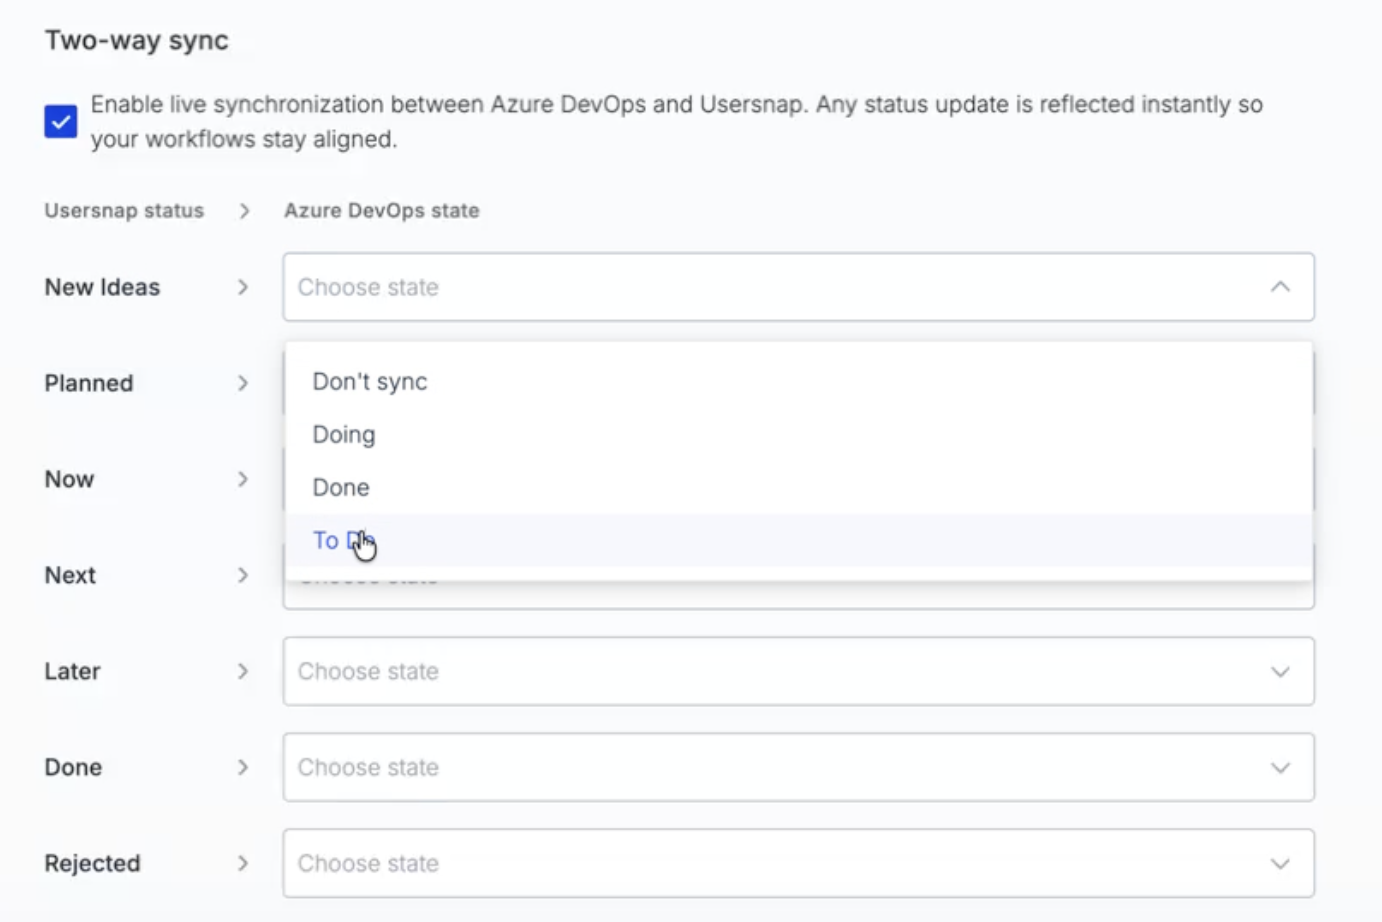
Configure status mapping
Status mapping defines how Usersnap Opportunity statuses correspond to Azure DevOps work item states.
This mapping is required to sync status changes from Usersnap to Azure DevOps.
Once configured, moving an Opportunity through these statuses in Usersnap will update the linked Azure DevOps work item.
Note: Status mapping alone enables one-way status sync (Usersnap → Azure DevOps). To sync status changes back from Azure DevOps to Usersnap, you must configure Azure DevOps webhooks.
Set up webhooks for two-way sync
Creating Opportunities in Azure DevOps works without additional configuration. However, to synchronize status updates from Azure DevOps back to Usersnap, you'll need to configure two Azure DevOps Service Hooks.
Create the "Work item created" webhook
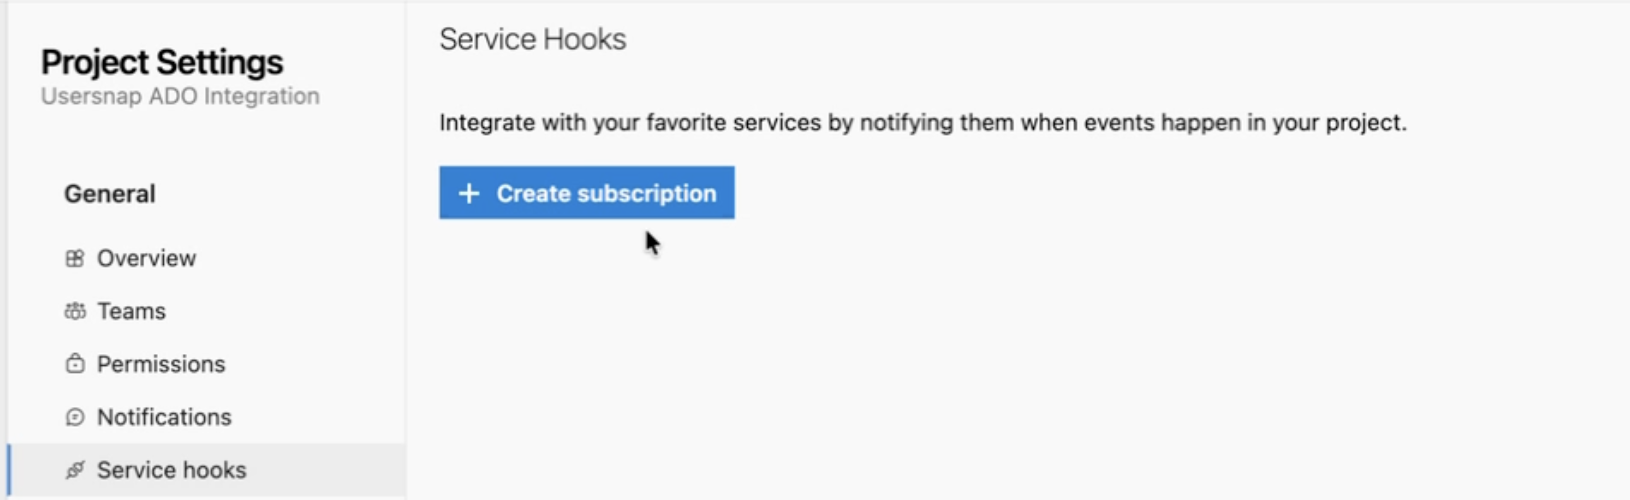
- In Azure DevOps, open your Project Settings.
- Select Service Hooks.
- Click Create Subscription (or + if you already have existing subscriptions).
-
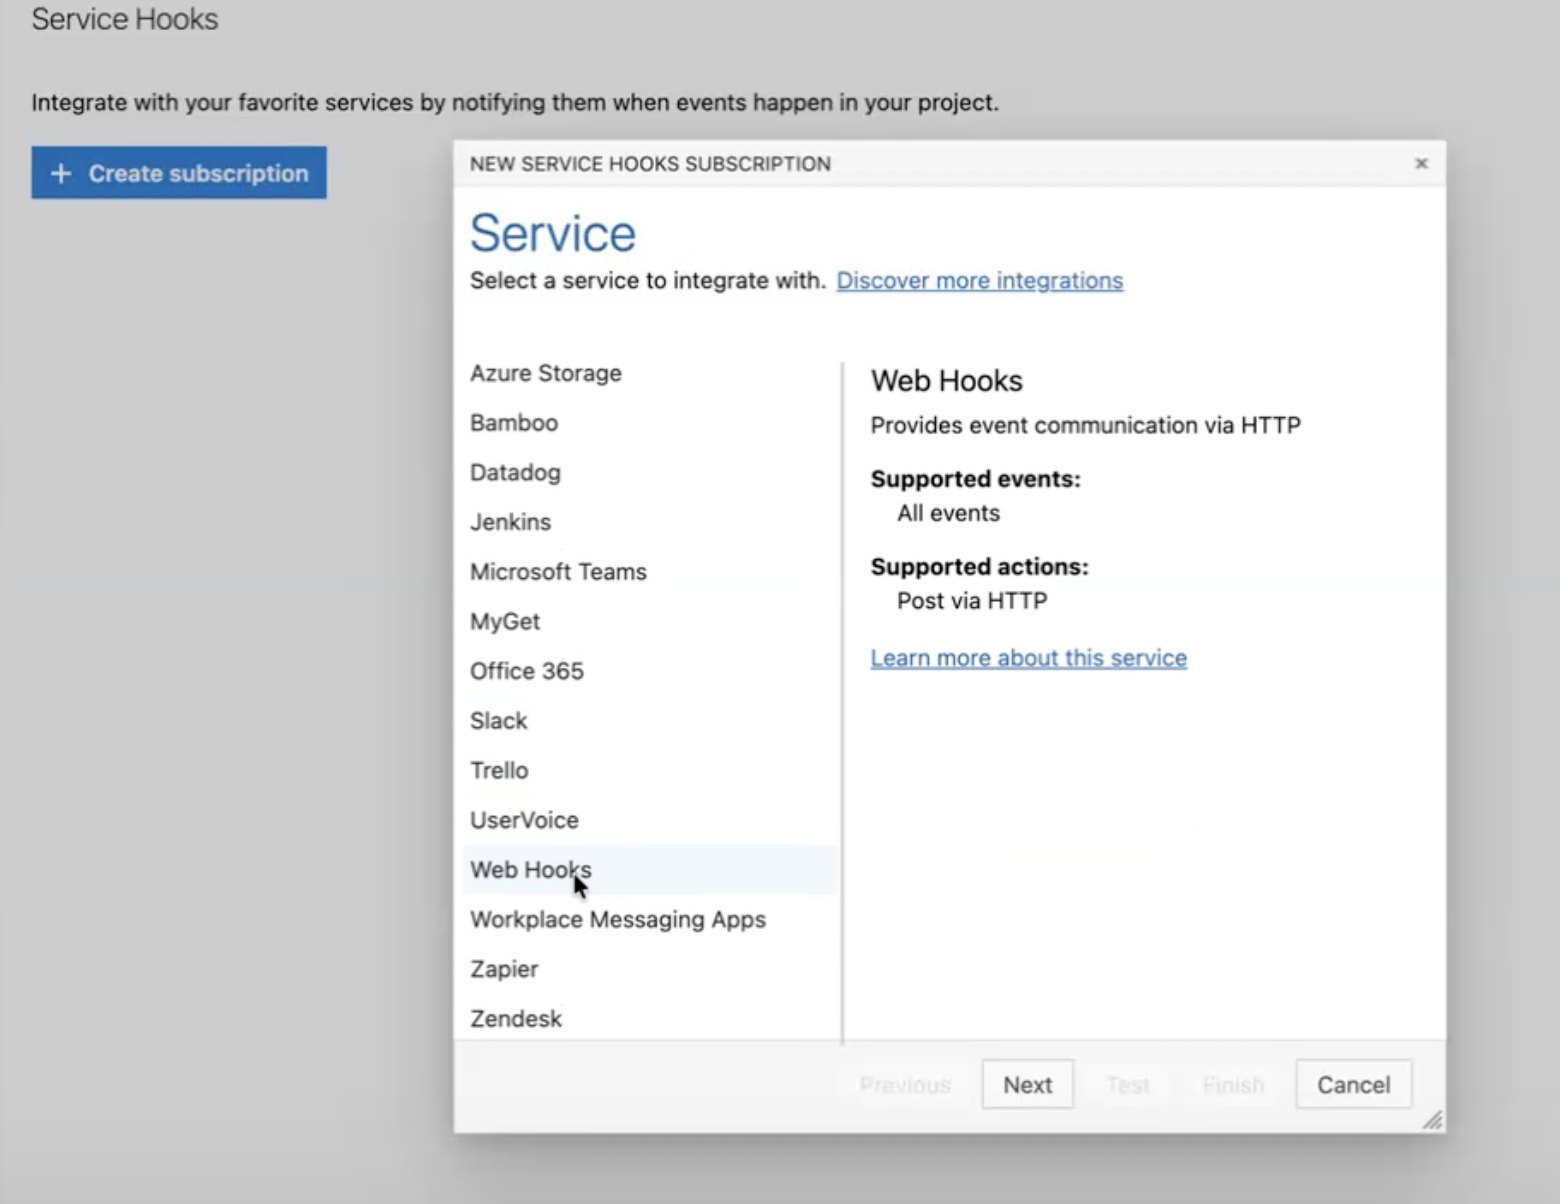
Select Web Hooks.
-
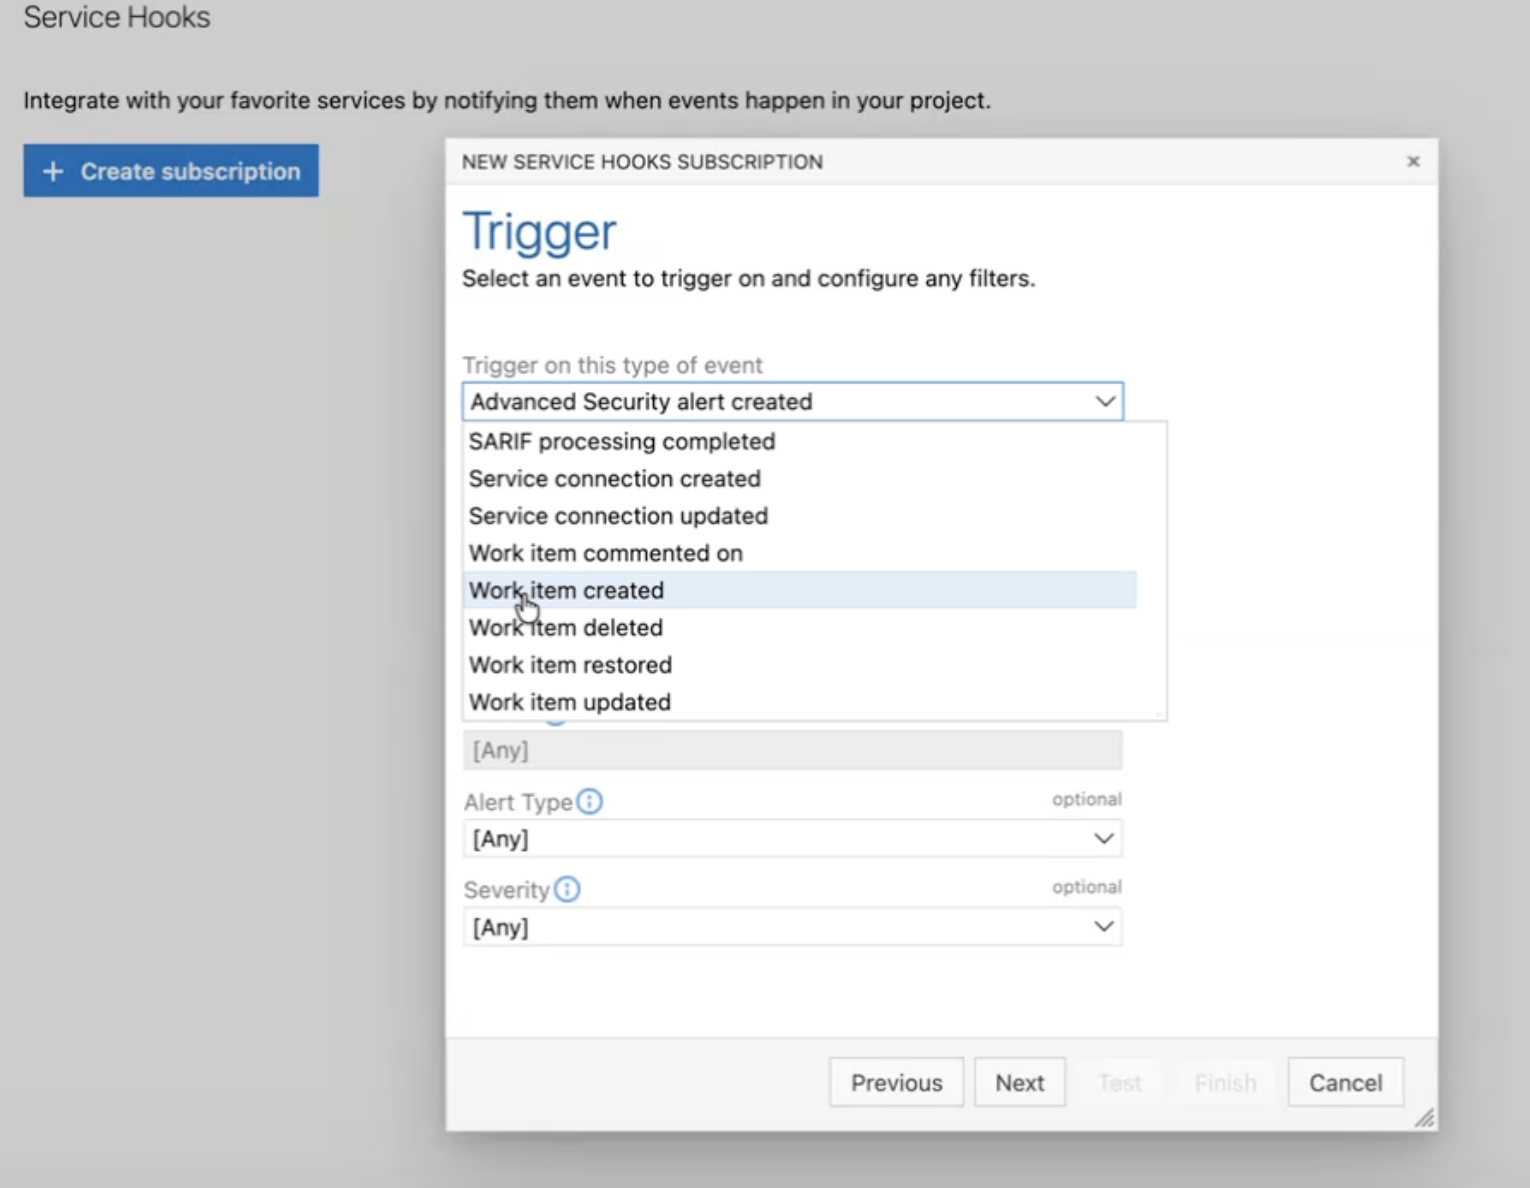
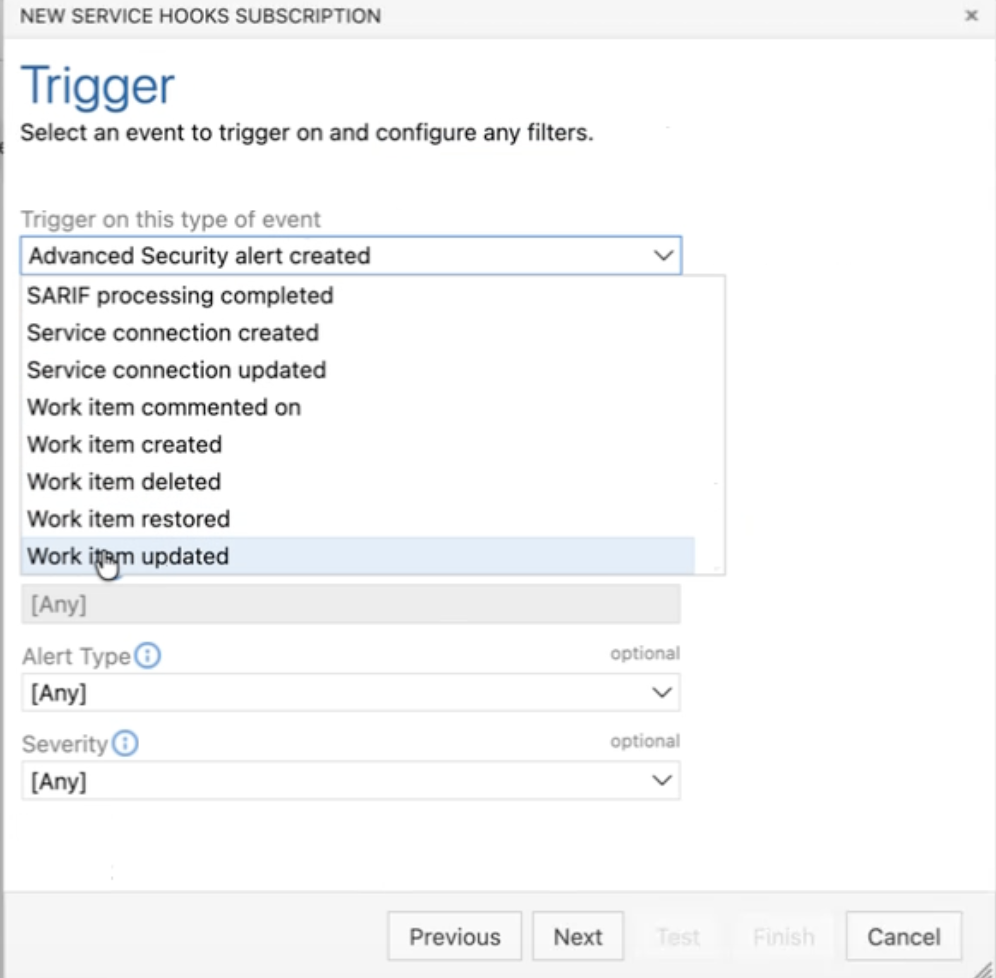
Choose the Work item created event.
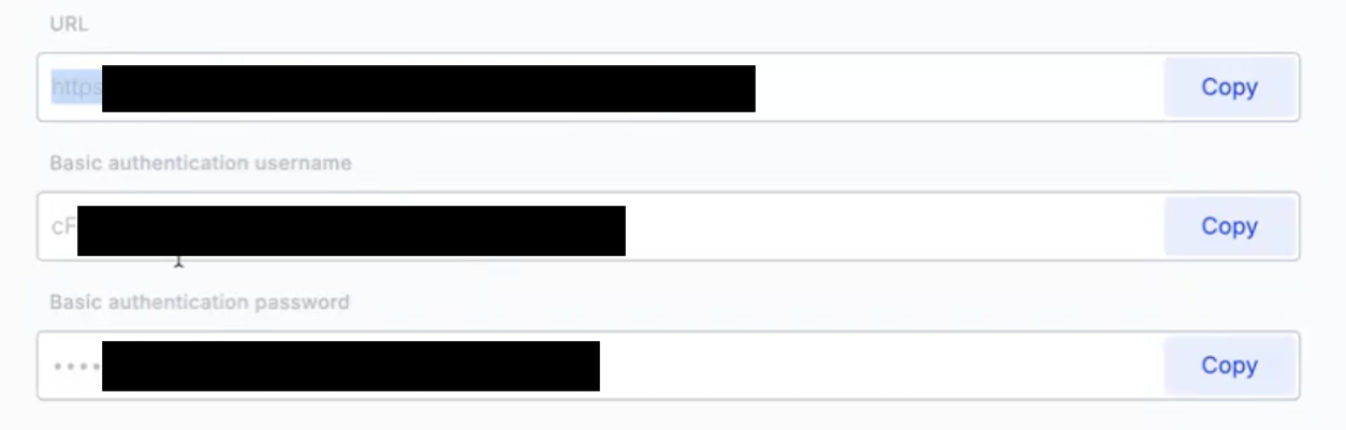
- In Usersnap, copy the following values from the Azure DevOps integration settings into webhook created in Azure DevOps. (as shown in step 4 below)
- Webhook URL
- Username
- Password
- Paste the values into the corresponding fields in Azure DevOps.
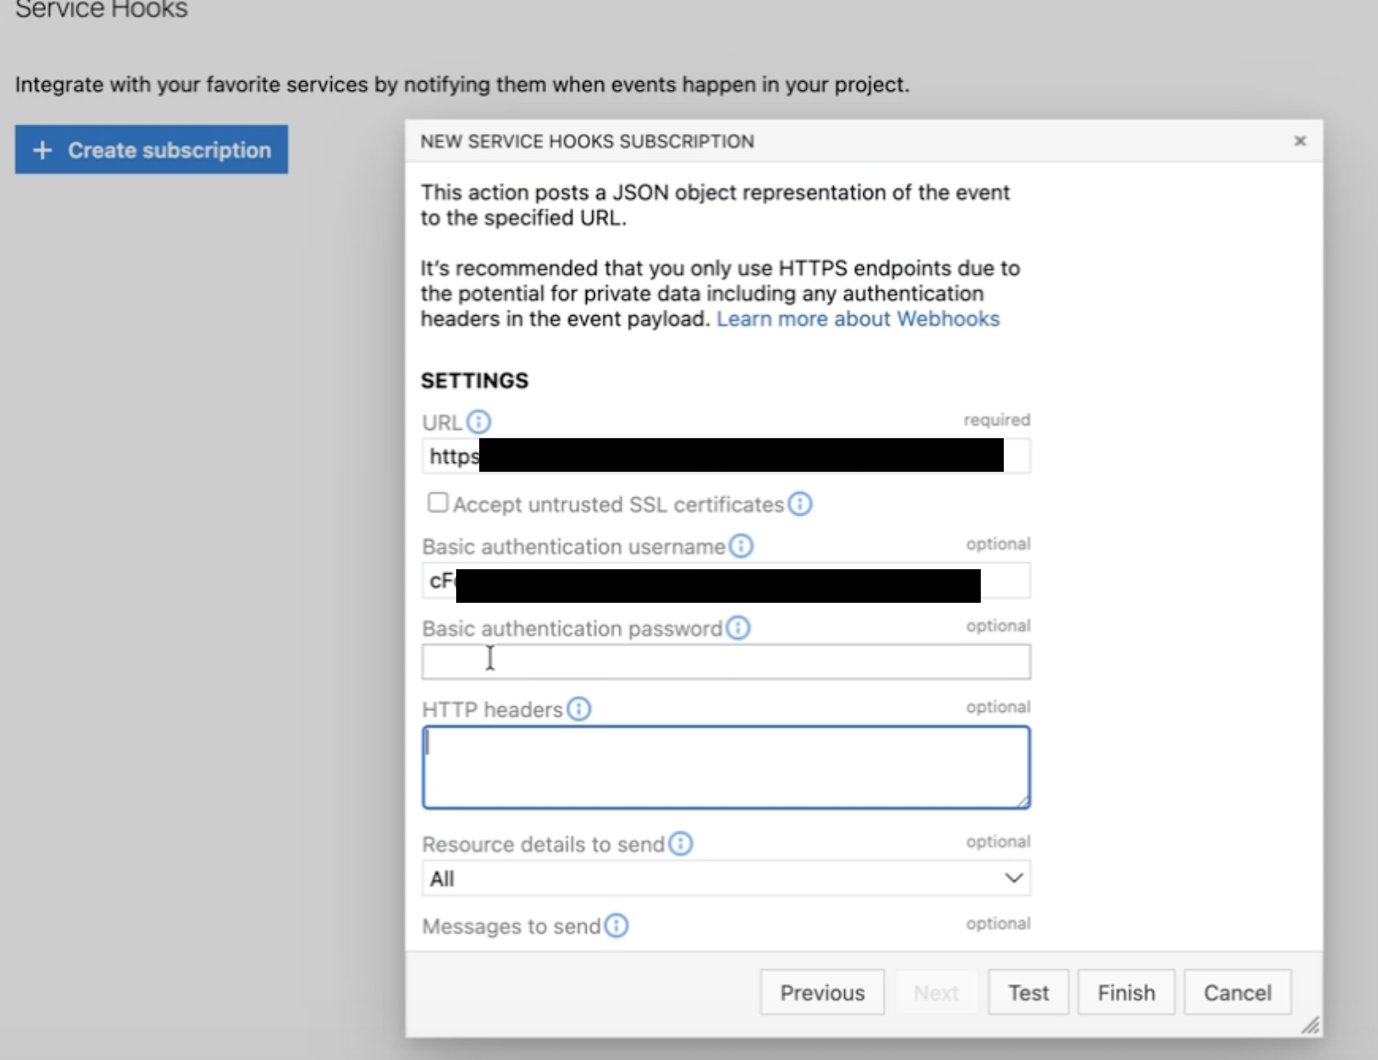
- Click Finish.
Create the "Work item updated" webhook
Repeat the same steps, but choose the Work item updated event instead.
Once both subscriptions have been created, Azure DevOps will notify Usersnap whenever a linked work item is created or updated.
Test the integration
We recommend testing the integration before using it with real Opportunities. Verify that the test Opportunity is created in Azure DevOps using the selected work item type.
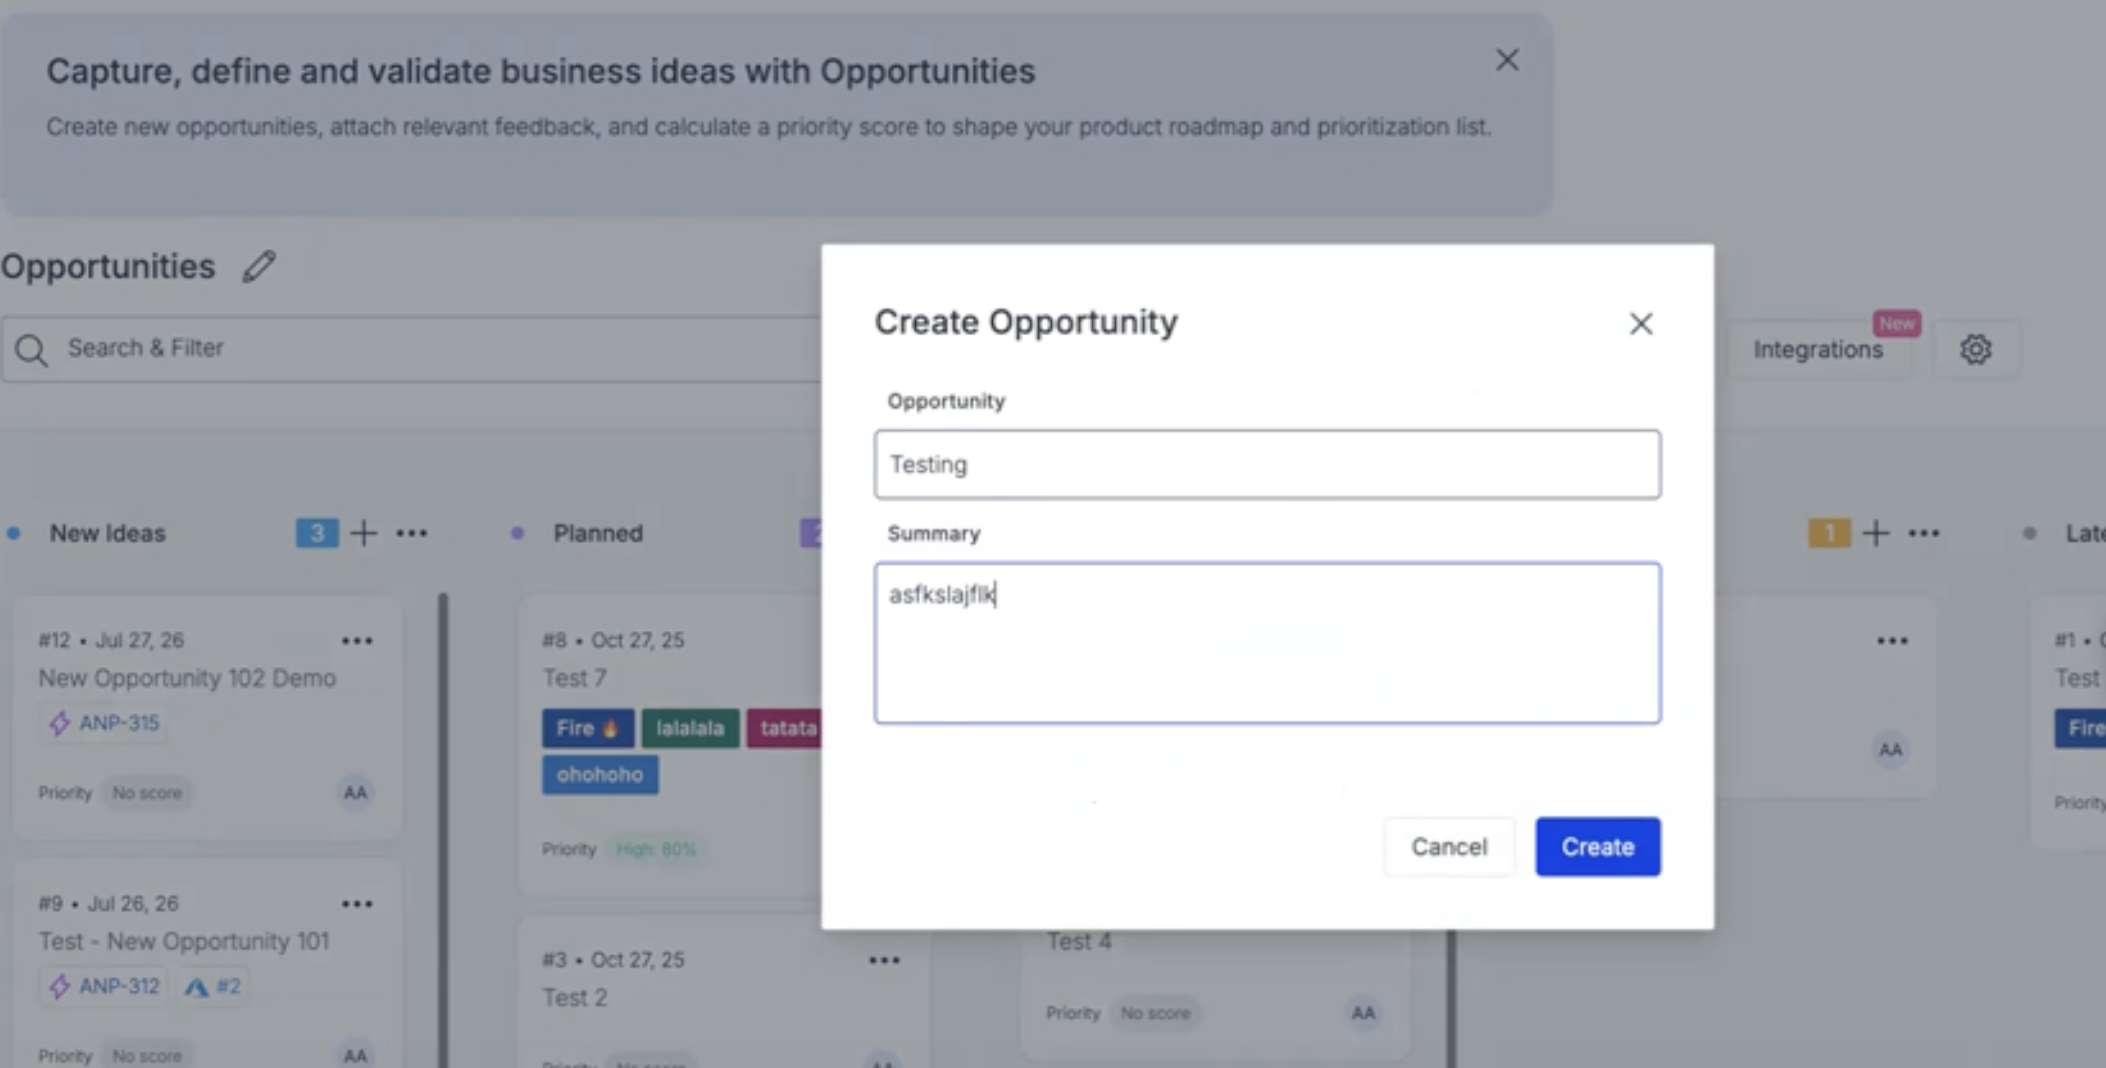
Confirm that:
- A corresponding work item is created in Azure DevOps.
- The Opportunity displays a link to the Azure DevOps work item.
- Move the Opportunity to a different status in Usersnap and verify that the Azure DevOps work item state is updated.
- Change the work item state in Azure DevOps and verify that the linked Opportunity status is updated in Usersnap.
Updated 8 days ago