
Feedback with a screenshot
Capture visual context alongside every submission
Give your team the visual context behind every reported issue.
Usersnap lets people capture a screenshot directly from your product and annotate it before submitting their feedback. This gives your team more context around what happened and where the issue occurred.
You can choose whether screenshots are required, optional, or available through an annotation-first experience, depending on how you want people to submit feedback.
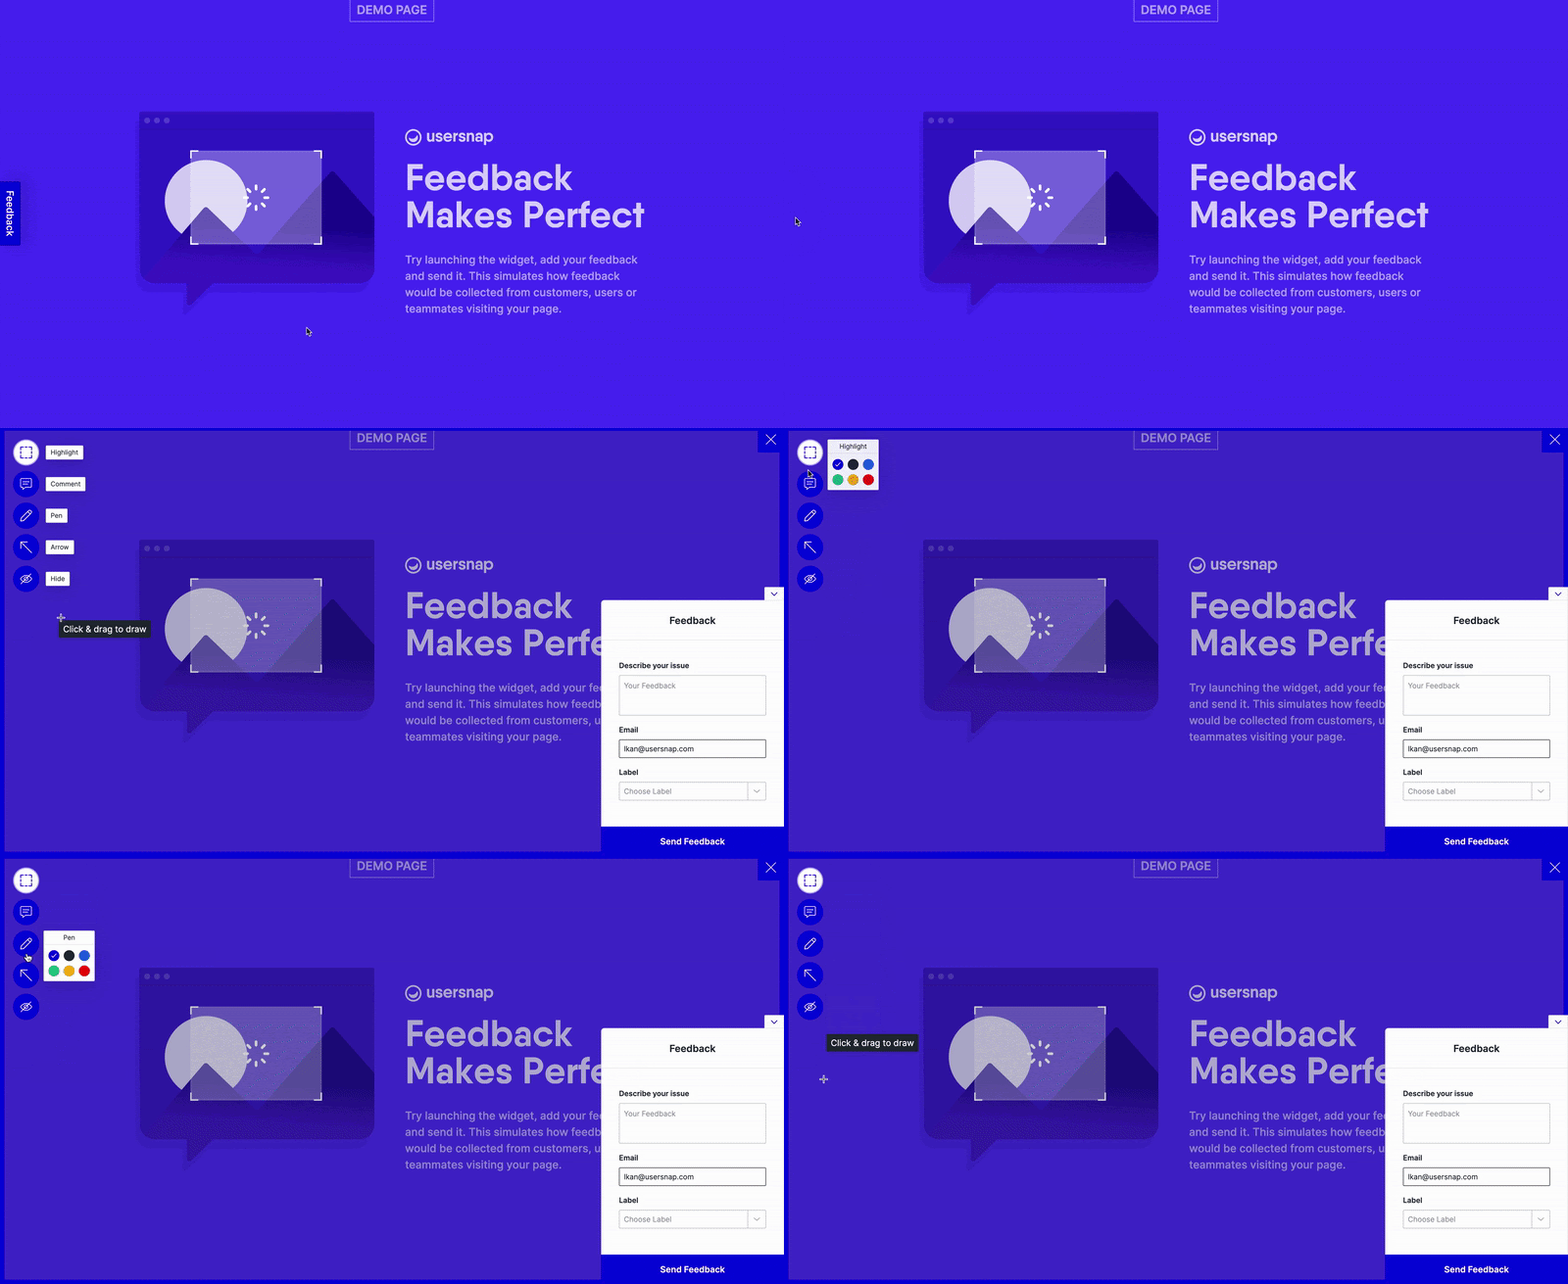
Screenshot modes and annotations
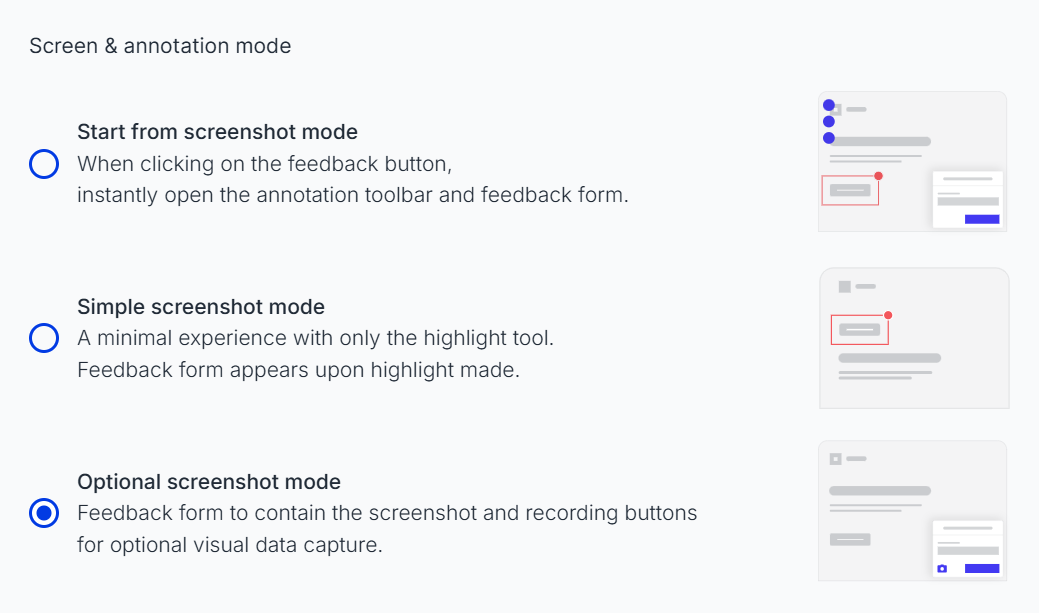
Choose how you want users to start capturing visual context when they open the Usersnap widget.
Start from screenshot mode
Open the screenshot and annotation tools immediately when a user clicks the feedback button. This gives users a direct way to capture and highlight what they want to report before filling out the form.
Use this when: visual context is an important part of most submissions.
Simple screenshot mode
Start with a minimal screenshot experience that provides only the highlight tool. The feedback form appears after the user highlights an area.
Use this when: you want users to quickly point out a specific area without showing the full set of annotation tools.
Optional screenshot mode
Let users decide whether to include a screenshot or screen recording with their submission. The feedback form contains the screenshot and recording buttons, but capturing visual context is optional.
Use this when: screenshots are useful for some submissions but aren't necessary for every one.
Annotations:
Once a screenshot has been captured, users can add annotations to show exactly what they want to highlight.
Usersnap supports up to five annotation tools: Highlight, Comment, Pen, Arrow, and Hide. You can choose which tools are available in your project. The Hide options alows your end users to hide sensitive information from the screenshot.
PII featureIf there are confidential parts on the site that should always be hidden when taking screenshots, please take a look at the "usprivacy".
Why can screenshots sometimes look different?Usersnap's standard screenshot technology recreates the page from the resources available to our rendering environment, including CSS and images. This allows Usersnap to capture the visual context of the page without requiring the screenshot to be taken directly in the user's browser.
If the page or web application is protected by a firewall or other access restrictions, Usersnap may not be able to access the resources needed to recreate the page accurately. Learn more about screenshot rendering issues.
In these cases, you can use native screenshot mode, which captures the screenshot directly in the user's browser instead of using Usersnap's rendering technology. Continue reading to learn more.
How screenshots are captured
Usersnap offers different screenshot technologies depending on your application and setup.
Standard screenshot technology
By default, Usersnap uses its rendering technology to recreate the page and capture the screenshot.
This works well when Usersnap can access the page's resources, such as its CSS and images. If your application is protected by a firewall or those resources aren't accessible to Usersnap's rendering environment, the screenshot may not render as expected.
Native screenshots
Native screenshots capture the screen directly in the user's browser instead of using Usersnap's rendering technology.
Use native screenshots when: Usersnap cannot access your application or its resources, for example because the application is protected or running in a restricted environment. Find out more about the native screenshots technology next:
Taking screenshots without our rendering technology
If Usersnap’s rendering technology cannot access your servers or the resources needed to recreate your page, you can use native screenshot mode instead.
Native screenshot mode captures the screenshot directly in the user’s browser using the browser’s built-in "media-record-API".
Users can then annotate the captured screenshot before submitting it, giving your team additional visual context about the issue.
How do you activate this feature?
<script>
  window.onUsersnapCXLoad = function(api) {
    api.init({
    	nativeScreenshot: true
    });
  }
  var script = document.createElement('script');
  script.defer = 1;
  script.src = 'https://widget.usersnap.com/global/load/globalapikey?onload=onUsersnapCXLoad';
  document.getElementsByTagName('head')[0].appendChild(script);
</script>
Add "nativeScreenshot: true" to the init() call.
If you want to open the screenshot with annotations in a new browser tab, you can use this way of initiating:
api.init({ nativeScreenshot: { target: '_blank' }});What your users will see?
Your users will need to allow the browser pop-up and select the screen or browser tab they want to capture. This is a standard browser permission required to use native screenshot mode.
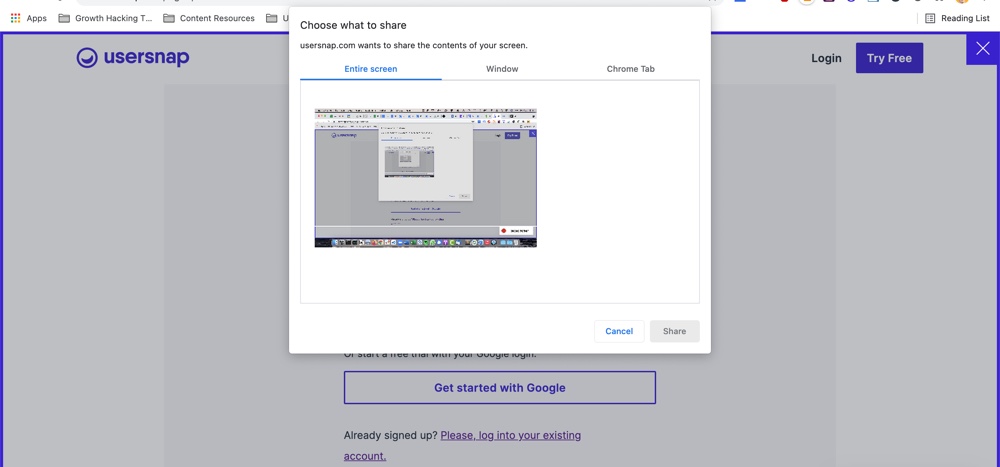
Once the screen or tab is selected, the screenshot experience works much like the standard screenshot mode, including the option to annotate the captured screenshot.
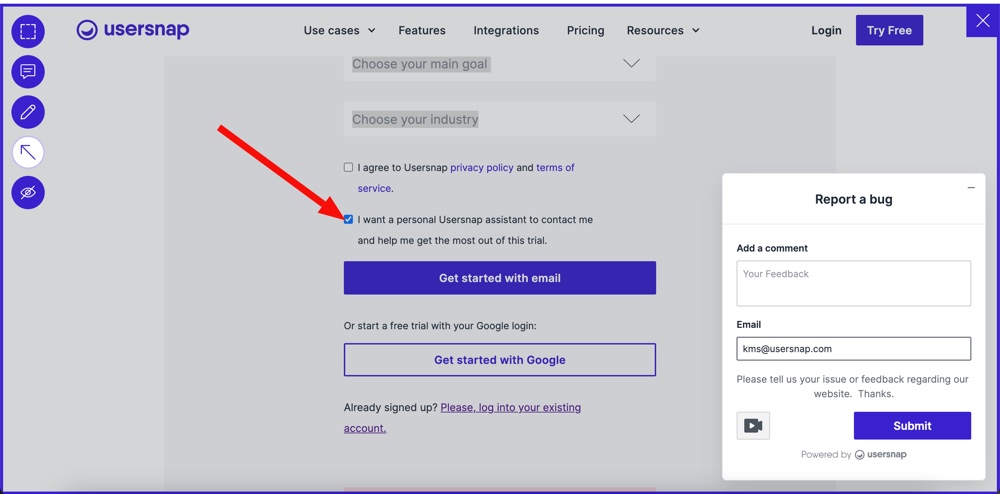
Limitations of this technology
Attention:
- The native screenshot feature is not supported on mobile web browsers
- The native screenshot is only available in a secure context.
- When the widget is put inside the iframe, this feature will require user permission in order to access the screen. If users click on the button they will be asked to give permission to access their screen. After permission is granted, the Usersnap widget should be able to read this permission. In order to make it work, please use the attribute allow="display-capture" on the top iframe in which you put our widget.
- This technology only works with the "optional screenshot mode" in Safari browsers (desktop) and one can share the window or screen, but not the tab alone.
- More limitations shared with the screen recording feature are shown HERE.
Updated 18 days ago