
Feedback menu: host multiple feedback options in one menu
To navigate customers to the right feedback category and make them feel more cared for, you can use the feedback menu widget to host all your feedback and support options. Build a feedback menu that tailors to the needs of your customers.
How to create a feedback menu?
Watch the tutorial video or read the step-by-step instructions below.
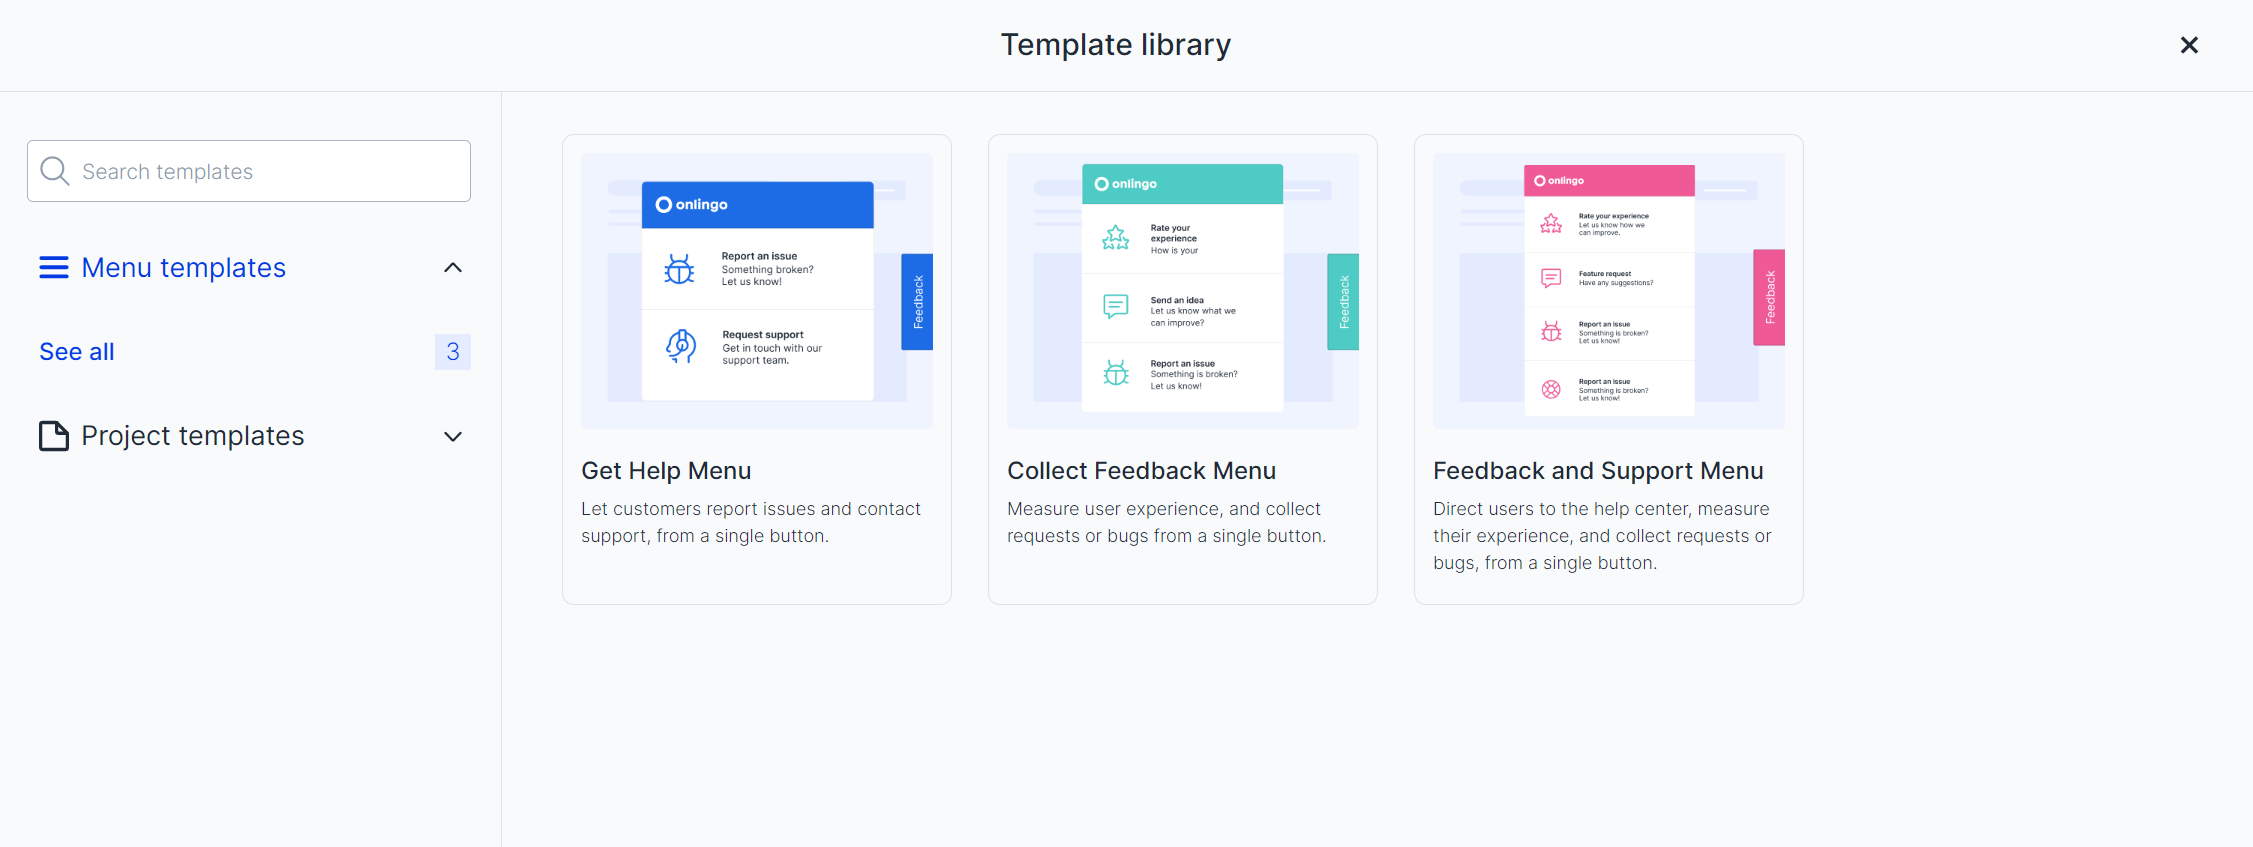
There are multiple options you can choose from the feedback menu templates. Please select one that fits your use case the best.
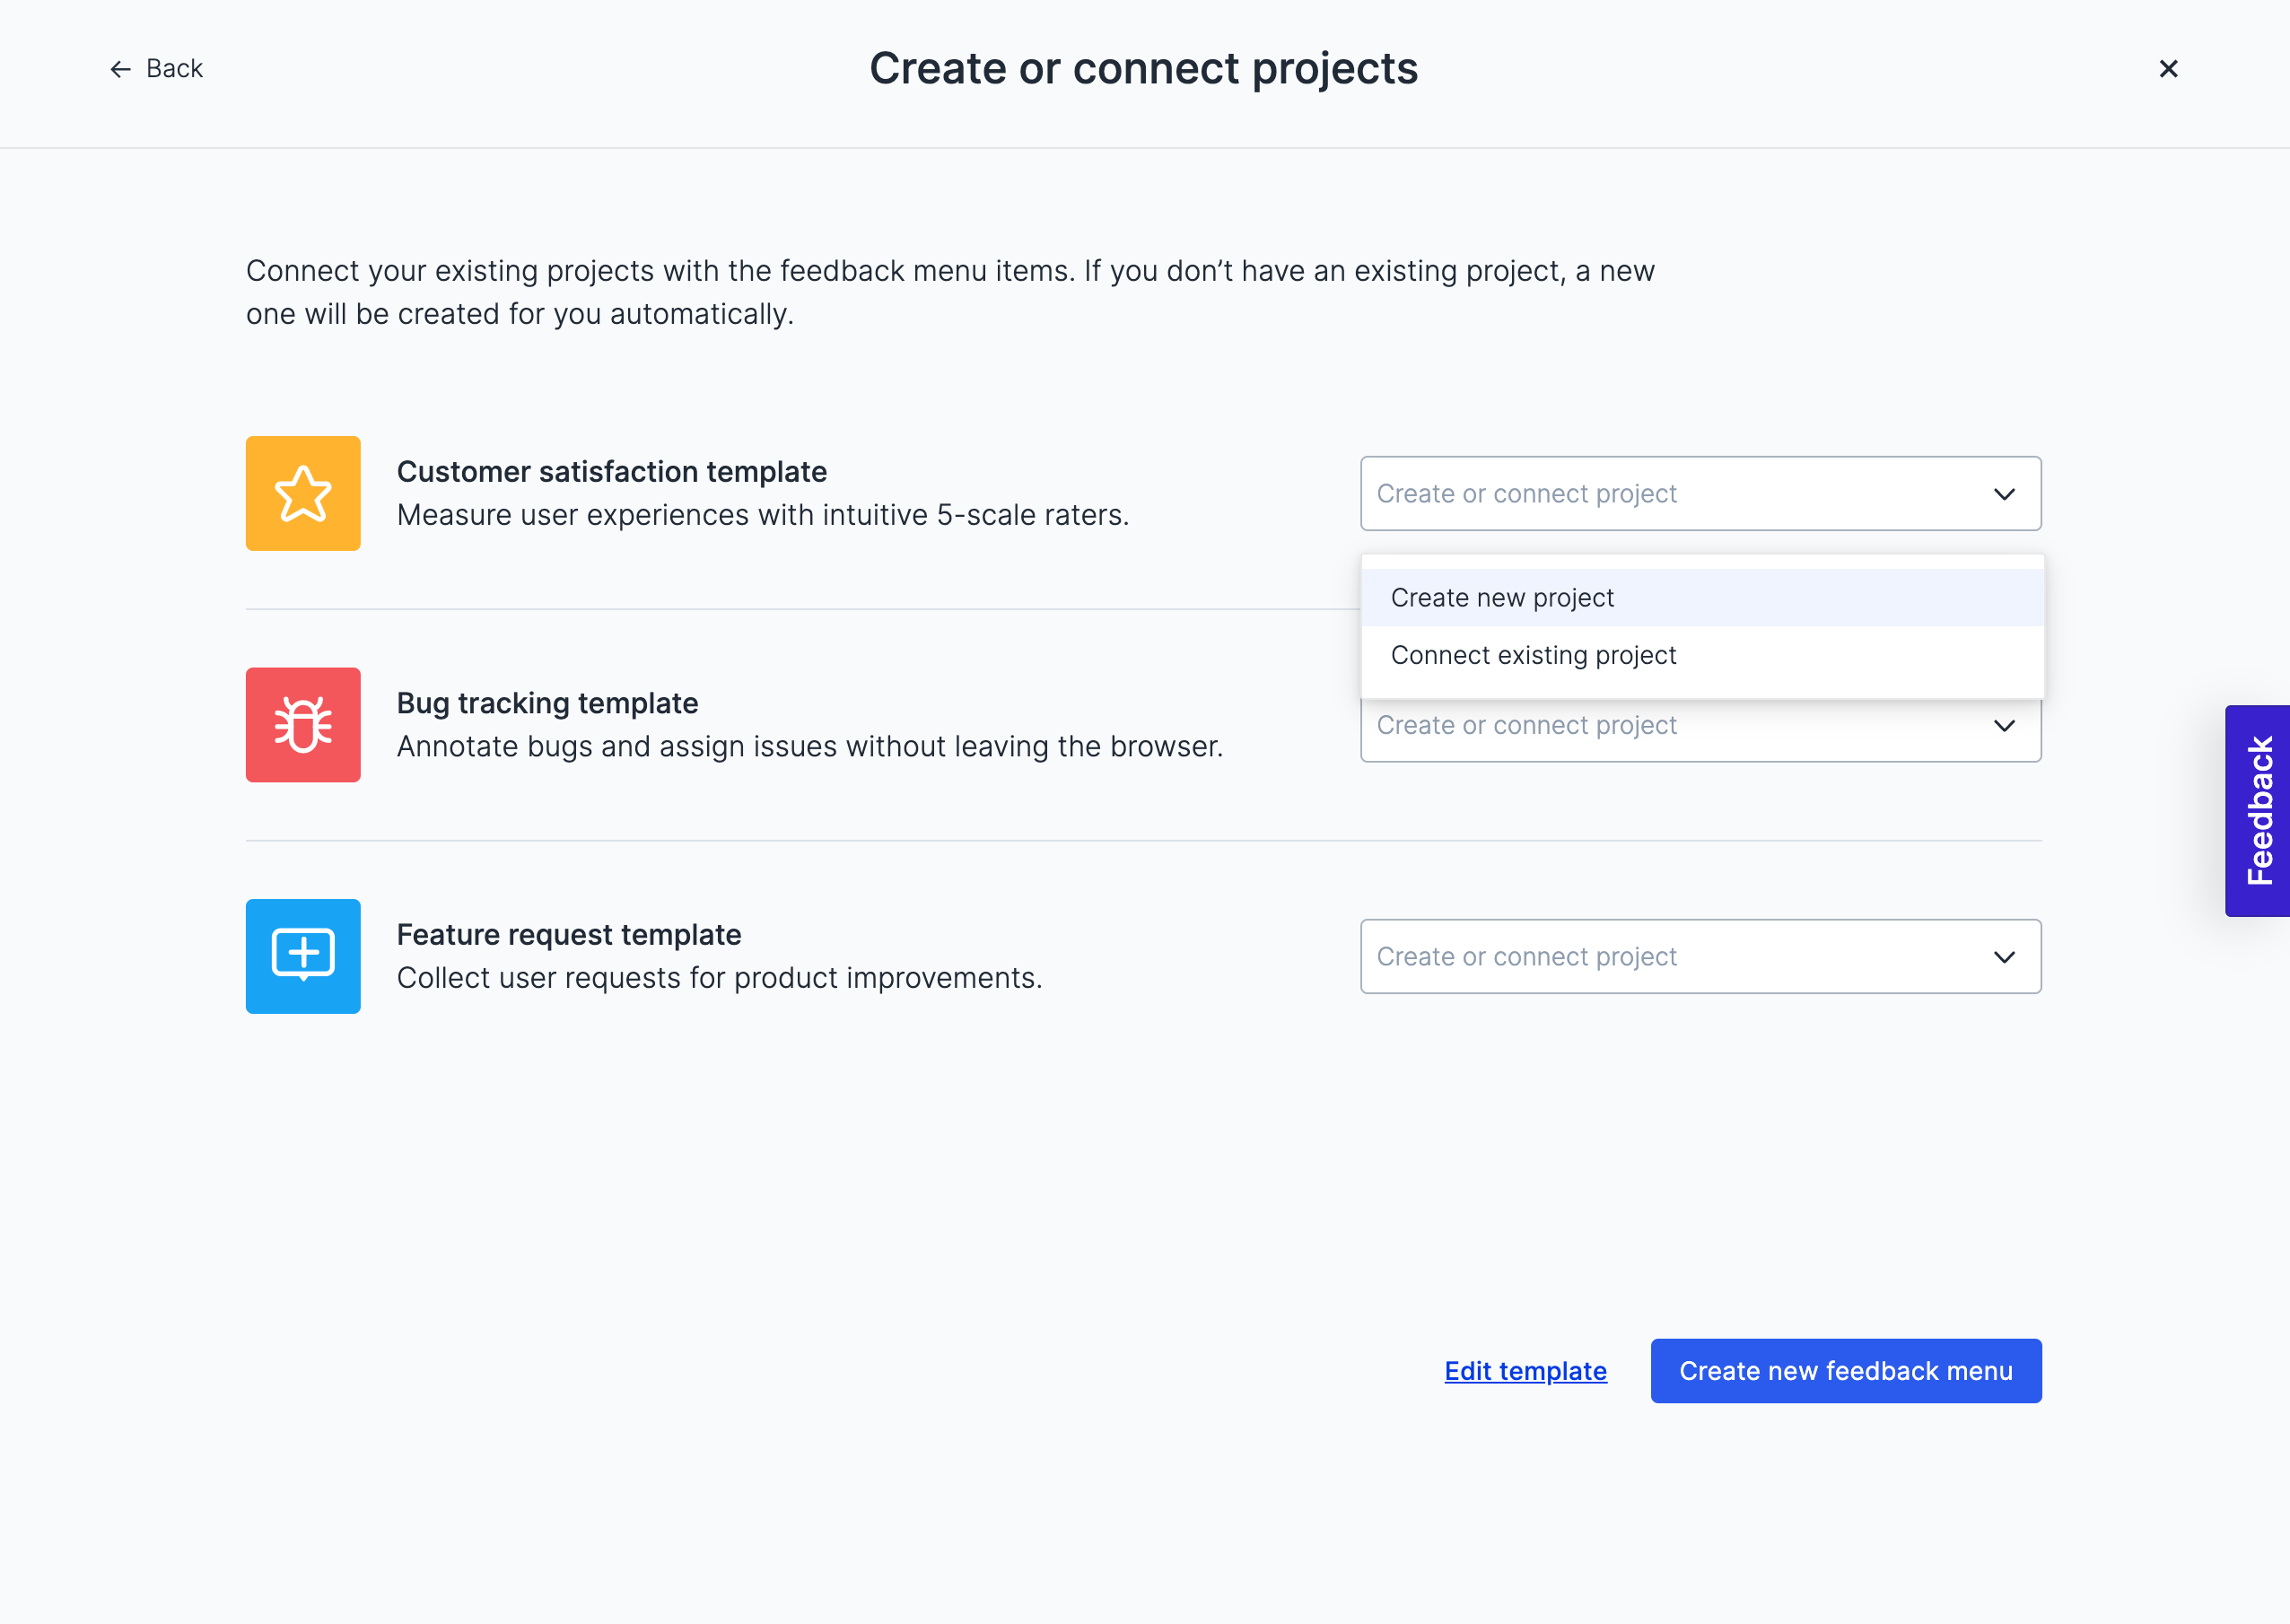
Then please define if the existing project(s) should be connected, or new ones shall be auto-created.
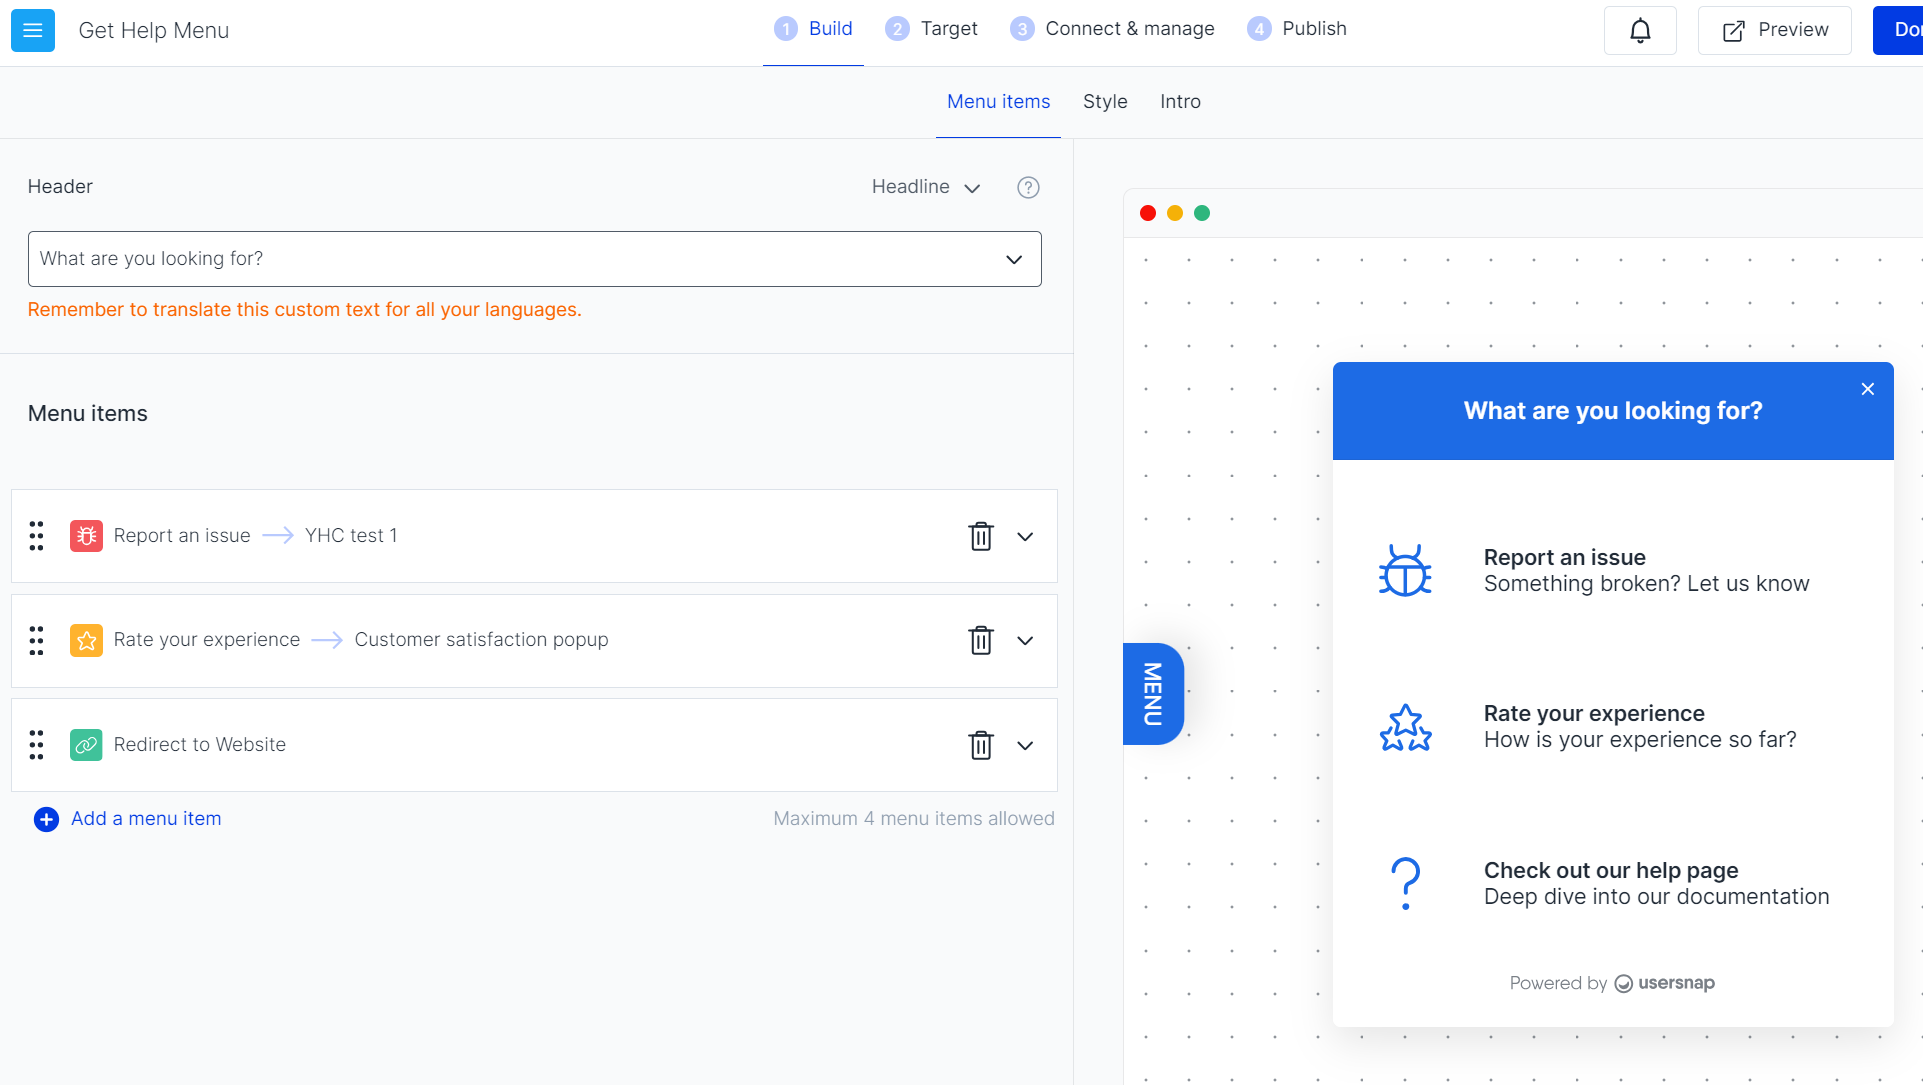
The menu's layout can be easily edited during the creation.
The feedback menu's config. view: Everything is configurable and movable directly in this view.
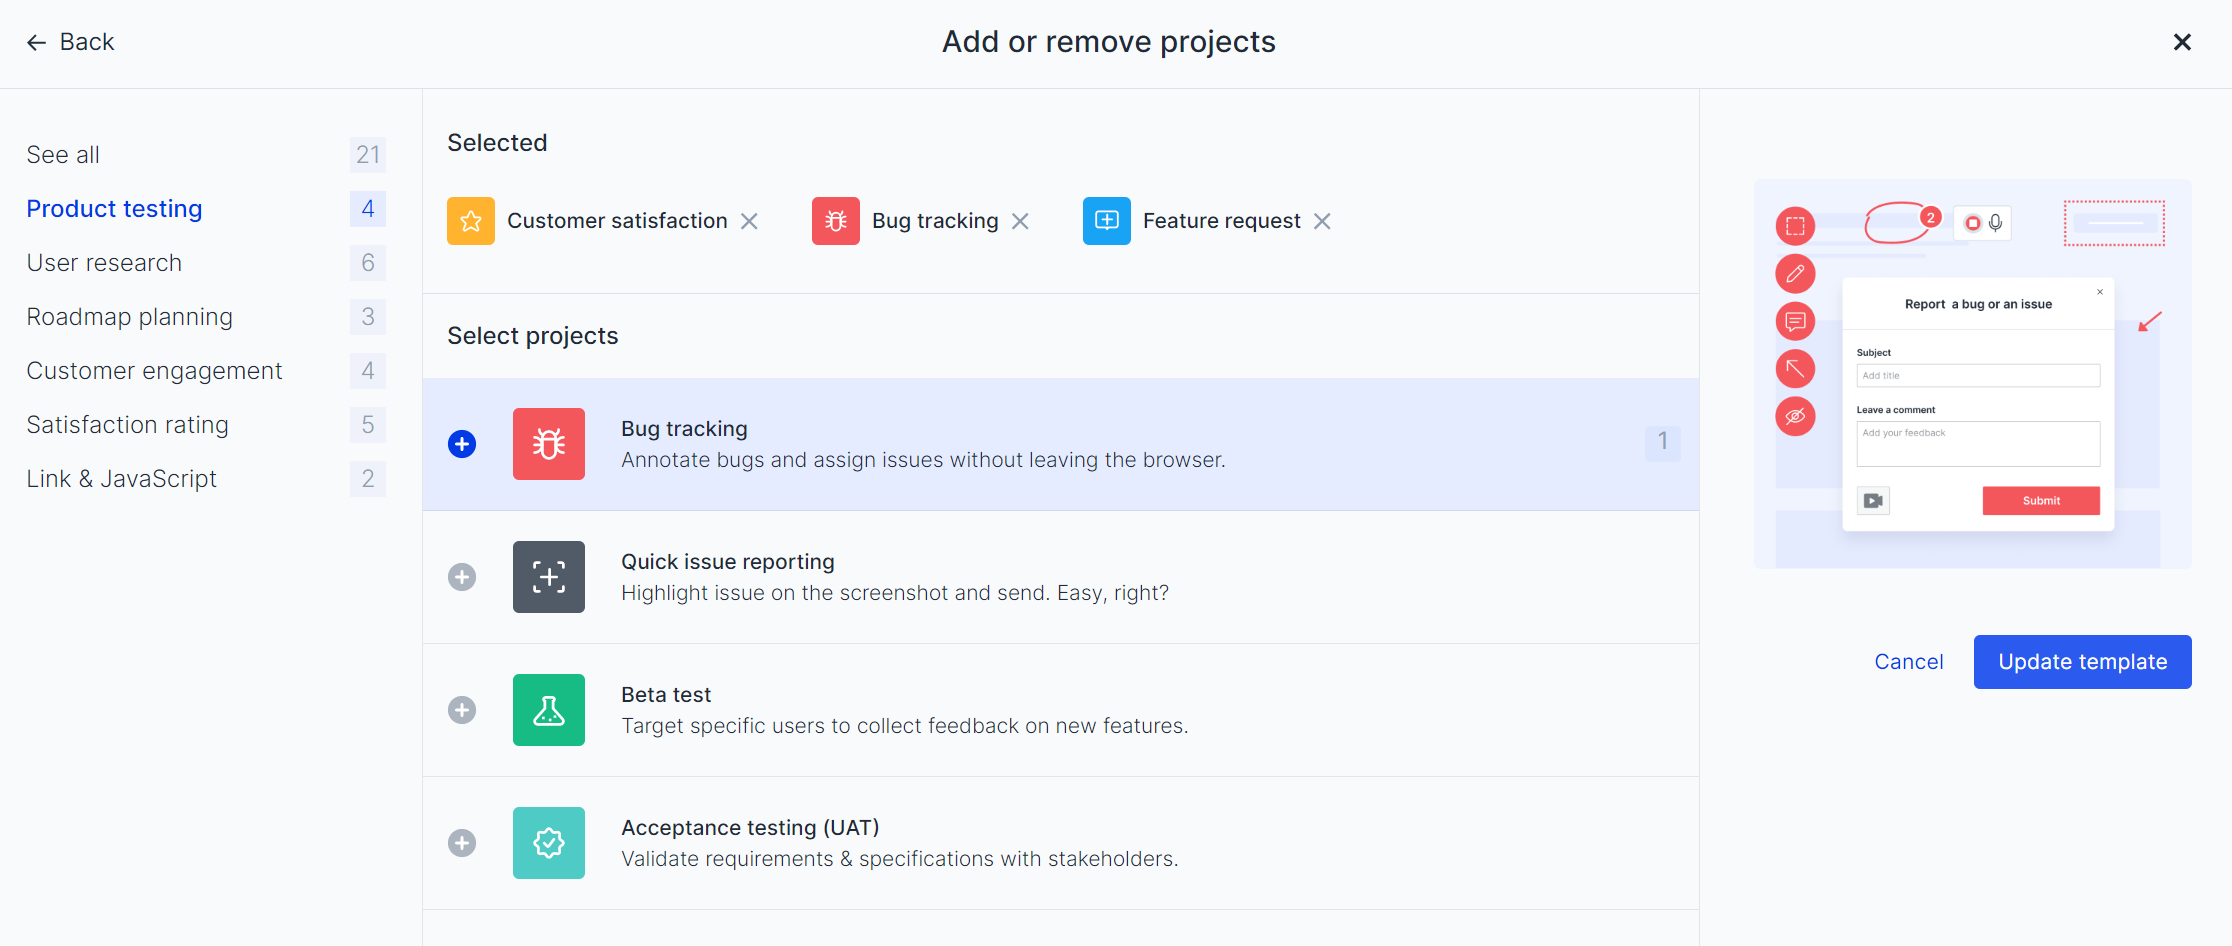
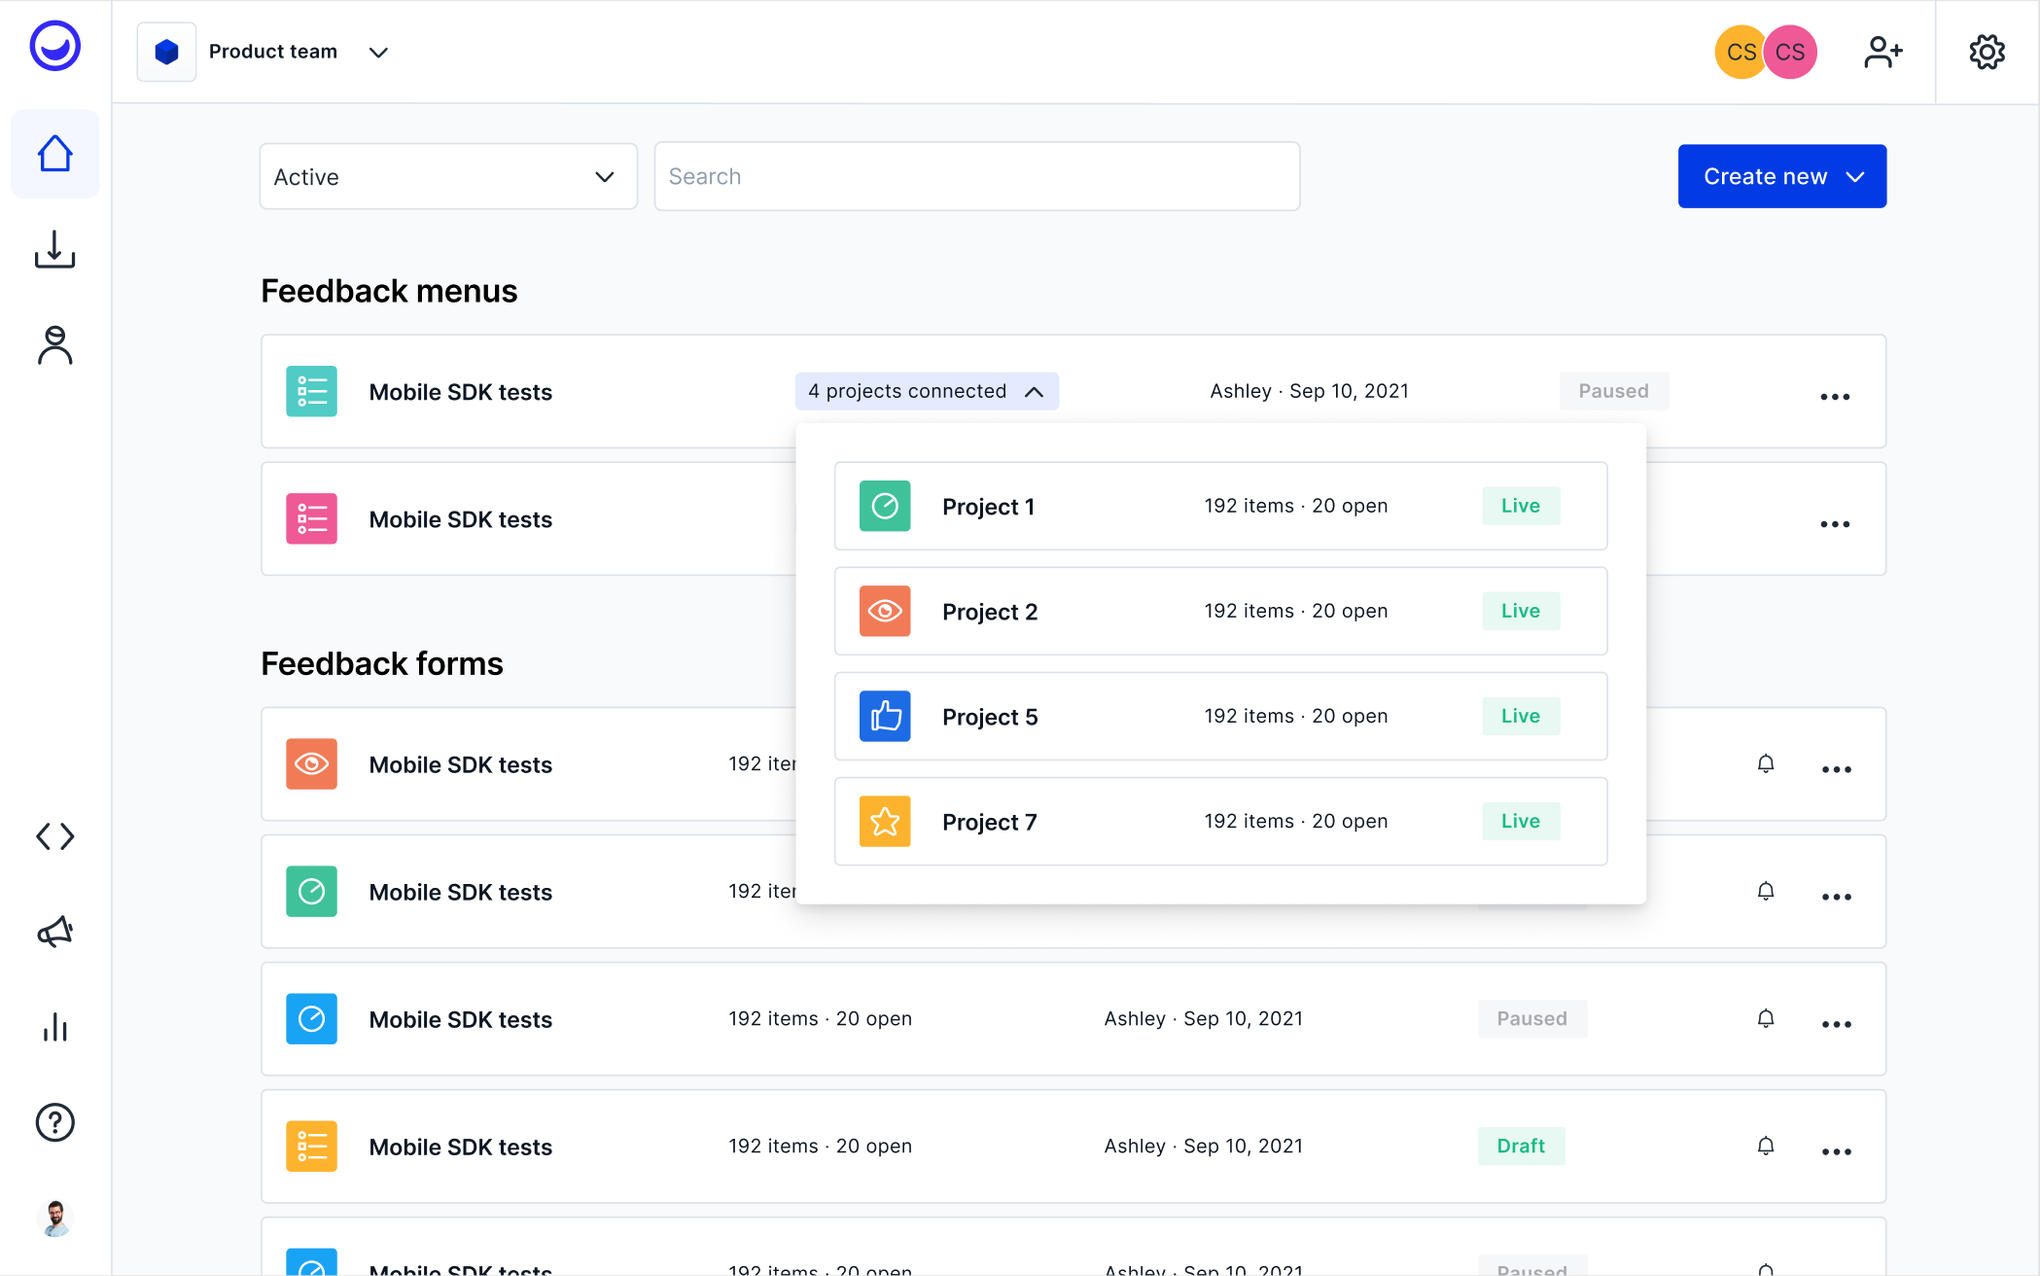
Menu configuration - below the Form the users can see connected projects with a note that a maximum of 4 items is allowed.
The item title and connected project name are shown. When opening an item it highlights the corresponding item in the preview. In addition, the linked projects direct you to given project config. with link opening up in a new tab.
Note: Some additional information on the feedback menu.
Once a menu is created, the project dashboard shows links with connected projects within a menu.
Do I need to install a snippet code for each project?
No. Our Usersnap space (global) code snippet has global control over all projects. You just have to install it once on your website and no more codes 👍
If you have not yet done that, please go to this page for help.
Why is more than one feedback button showing?
Only the feedback button of the feedback menu should be visible
Step 1: We have to set the so-called "Display rules" right so that the widgets only appear when we want them to appear.
Step 2: We should not forget to press the "Set live" button on each project. This controls whether the project is available at all or not. Great to pause a project quickly.
feedback menu
The feedback menu widget must be "set live" and in the "Display" tab of the "Configuration", you can set a path where the widget should appear. Let's say your web app is provided under the URL https://amazingapp.com/app/. Use the "URL contains" limiter to display the widget on all URLs starting with this URL.
The other two widgets' audience should be set to "Nobody" so that the buttons of these widgets are not showing up.

Projects which are linked can be easily spotted on the dashboard.

Configure the feedback menu with your help center linking to a URL and your customer service chat using the "JavaScript code execution". This code varies from tool to tool, so depending on which tool you apply, that will change. Please kindly check that out for your chatting tool's specifics.

Some additional information on the feedback menu.
Now, you should be ready to go. Start collecting feedback.
AttentionThe feedback menu can only route projects with "Website widget (button, pop-up)" as a collection type.
This is a gated featurePlease contact our support for more details. customer success team
Updated about 1 year ago