
Azure Devops
Azure DevOps can be connected with Usesnap in 2 ways:
-
with your ADO account;
-
with a service principal
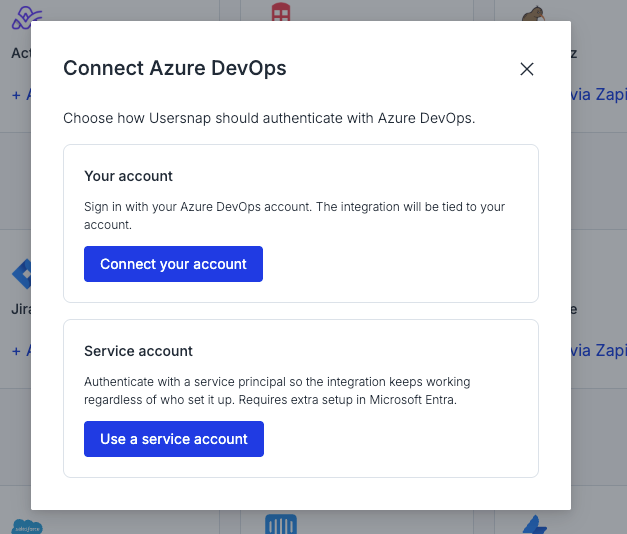
Connect Usersnap with Azure Devops with your account
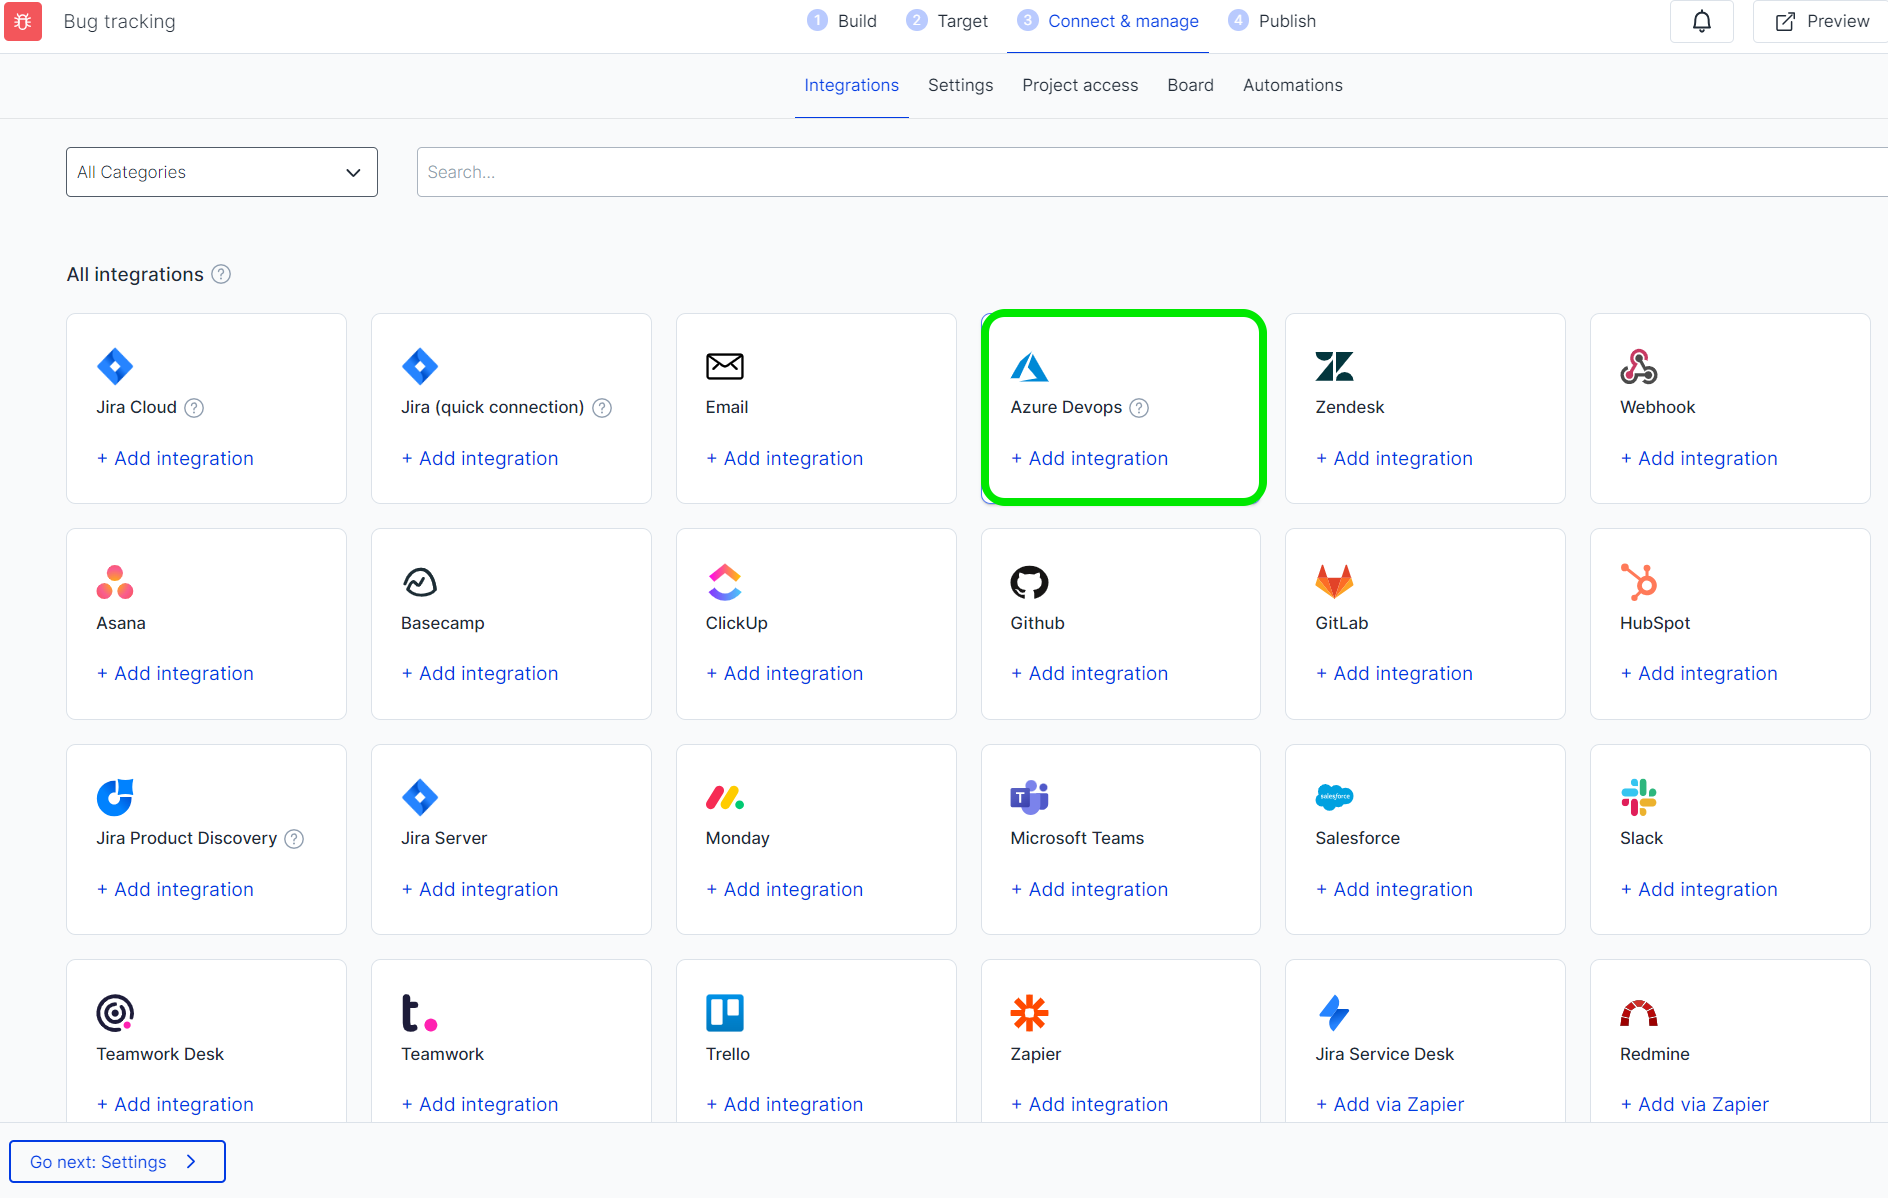
- Go to your Usersnap project’s Integration tab and select Azure DevOps from the grid.
Simply sign in to your Azure Devlops account.
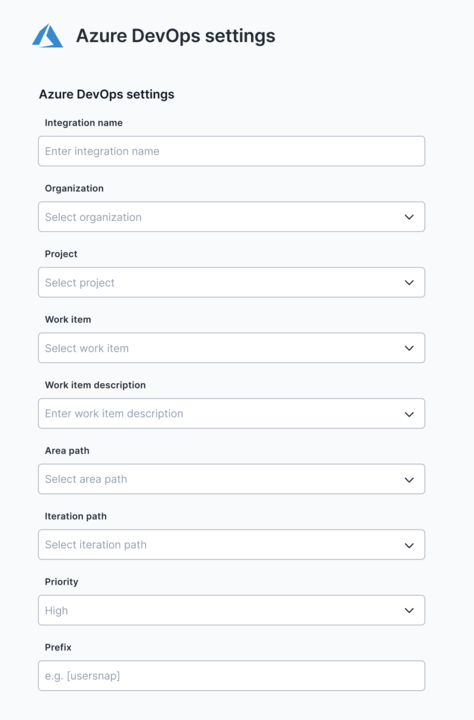
- Fill out the form accordingly and don't forget to save the settings.
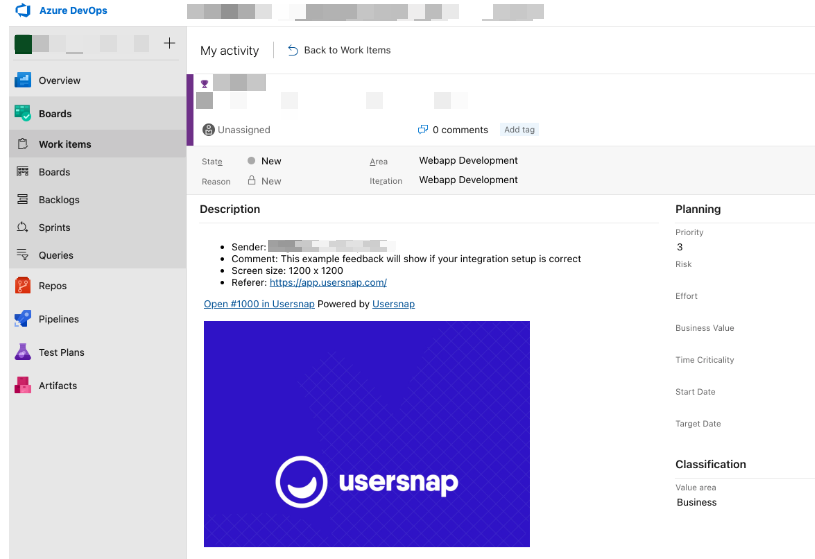
- A test feedback item can be sent right in the configuration's page.
Things to consider when configuring an integration
Permission and scopes
Usersnap uses OAuth2 to secure your authentication with Azure DevOps, storing the necessary credentials. Consequently, the scope of permissions for the Usersnap-Azure DevOps integration mirrors those of the user who initiates the integration. As such, any issues pertaining to permissions or authorization should be resolved by the initiating user.
During the setup, Usersnap will request access to the "vso.work_write" scope. This permission is essential for enabling the Usersnap-Azure DevOps integration to create work items in Azure DevOps, and lets Usersnap create tasks and send your feedback directly into Azure DevOps."
ActiveDirectory in conjunction with Azure DevopsWhen the connecting account is only a guest account in the ActiveDirectory, please use an account that is a "member" in the ActiveDirectory in order to connect to Azure Devops."
Additionally, users should also check if you have the Third-Party OAuth Access option enabled in your Azure DevOps Organization Settings as followed:
Organization Settings -> Security -> Policies -> Third-party application access via OAuth
Usersnap is using the OAuth2 flow. More related info can be found in Authorize access to REST APIs with OAuth 2.0 and Get started with permissions, access, and security groups.
Custom work items
Usersnap lets you create your own types of work items. When you do this, you'll need to decide where in the work item's fields you'll save the feedback description from Usersnap. This is usually saved in the "Description" or "Repro steps" fields.
To create custom work items in Microsoft Azure DevOps, please follow the official Azure DevOps guide regarding adding custom work items. Please make sure that your custom work items have at least a 'Description' field as it's a requirement for Usersnap to integrate properly.
Project process in Azure DevOpsPlease note that you might need to change your project process in Microsoft Azure DevOps. For that, check out the official Azure DevOps' guide regarding switching project process from 'Basic' to 'Agile'.
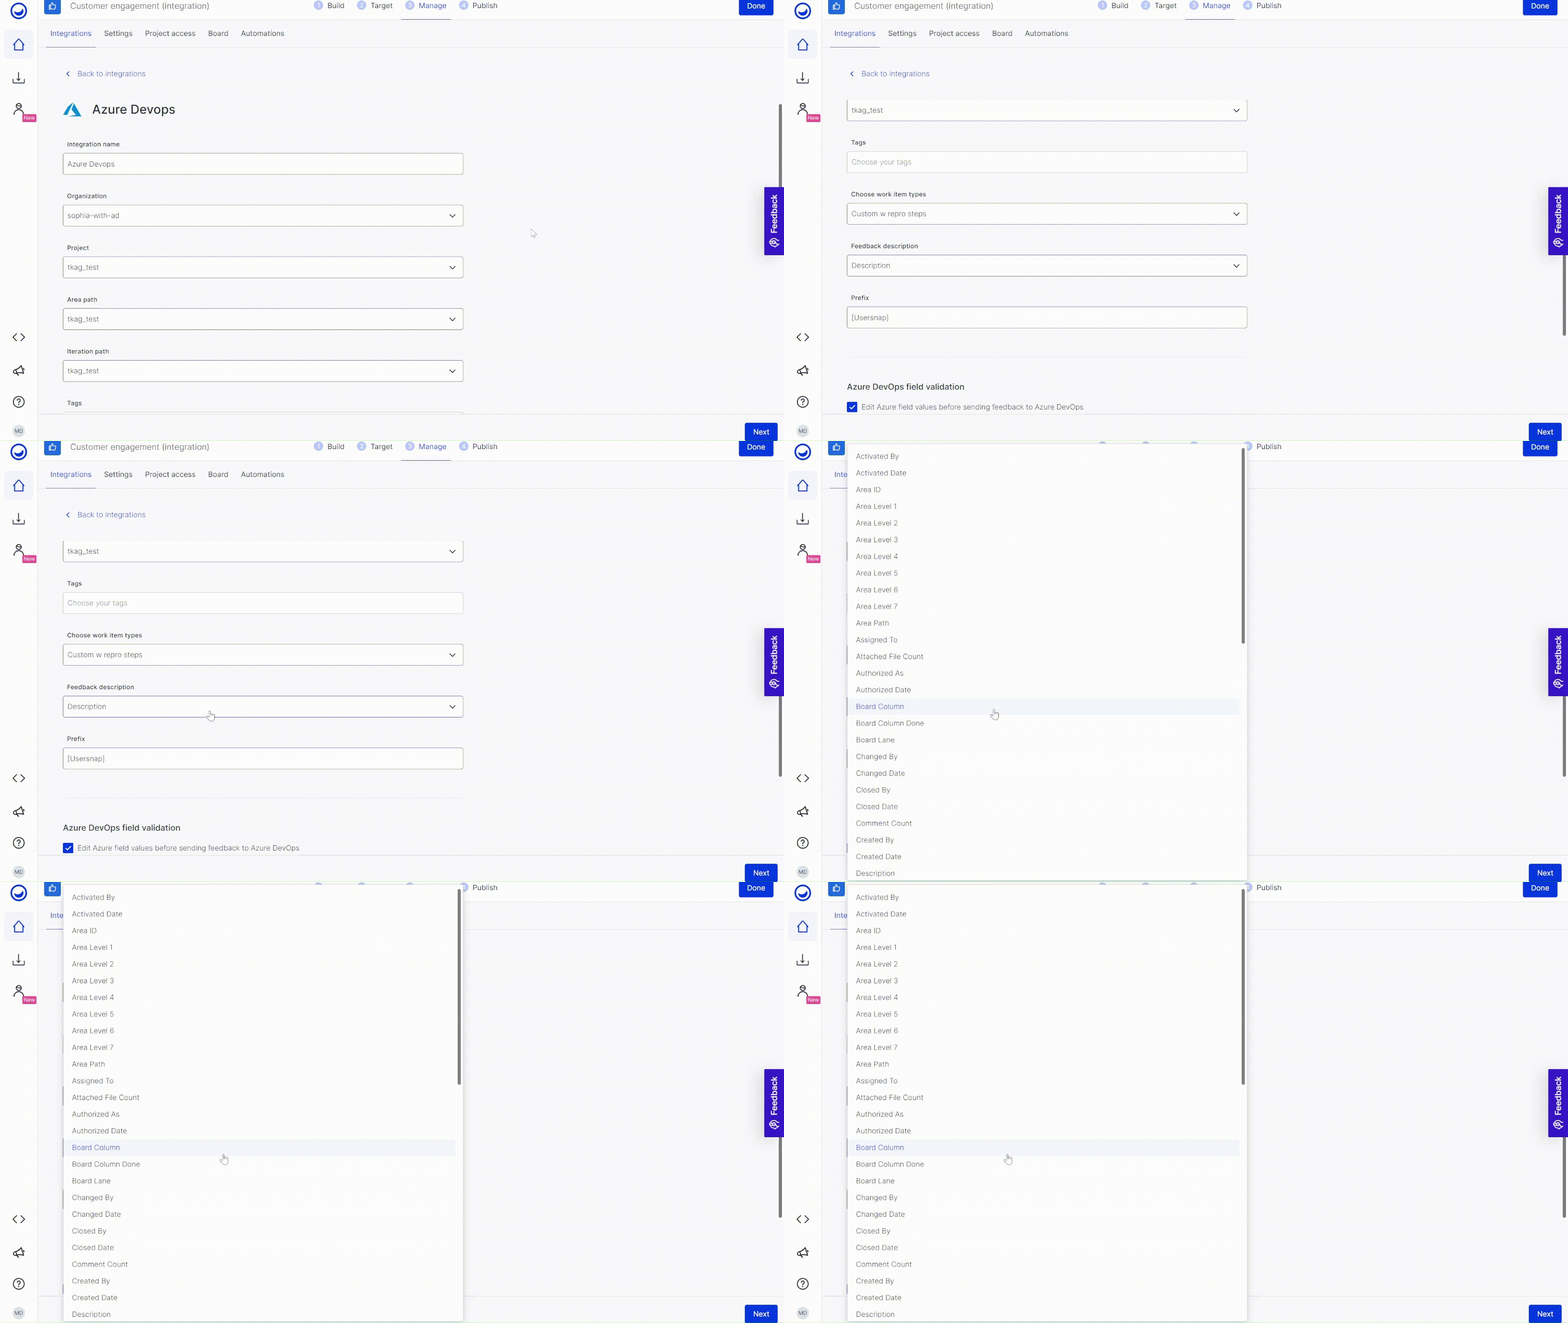
After adding your custom work item, you will be able to select which field should be used for the Feedback description:
Azure DevOps field validation
Usersnap provides the ability to modify field values of feedback items prior to their dispatch to Azure DevOps.
In order to enable this feature, it is first required to activate it within your integration configuration page. The navigation pathway is straightforward: simply proceed to 'Configuration -> Manage -> Azure DevOps' within your project and turn on the "Azure DevOps field validation" option. Please hit the "Save" button after ticking the box.
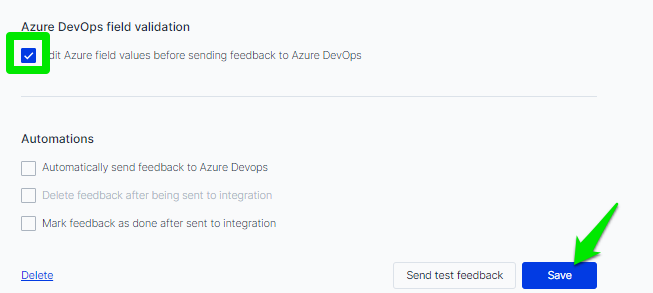
With this feature up and running, you'll be able to fine-tune the field values of your feedback items before they embark on their journey to Azure DevOps.
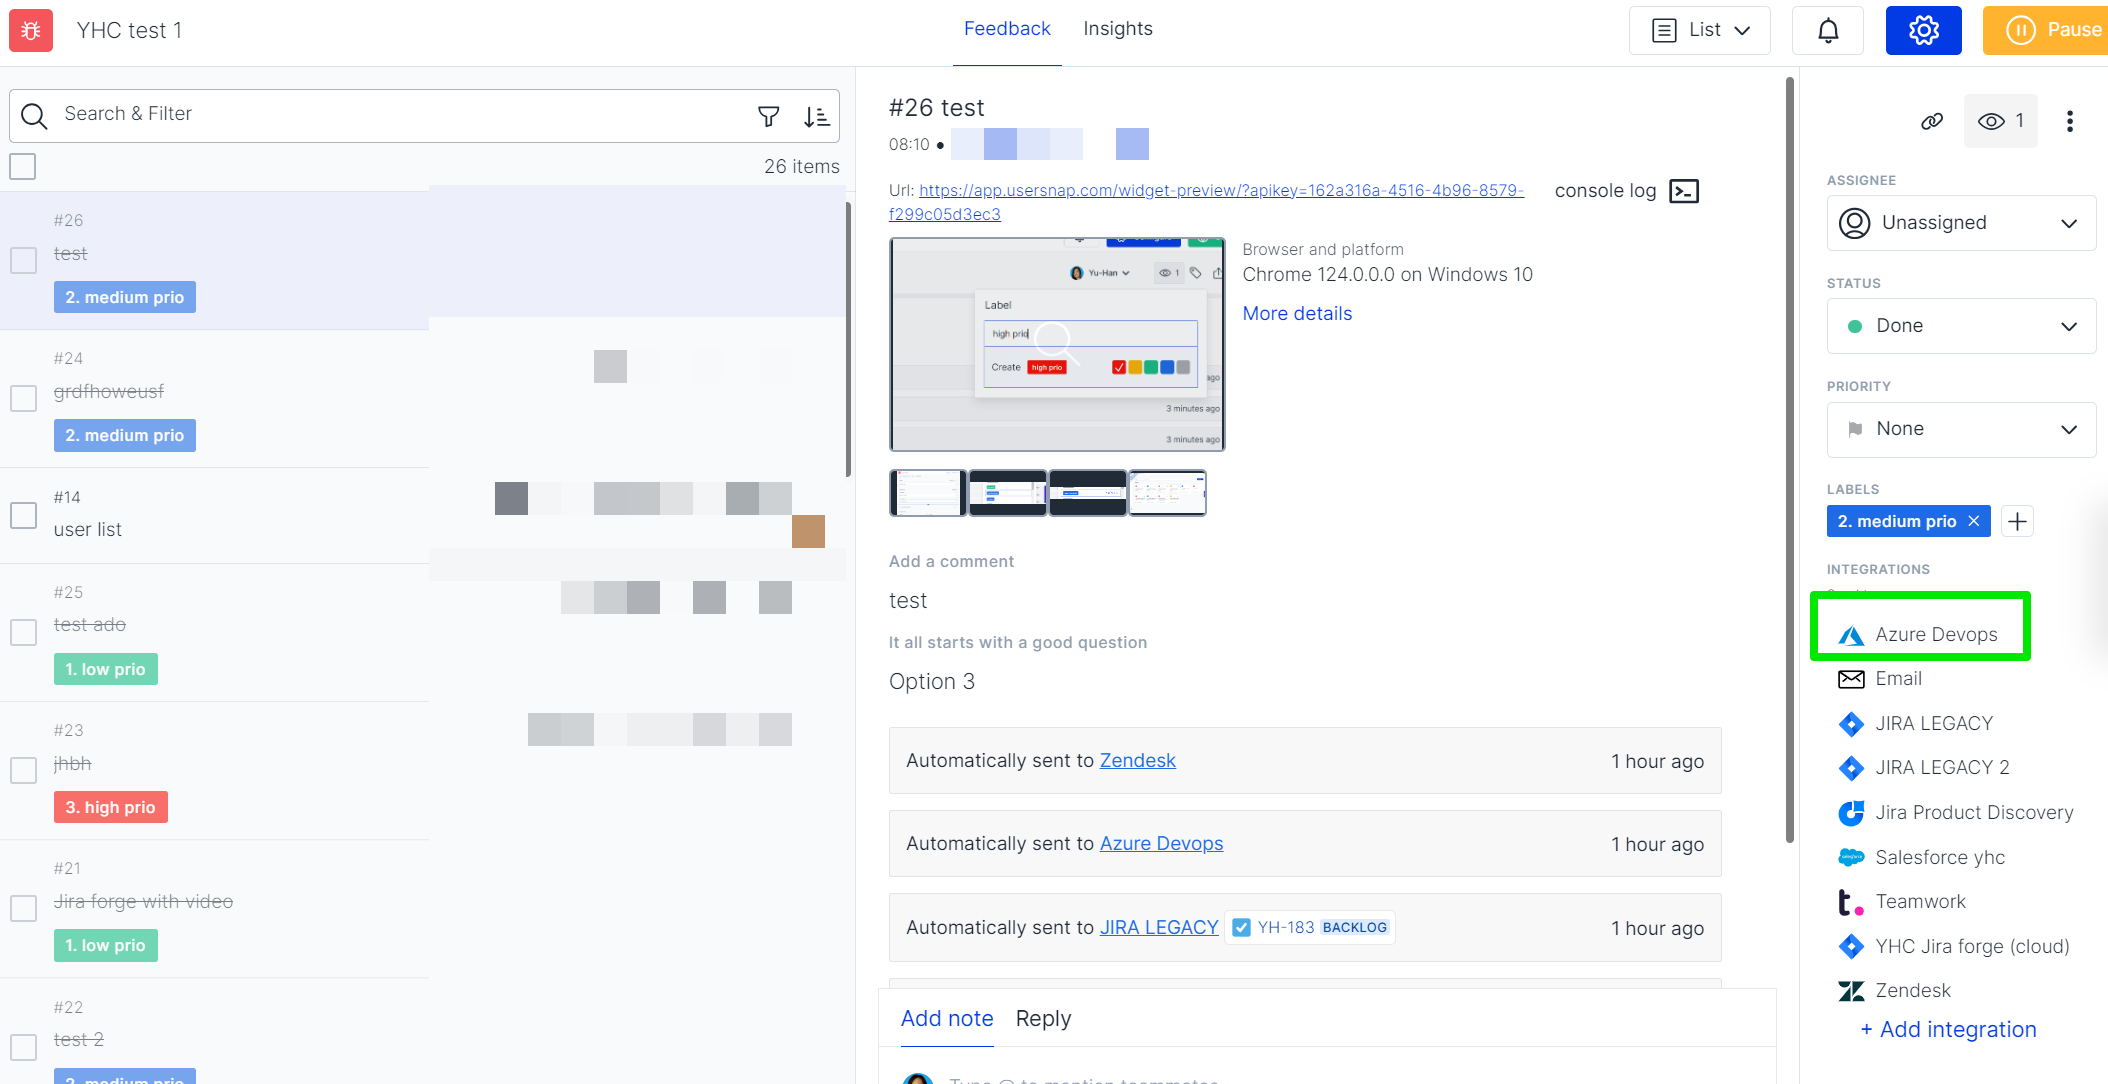
And it's simple to do so! When you want to modify a feedback item's field values, just choose your feedback item, click on the 'Share' button, then 'Send to integration', and pick 'Azure DevOps'.
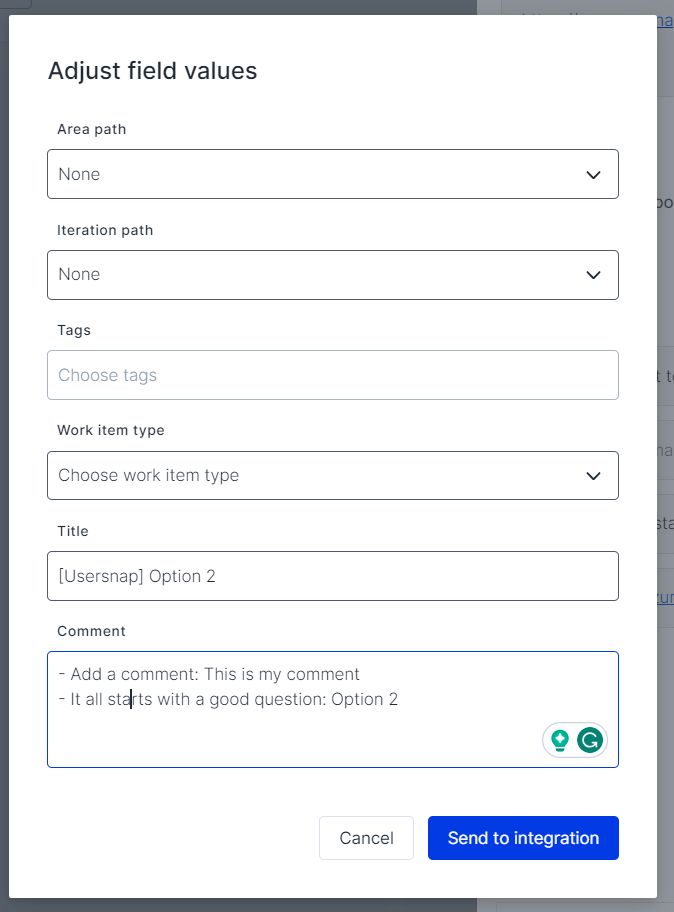
Now you can easily adjust field values before the item is pushed to Azure DevOps. This step in between allows you to customize items with more accuracy so that the team can follow up and manage tickets more precisely in the 3rd party tool.
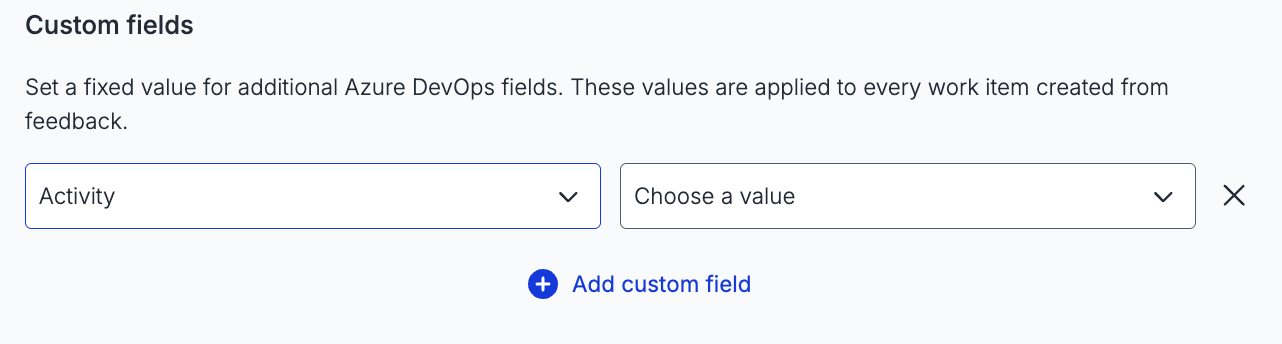
Azure Devops custom fields
Populate your Azure DevOps custom fields directly from Usersnap. Automatically include the information your team needs for workflows, reporting, and issue triage.
Azure Devops two ways sync 🚀
Now the status can be communicated between Usersnap and Azure Devops.
You can either update an existing Integration or create a new one.
The detailed instruction to set it up can be found in Azure DevOps status sync.
Connect Azure DevOps with a service principal
When you choose service principal authentication, the integration is created immediately, but it still needs to be configured before it can be used:
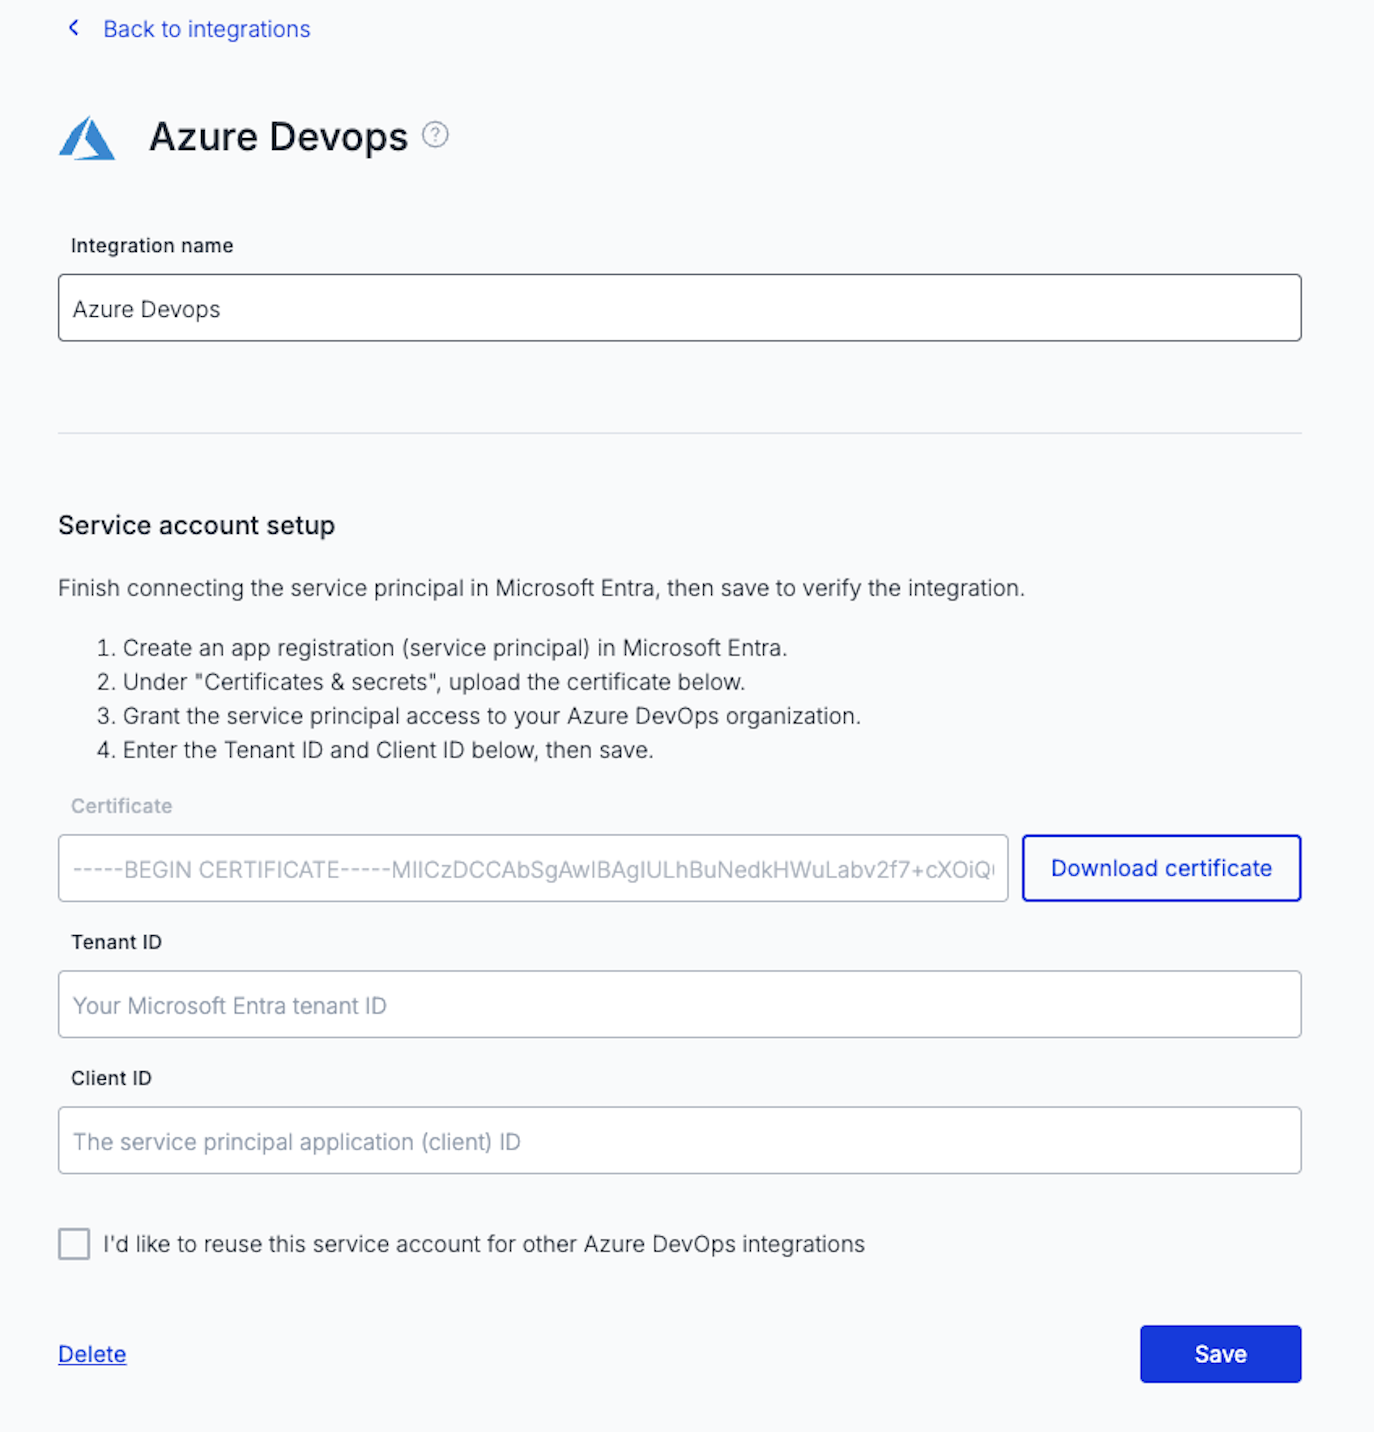
- Create a Service Principal in Microsoft Entra
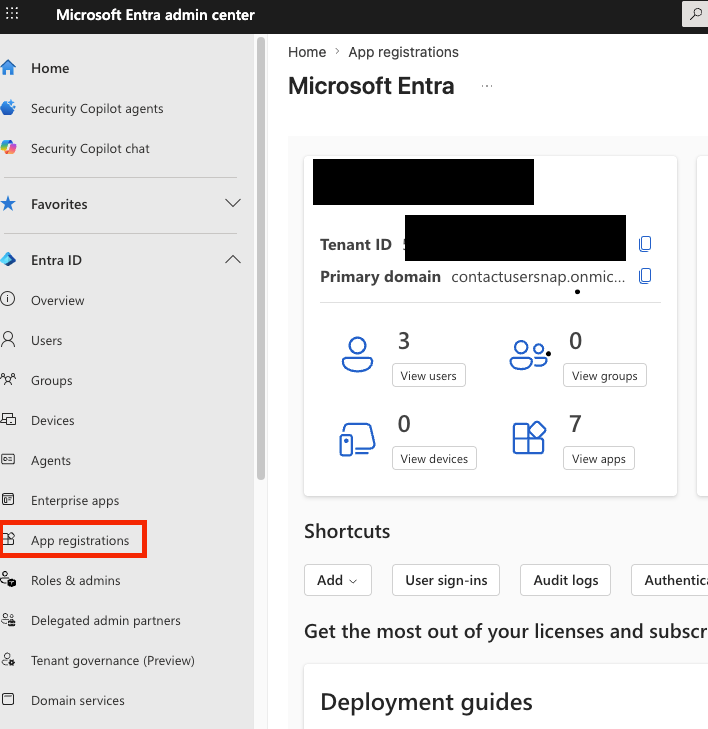
Open the Microsoft Entra admin center and navigate to App registrations:
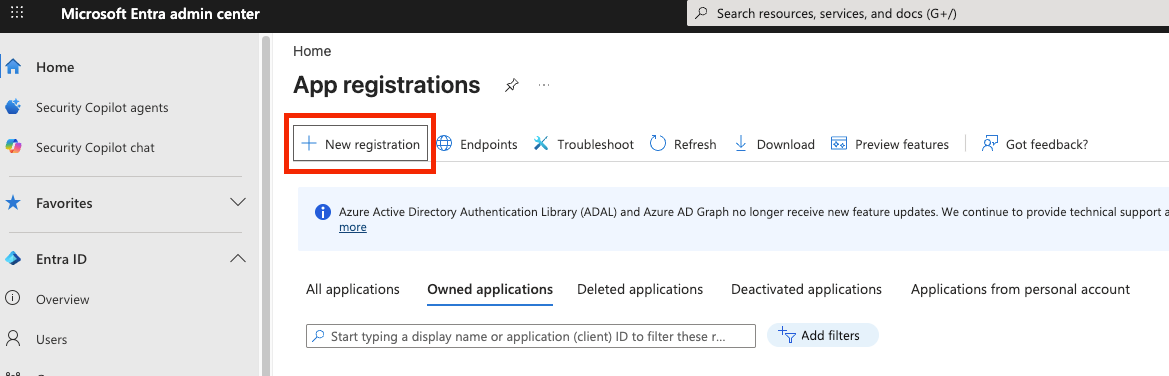
On the next screen, choose New registration:
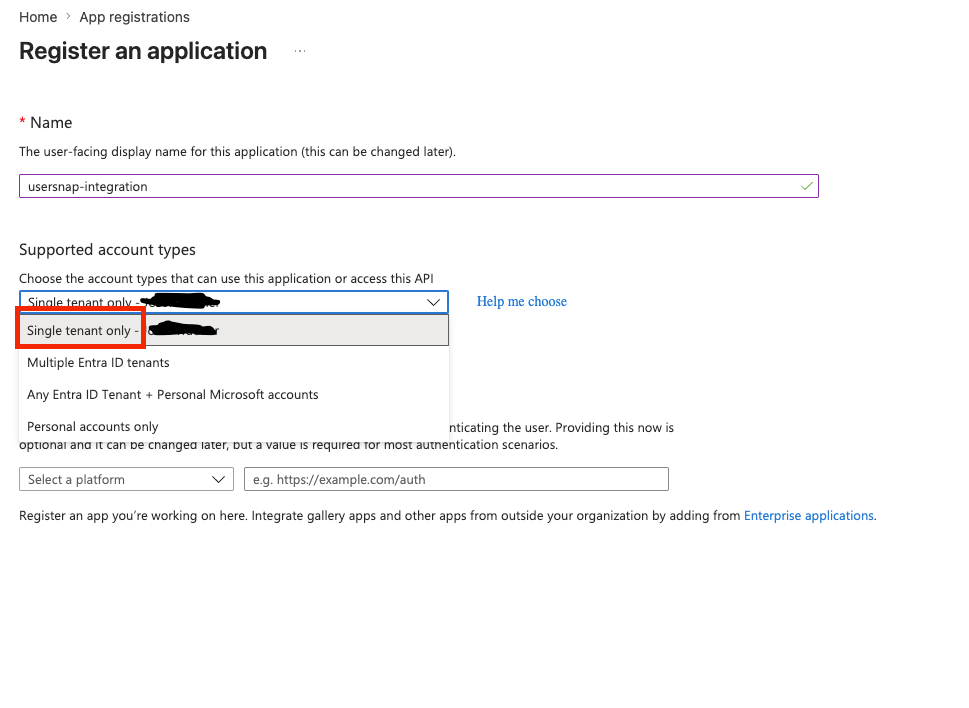
Then, complete the registration form:
- Name: Choose a descriptive name (for example, Usersnap Azure DevOps Integration).
- Supported account types: Select Accounts in this organizational directory only (Single tenant).
- Redirect URI: Leave this field empty.
Next, click Register:
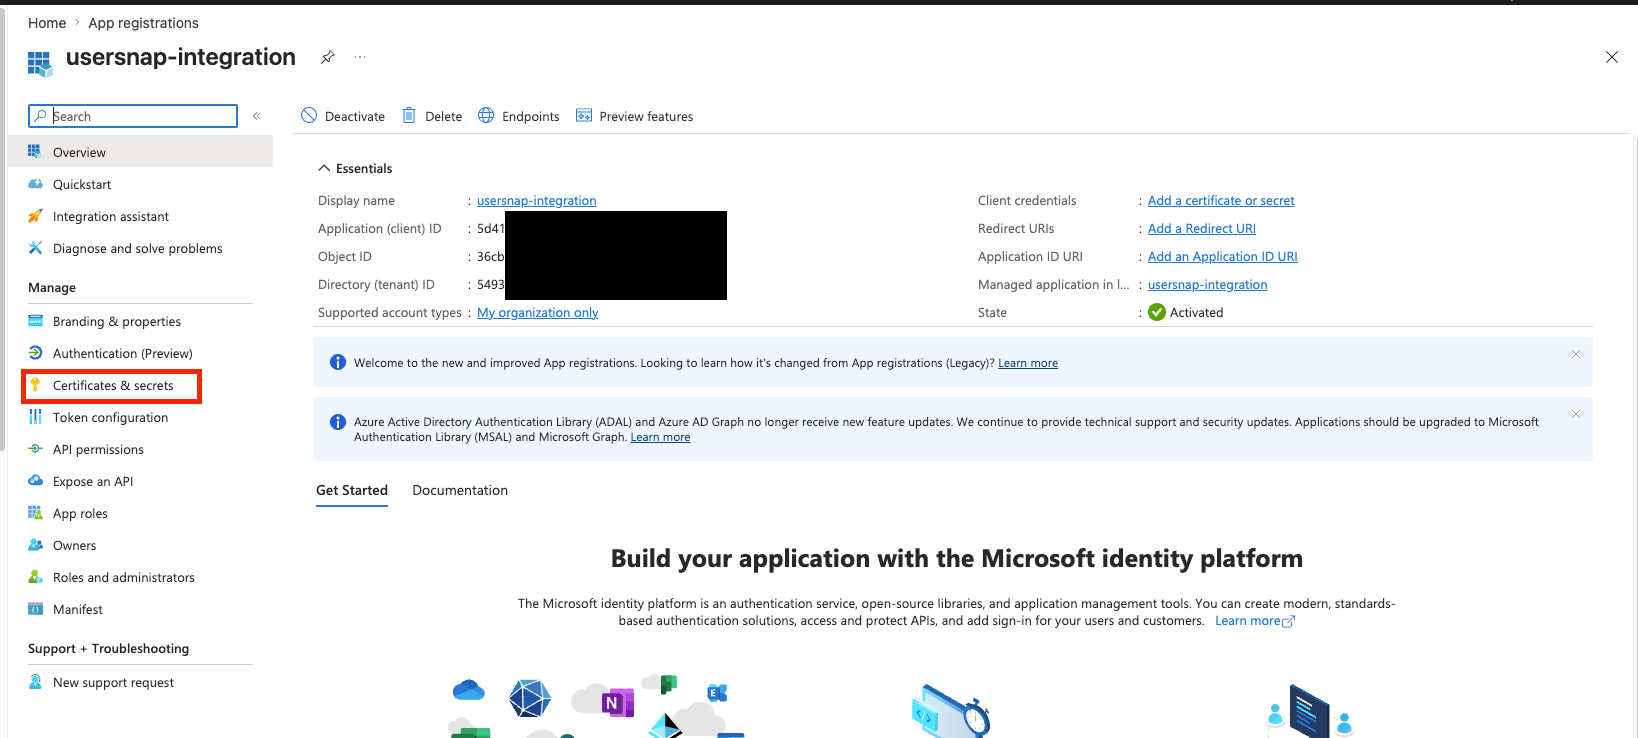
After the application is created, you'll be taken to its Overview page.
- Upload the Usersnap certificate
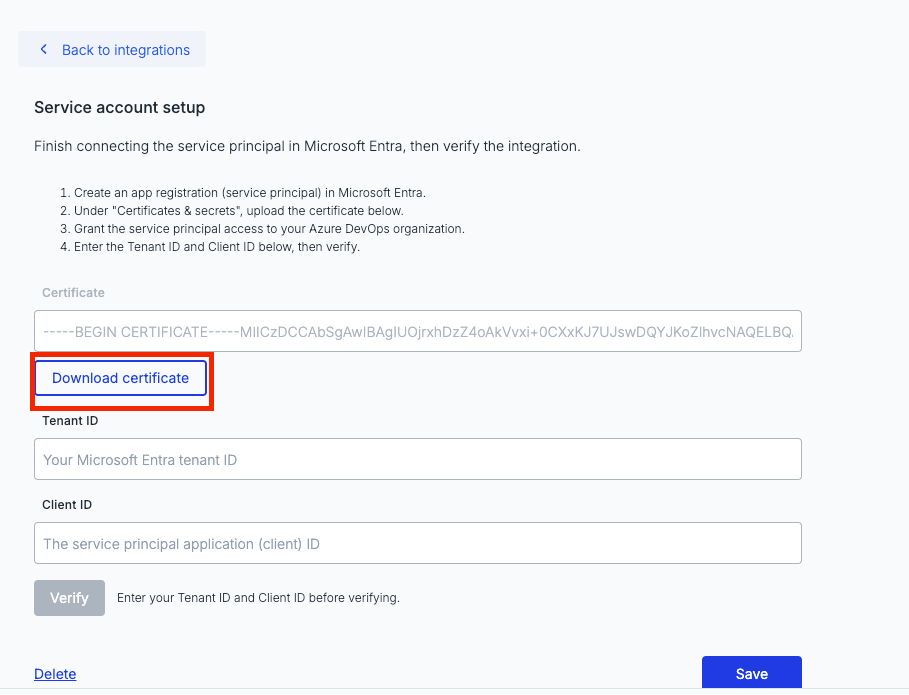
Usersnap authenticates using a certificate instead of a client secret.
In your new app registration, open Certificates & secrets:
Download the certificate from the Usersnap integration page:
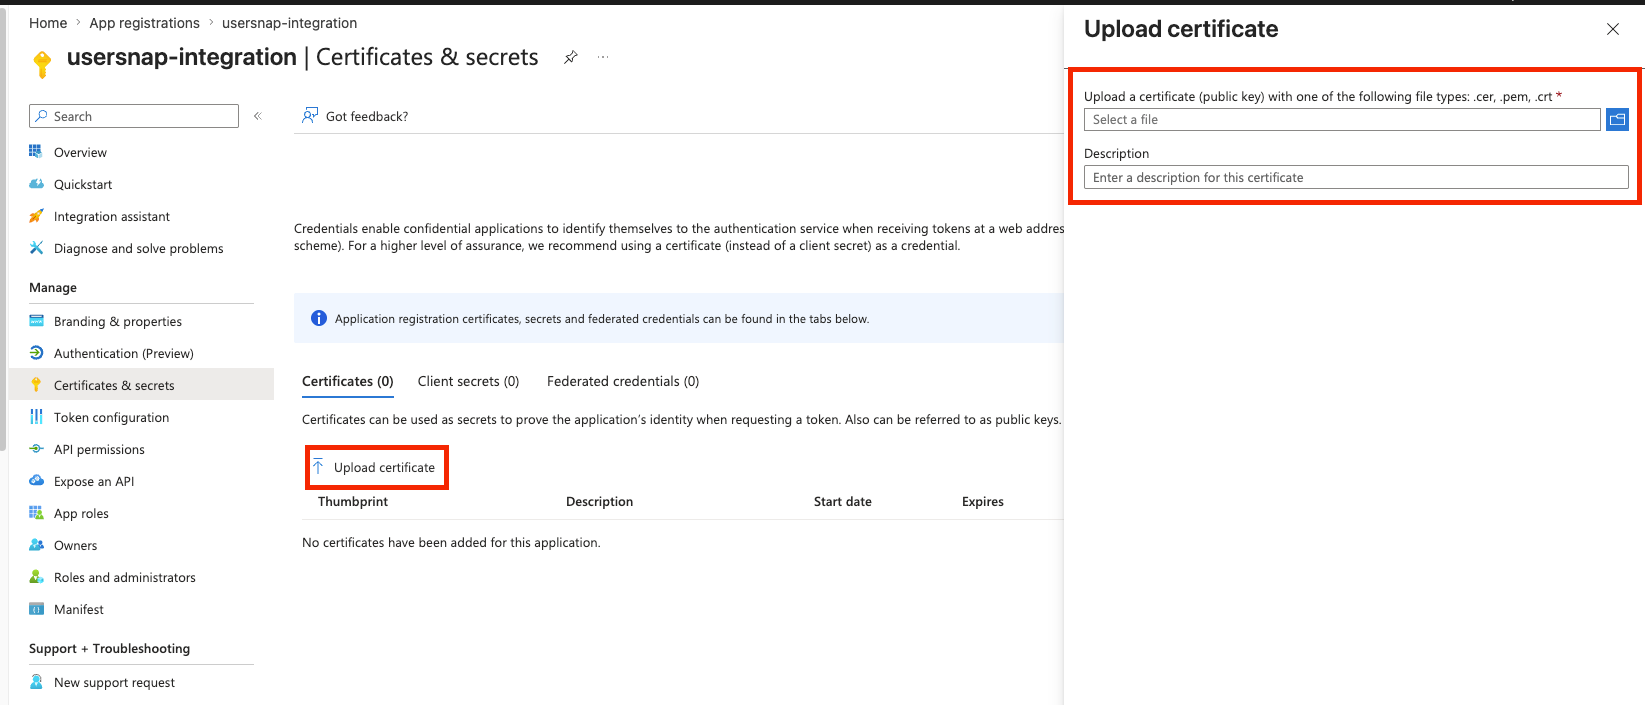
Back in Microsoft Entra:
- Open the Certificates tab.
- Click Upload certificate.
- Select the certificate you downloaded from Usersnap.
- The description is optional.
- Click Add.
- Add the Service Principal to Azure DevOps
Next, grant the service principal access to your Azure DevOps organization.
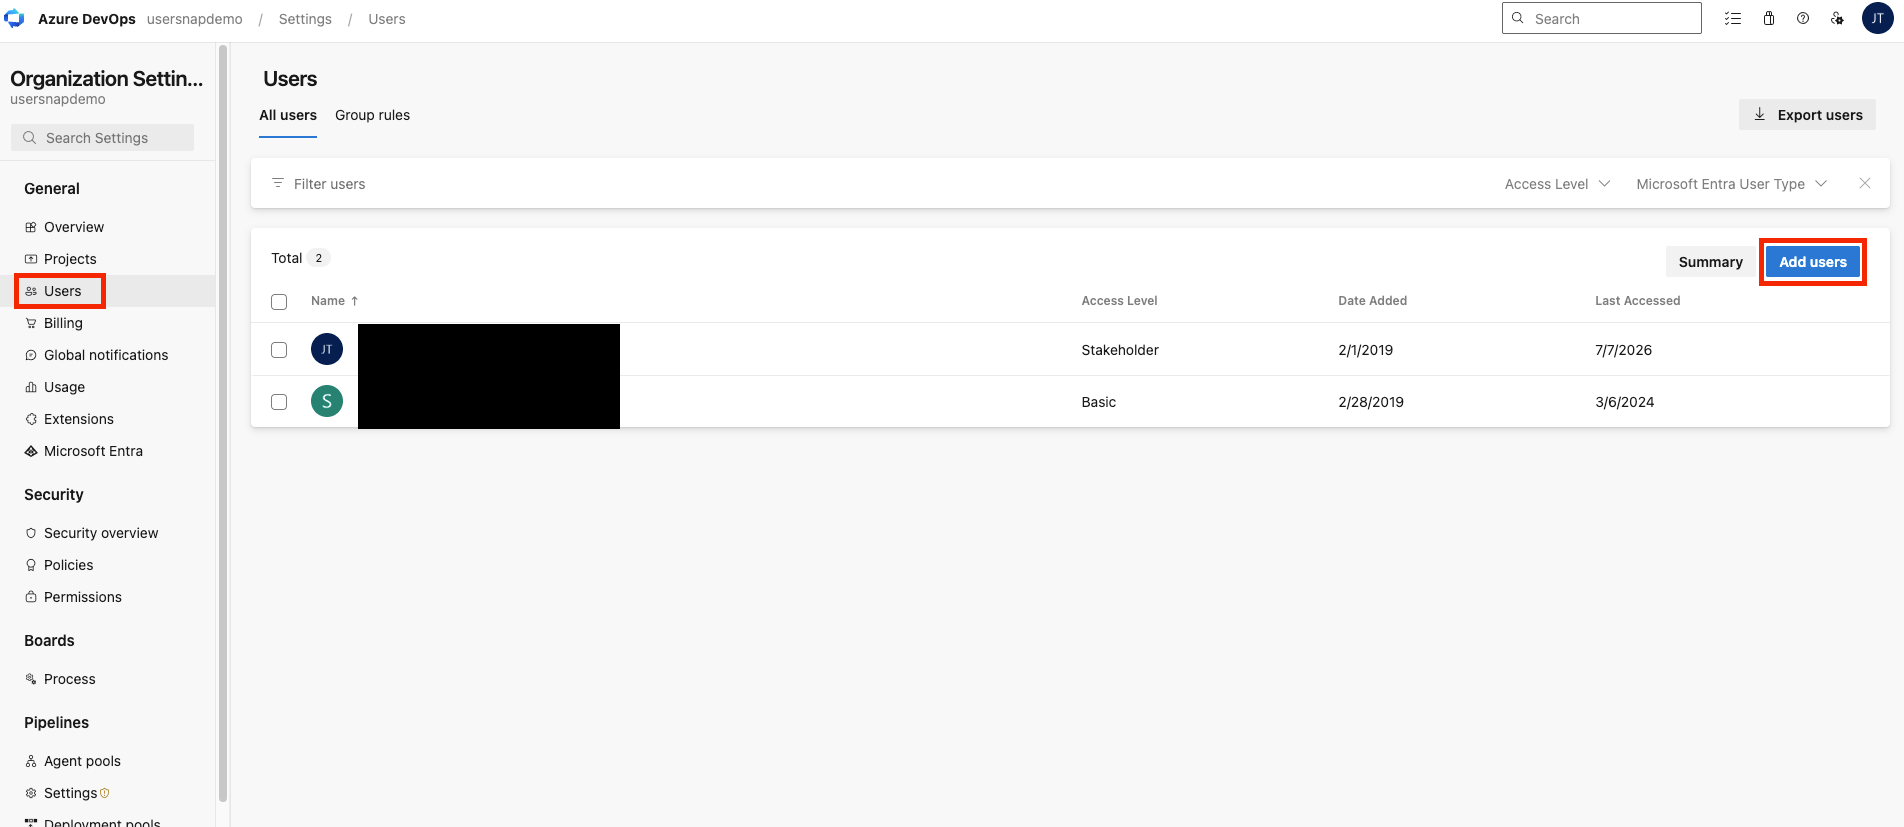
- In Azure DevOps, open: Organization Settings → Users
- Click Add users.
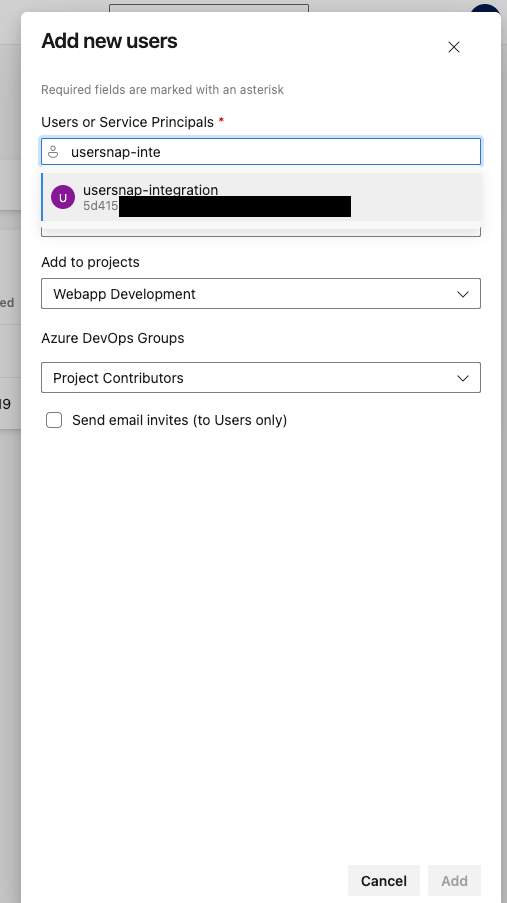
- In the Users or Service Principals field, search for the application you created.
- Select it, then configure:
Access level: Stakeholder
Add to projects: Select the Azure DevOps projects that Usersnap should be able to access.
-
Click Add.
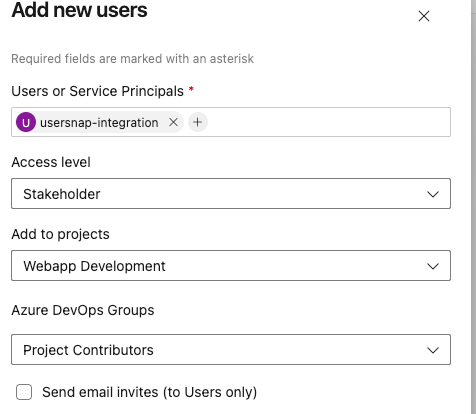
At this point, the Azure configuration is complete.
- Enter the application details in Usersnap
Return to your App registration in Microsoft Entra.
From the Overview page, copy:
- Application (client) ID
- Directory (tenant) ID
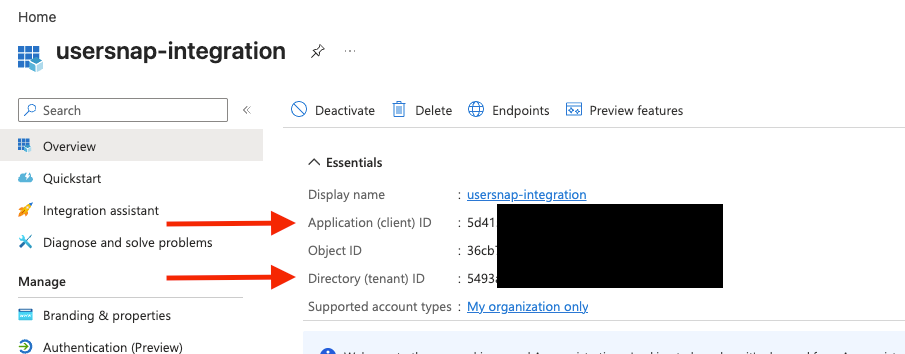
Paste both values into the Usersnap integration settings.
Once both fields are filled in, click Verify:
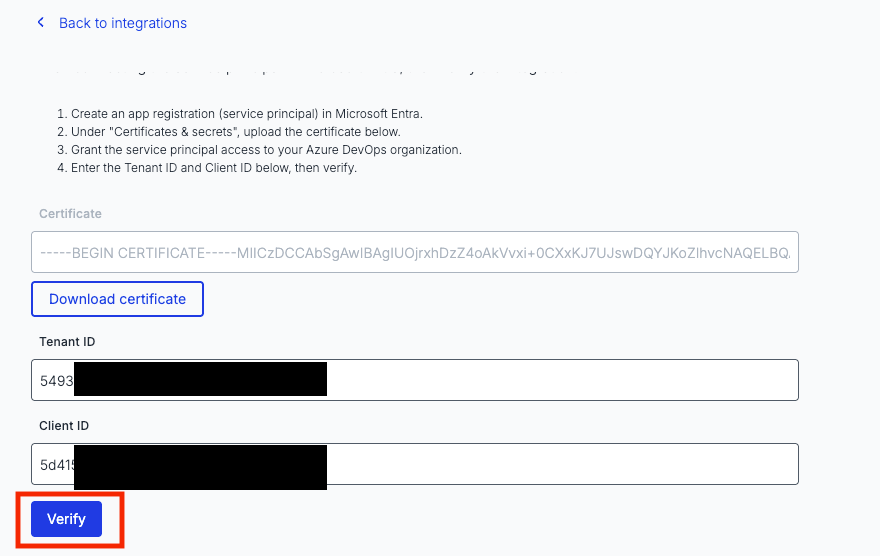
If everything is configured correctly, Usersnap will confirm that the connection was established successfully and display the integration details.
If verification fails, refer to the troubleshooting section below.
Troubleshooting
Verify each setup step
Most connection issues are caused by an incomplete setup.
Double-check that:
- the certificate was uploaded to the correct app registration;
- the Application (Client) ID and Directory (Tenant) ID were copied correctly;
- the service principal has been added to your Azure DevOps organization;
- the service principal has access to the required projects.
Common issues include:
- The service principal doesn't appear when adding users
If you can't find your service principal in Organization Settings → Users, verify that your Azure DevOps organization is connected to the correct Microsoft Entra directory.
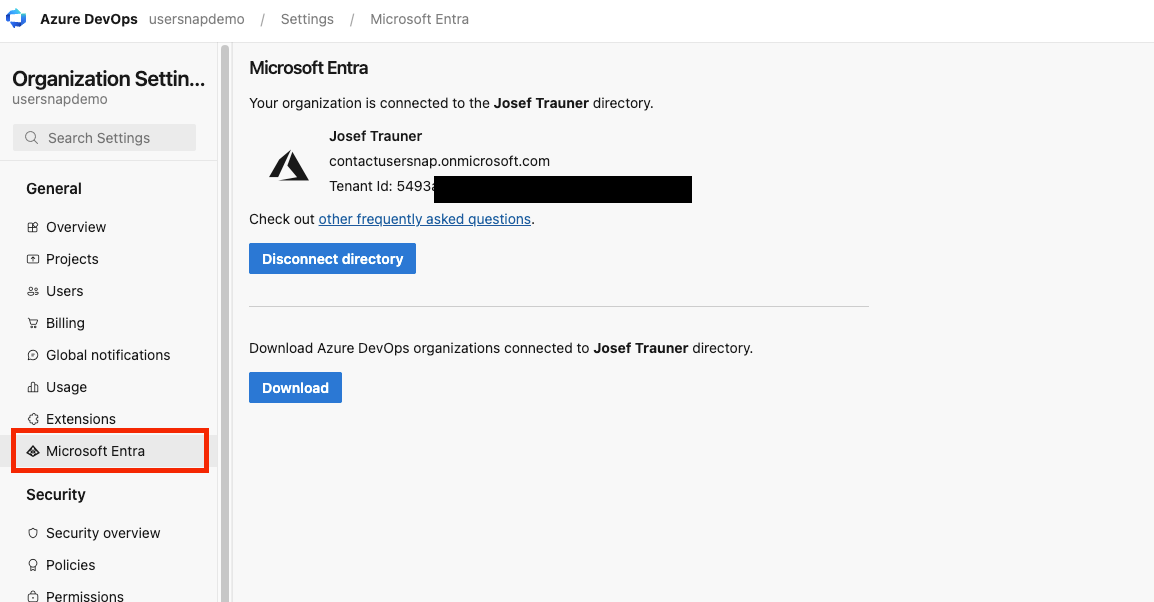
- The integration verifies, but can't access projects
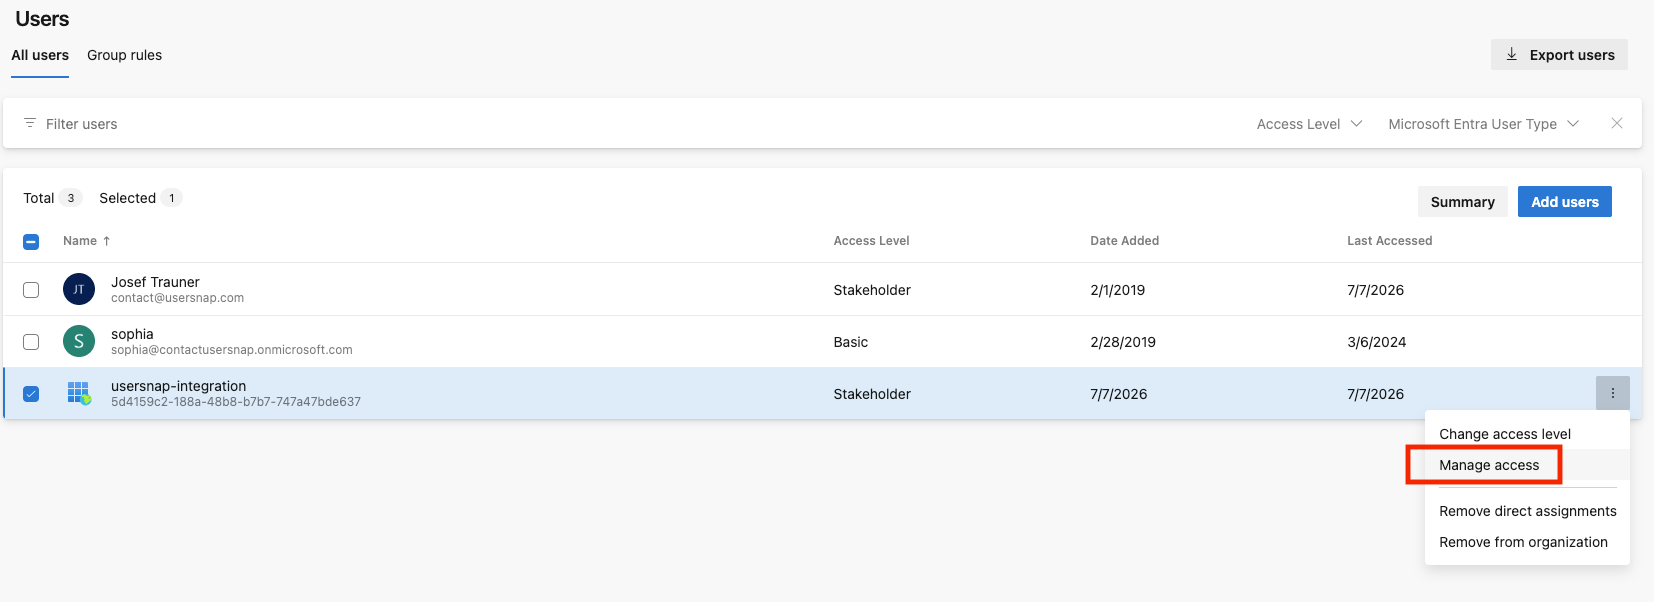
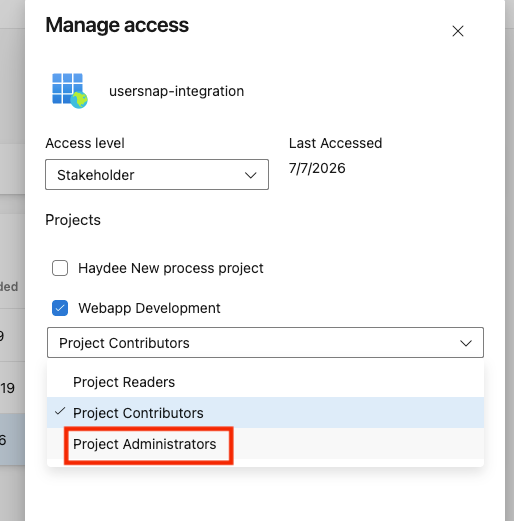
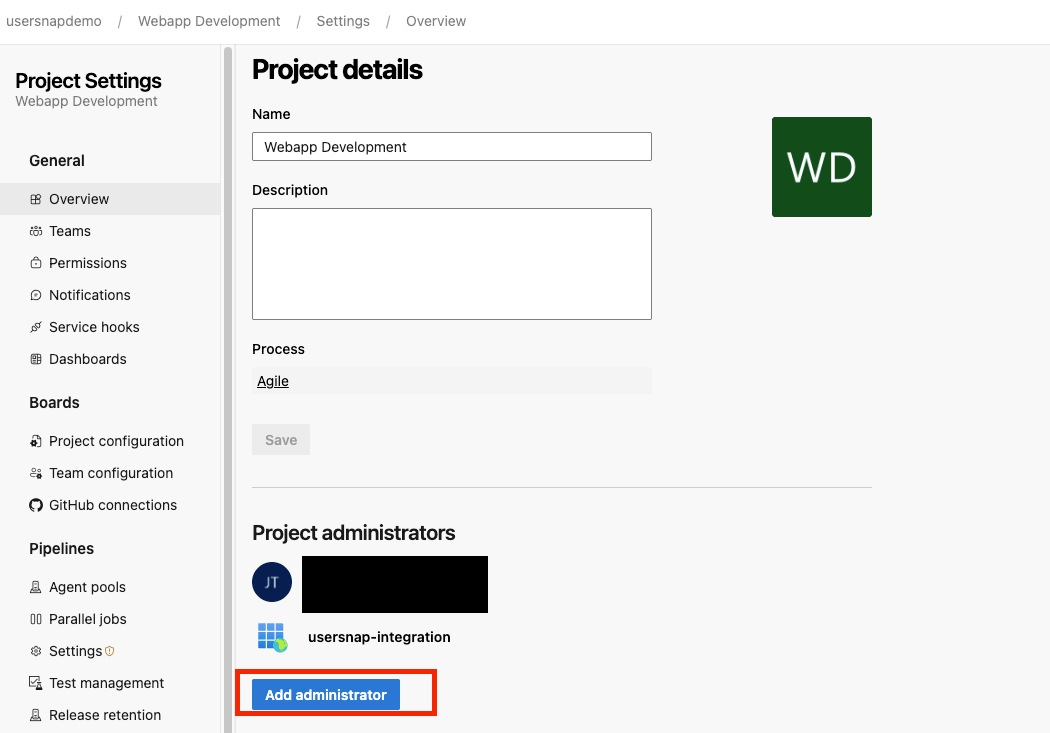
A common cause is that the service principal has been added to the organization but doesn't have permissions for any Azure DevOps projects.
Grant the service principal access to the required project. Depending on your organization's configuration, you can do this either:
-
from Organization Settings
-
from the individual Project Settings.
Please noteIf you recreate the service principal, you'll need to upload a new certificate and verify the integration again.
Updated 2 months ago