Installation on Wordpress
Installing Usersnap via the WordPress Plugins
The installation of Usersnap on a WordPress website is now a breeze thanks to the Usersnap plugin. You just need to download it, activate it, and use your API code to connect to Usersnap.
Let's see how it's done.
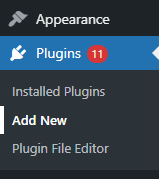
Through the dashboard menu, navigate to Plugins -> Add New.

Search for the "Usersnap" plugin, then install and activate it.

Now you need your Usersnap API key. Simply copy your Space API key through the configuration page.

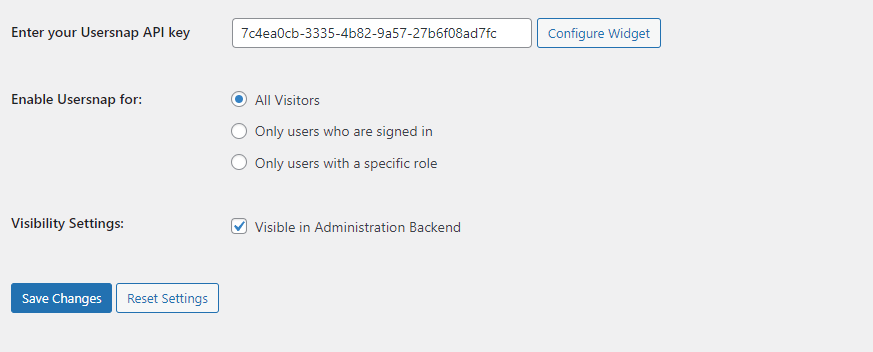
After copying the API Key, navigate to the Usersnap plugin's settings page. You can access the Usersnap plugin's settings by navigating to Settings > Usersnap. Within the settings page, input your Usersnap API key in the designated field and then save the changes.

Congrats, you have successfully installed Usersnap on your WordPress website!
As you can see, you can also set some basic configurations. On the settings page, you can:
- Set the visibility of the widget by selecting a specific group of users who can view it
- Set the visibility of the widget in the WordPress dashboard
Note that you only require the Space API Key and no additional configuration is needed on your WordPress website. All configurations can be completed through the Usersnap main dashboard.
Installing Usersnap natively in Wordpress
An alternate way to install Usersnap on a WordPress website is through a native installation.
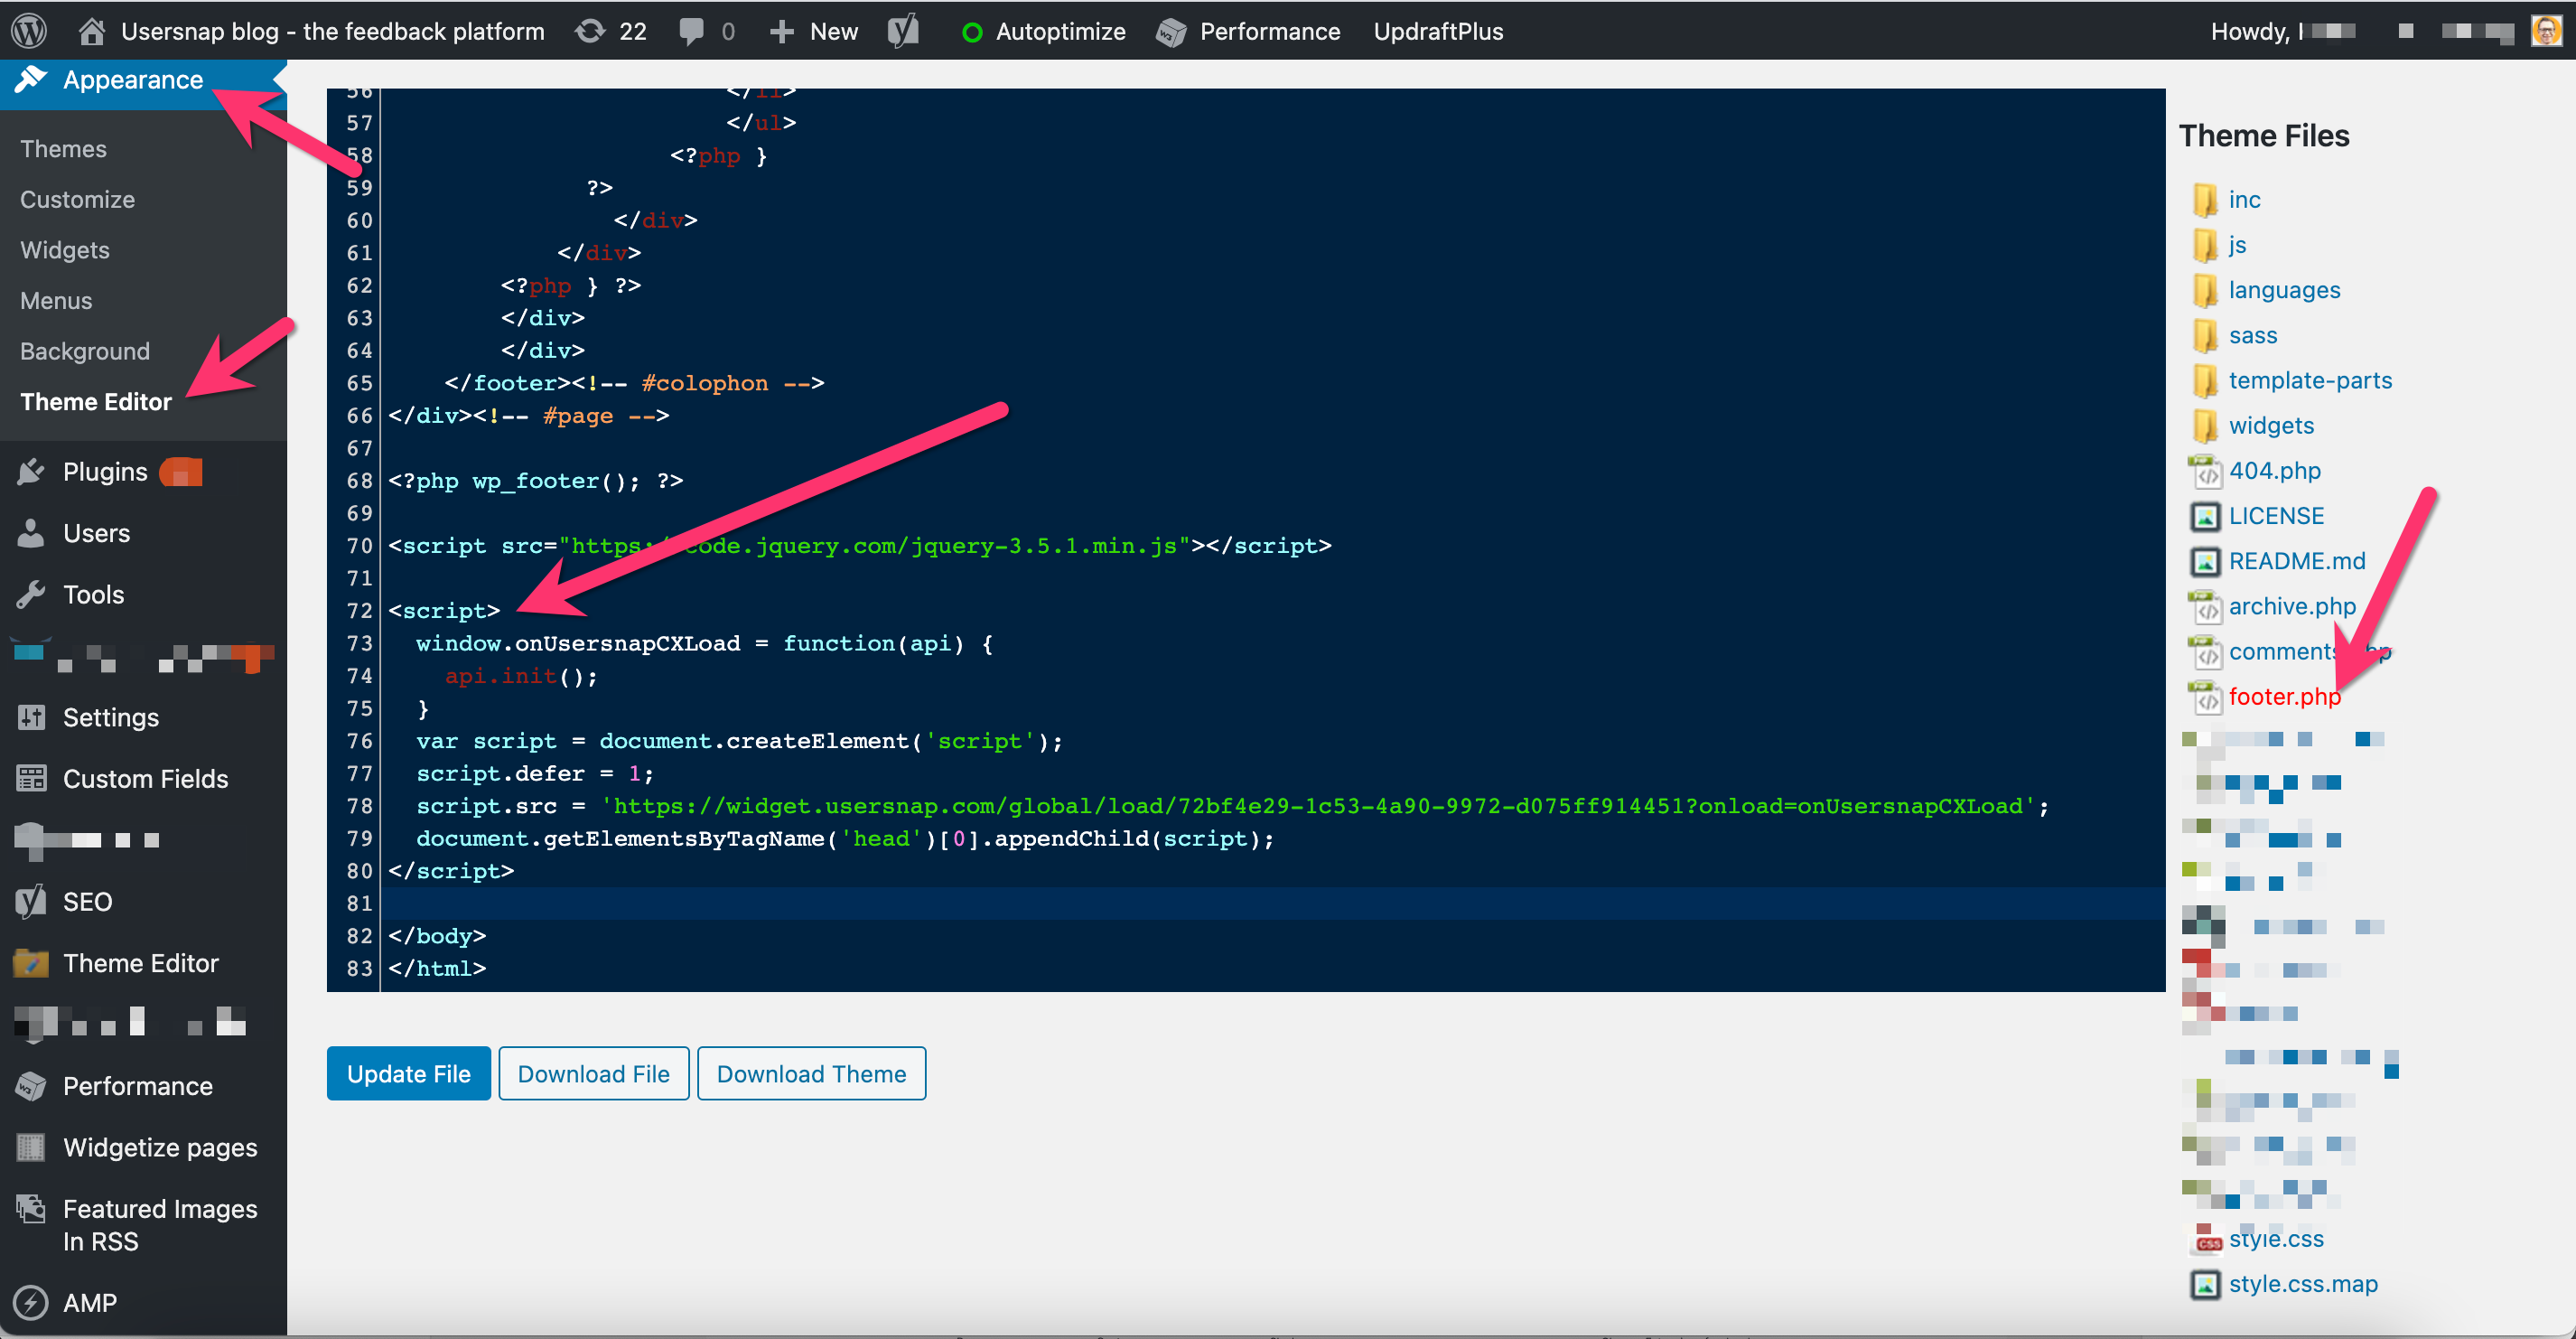
Simply navigate to Appearance > Theme File Editor. There, you can see a list of files of your current installed theme listed on the right side. Find the "footer" file within the list and select it. Now among the code lines, look for the HTML </body> tag. Then, paste the Usersnap space global code snippet exactly before the </body> tag.
After that, simply update the file and save the changes.

Done! You have managed to install Usersnap on WordPress natively.
Updated 9 months ago
