Migrating existing Legacy projects to the Platform system
What does self-serviced migration mean?
Migration is essentially copying and pasting. The system will export your tickets, create a new project and import them there.
Now instead of having your project auto-migrated, you are in full control of the migration process.
A new project (the platform project) will take the place of the legacy (classic) project you migrated. That means once hitting the "Migrate Project" button, the old project will no longer be seen in the dashboard.
If you wish to keep the data of your existing legacy project in the format of CSV or Excel files, you can export the classic project like this before starting the migration process.
Attention:
Only the team admin and the project owner can migrate a project.
If your legacy projects contain more than 100k screens, it is not yet possible to migrate them via the self-serviced button. It will be available in a later time frame.
Usersnap will auto-migrate your projects starting from 31st March 2022.
What you need to do is just these 3 simple steps:
Step 1
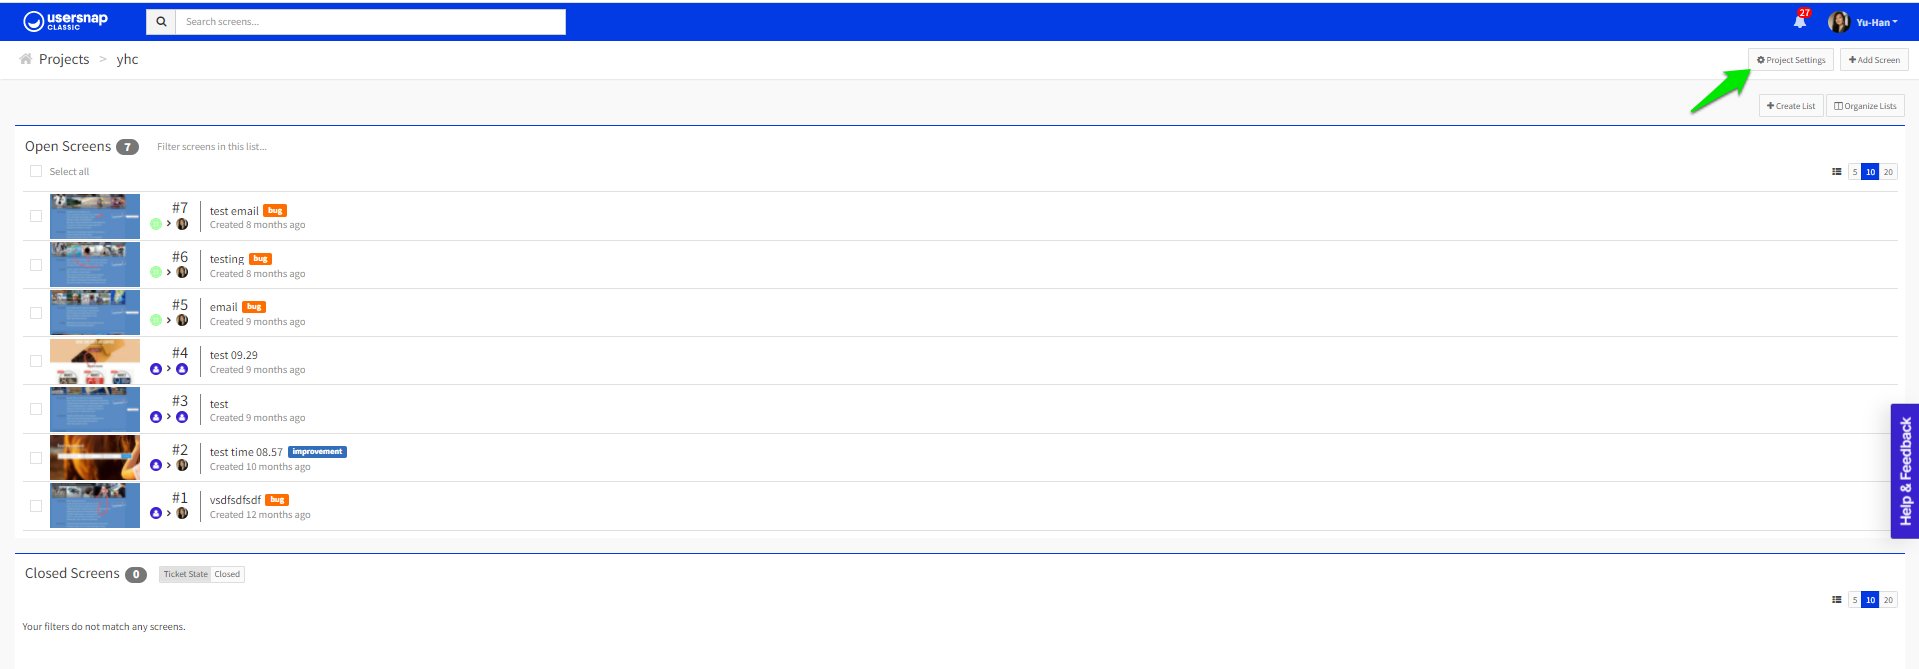
Go into the project you wish to export and open the "Project settings".

Step 2
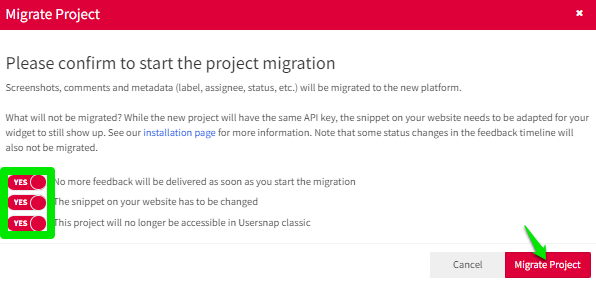
Hit the "Migrate project" button.

Step 3
Read through the message carefully and check all 3 boxes in order to confirm the process.
There is also a guide to install the new project so you can include necessary parties to replace the old snippet with the new code snippet.

The URLs to the screens
As the migrated legacy project will no longer be accessible, all the links previously received through email will cease to work.
Most settings in the new project will align with your legacy project to save you time on re-configuring everything.
However, for privacy reasons, there are some settings you will need to re-configure in the new project:
- Integrations:
The new project will by default be not connected to any 3rd party integrations.
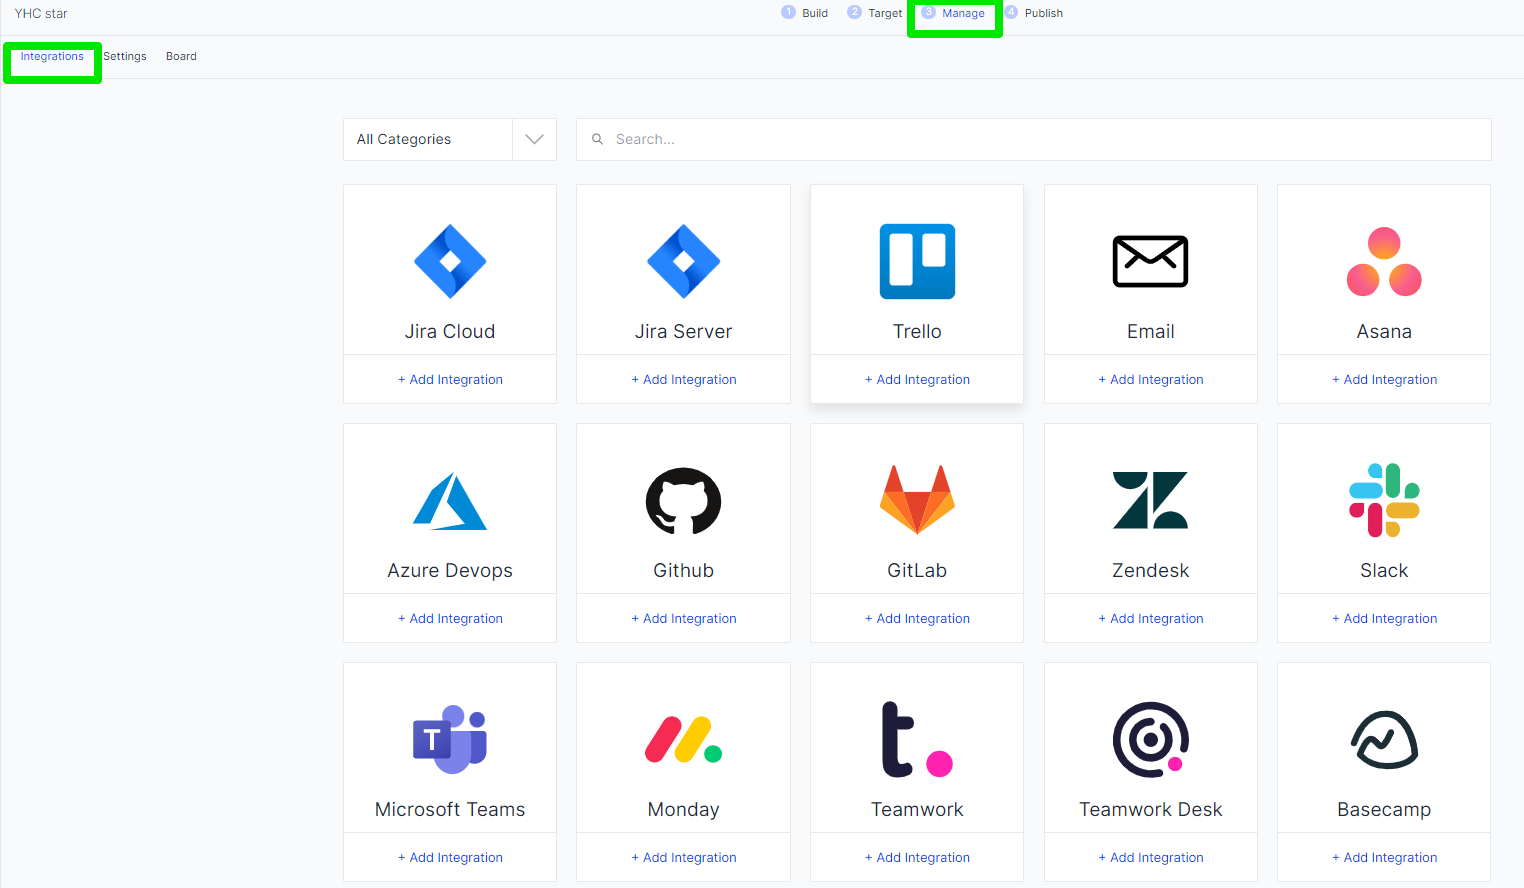
You can easily reconnect the tools in the integrations tab.

-
Display URLs:
If you have set restrictions of URLs for your widget, this would also need to be added to the new settings.
In the Configuration tab, go to Display > Path Targeting to limit where you want your widget to show.
The detailed info can be found in Control the visibility of buttons and widgets. -
Replacing the code on your website/app:
Since the new project is independent of the existing old project, you will have a new Usersnap snippet code.
To start running the new project, just like before, you need to place the new snippet on your website or app and remove the old code.
Lastly, when you see the feedback items in the new project, the previous activity log will be partially incomplete.
You can rest assured that the state of the feedback items and comments remains and are 100% identical.
Only the timestamps of the labels and item closing dates are not visible.
In other words, if a feedback item had a label, was assigned to a member, and was marked closed, in the new project it will keep the label and assignee and stay closed, just the notes in the activity log will be left behind.
In addition, the message "has been sent to integration x" shown in a screen's Timeline will not be visible, neither. This applies to screens both sent to integrations automatically and manually.
How much time will it take to self-migrate a legacy project?
It depends on your project size.
Roughly you can estimate 1 hour for around 3500 screens.
After the migration process is done, you'll get notified by email and the migrated project will appear in your Usersnap dashboard.
Updated almost 2 years ago
